On this page
Your VPN app may say Connected—but that green badge can lie. Leaks still sneak through five common gaps: IPv4, IPv6, DNS, WebRTC, and the brief chaos after a crash. In this guide, we’ll walk you through a repeatable, five-step ladder that begins with a 30-second browser check and ends with full packet capture, so you know—not guess—where every packet travels on Windows, macOS, Linux, Android, or Docker.
Quick answer: Test your VPN in five minutes
Need a lightning check before the deeper workflow? Run this five-step sanity test (no packet capture required).
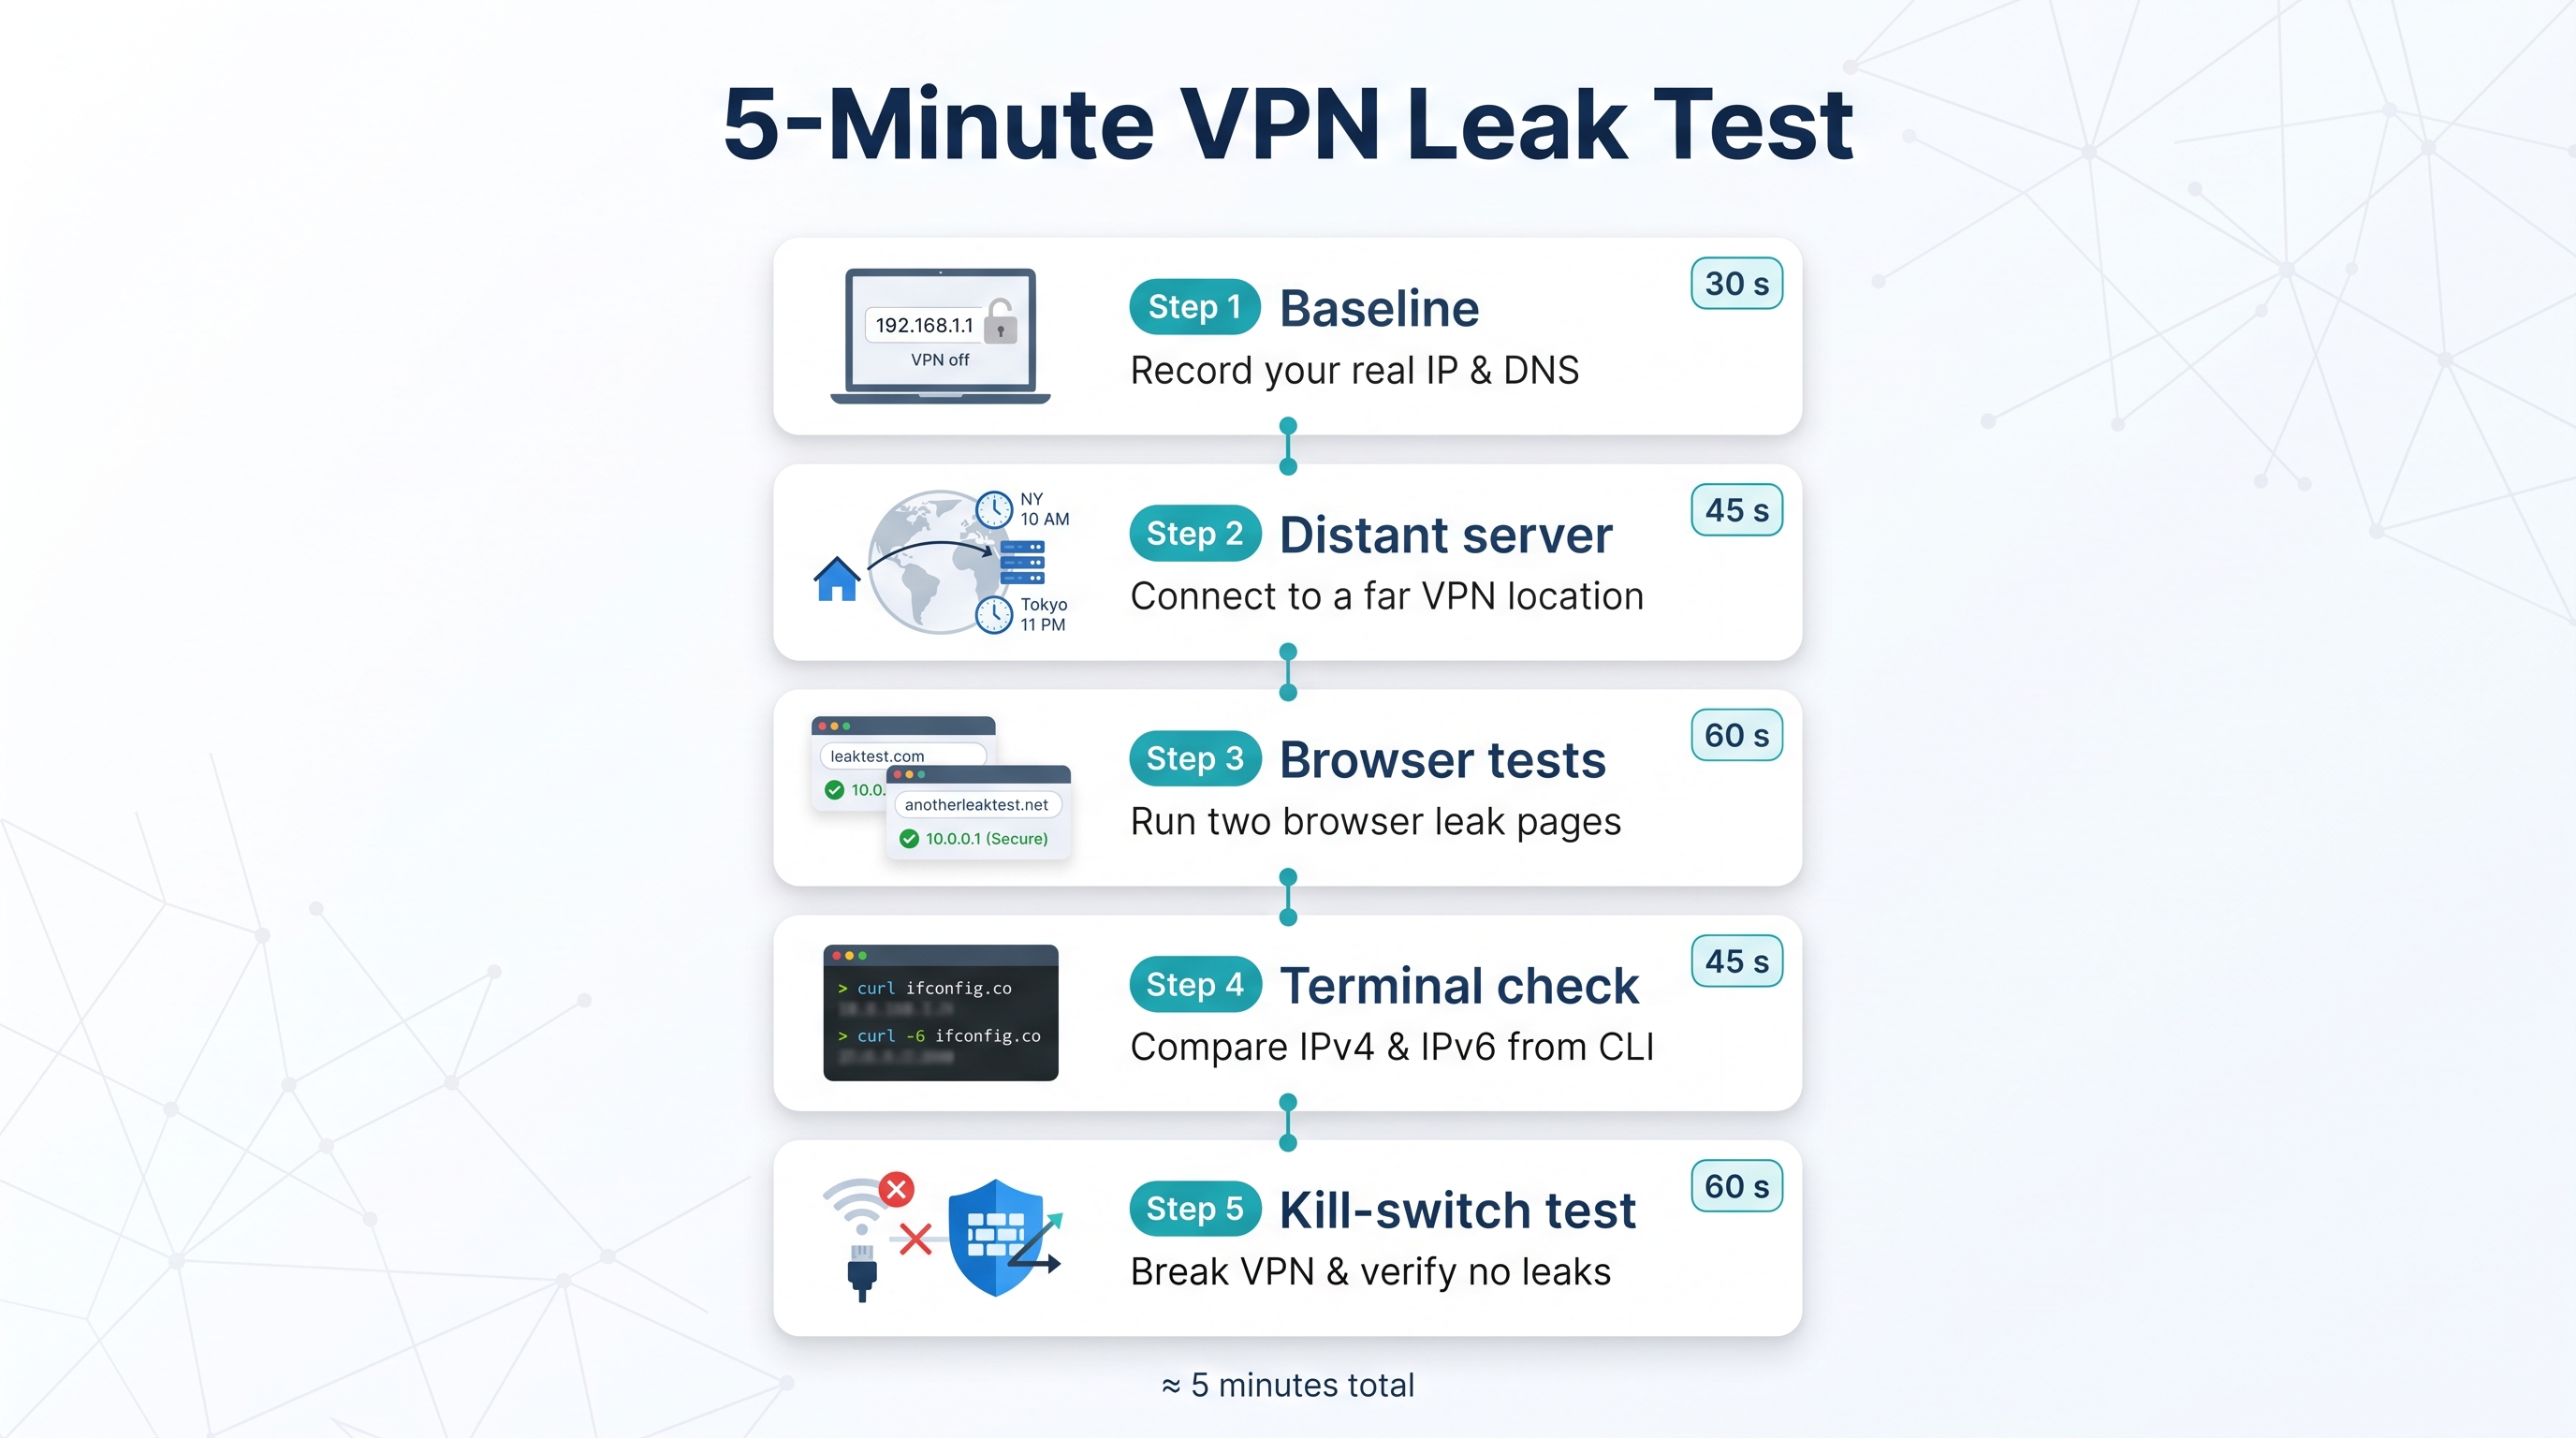
- Take a baseline (30 s). Disconnect from the VPN, open any leak checker, and record your public IPv4, public IPv6, ISP/ASN, DNS resolvers, and the browser’s Secure DNS/DoH status.
- Reconnect on a distant server (45 s). Pick a VPN location at least two time zones away so any stray packet is easy to spot.
- Run two browser tests (60 s). Start with TorGuard’s leak page, then cross-check with IPLeak or BrowserLeaks. If a single baseline IP, IPv6, or ISP DNS entry appears, you have a leak.
- Double-tap in the terminal (45 s). Run
curl ifconfig.coandcurl -6 ifconfig.co; both results should match the VPN location, not your home city. - Trigger a brief failure (60 s). While a test page auto-refreshes, disconnect the VPN or toggle Wi-Fi off and on. A real kill switch blocks all traffic until the tunnel reconnects, so your baseline IP should never show.
Finish these five steps without seeing your original identifiers, and you can move on to the advanced tests—or simply enjoy the peace of mind.
How we chose the five leak tests
We graded 18 public testers against a five-factor rubric and kept only the top performers for each leak vector.
| Criterion | Weight | What scored high |
|---|---|---|
| Comprehensiveness | 30 percent | IPv4, IPv6, DNS, WebRTC, app traffic, and failure-state capture |
| Accuracy & repeatability | 25 percent | Raw data, rerun buttons, published methods |
| Privacy & transparency | 20 percent | Open-source code, short retention, few third-party calls |
| Usability & cross-platform | 15 percent | Works on Windows, macOS, Linux, Android, Docker |
| Cost & access | 10 percent | No paywall or account gate |
Any tool that missed a whole category, such as IPv6 or crash testing, failed the cut.
Why these five made it
| Tool | Best role | Key strengths | Main caveat |
|---|---|---|---|
| TorGuard leak page | First sanity check | Fast DNS and WebRTC readout | Provider-owned |
| IPLeak.net | Browser plus torrent cross-check | Adds torrent IP and alt-port tests | AirVPN-owned; dense UI |
| BrowserLeaks | WebRTC and IPv6 drill-down | Raw ICE data, 50-query DNS burst | Browser-only |
| dnscheck.tools | Resolver autopsy | Traces each hop, shows DNSSEC status | DNS focus; technical |
| Wireshark / tcpdump + FOSS suite | Kill-switch and failure test | Full-packet evidence during crashes | Expert setup |
Using them in sequence covers every rubric line; no single site does.
Note: Even free leak pages log your connecting IP. Test on networks you control and clear screenshots before you share results.
Step 1: TorGuard, the two-click sanity check
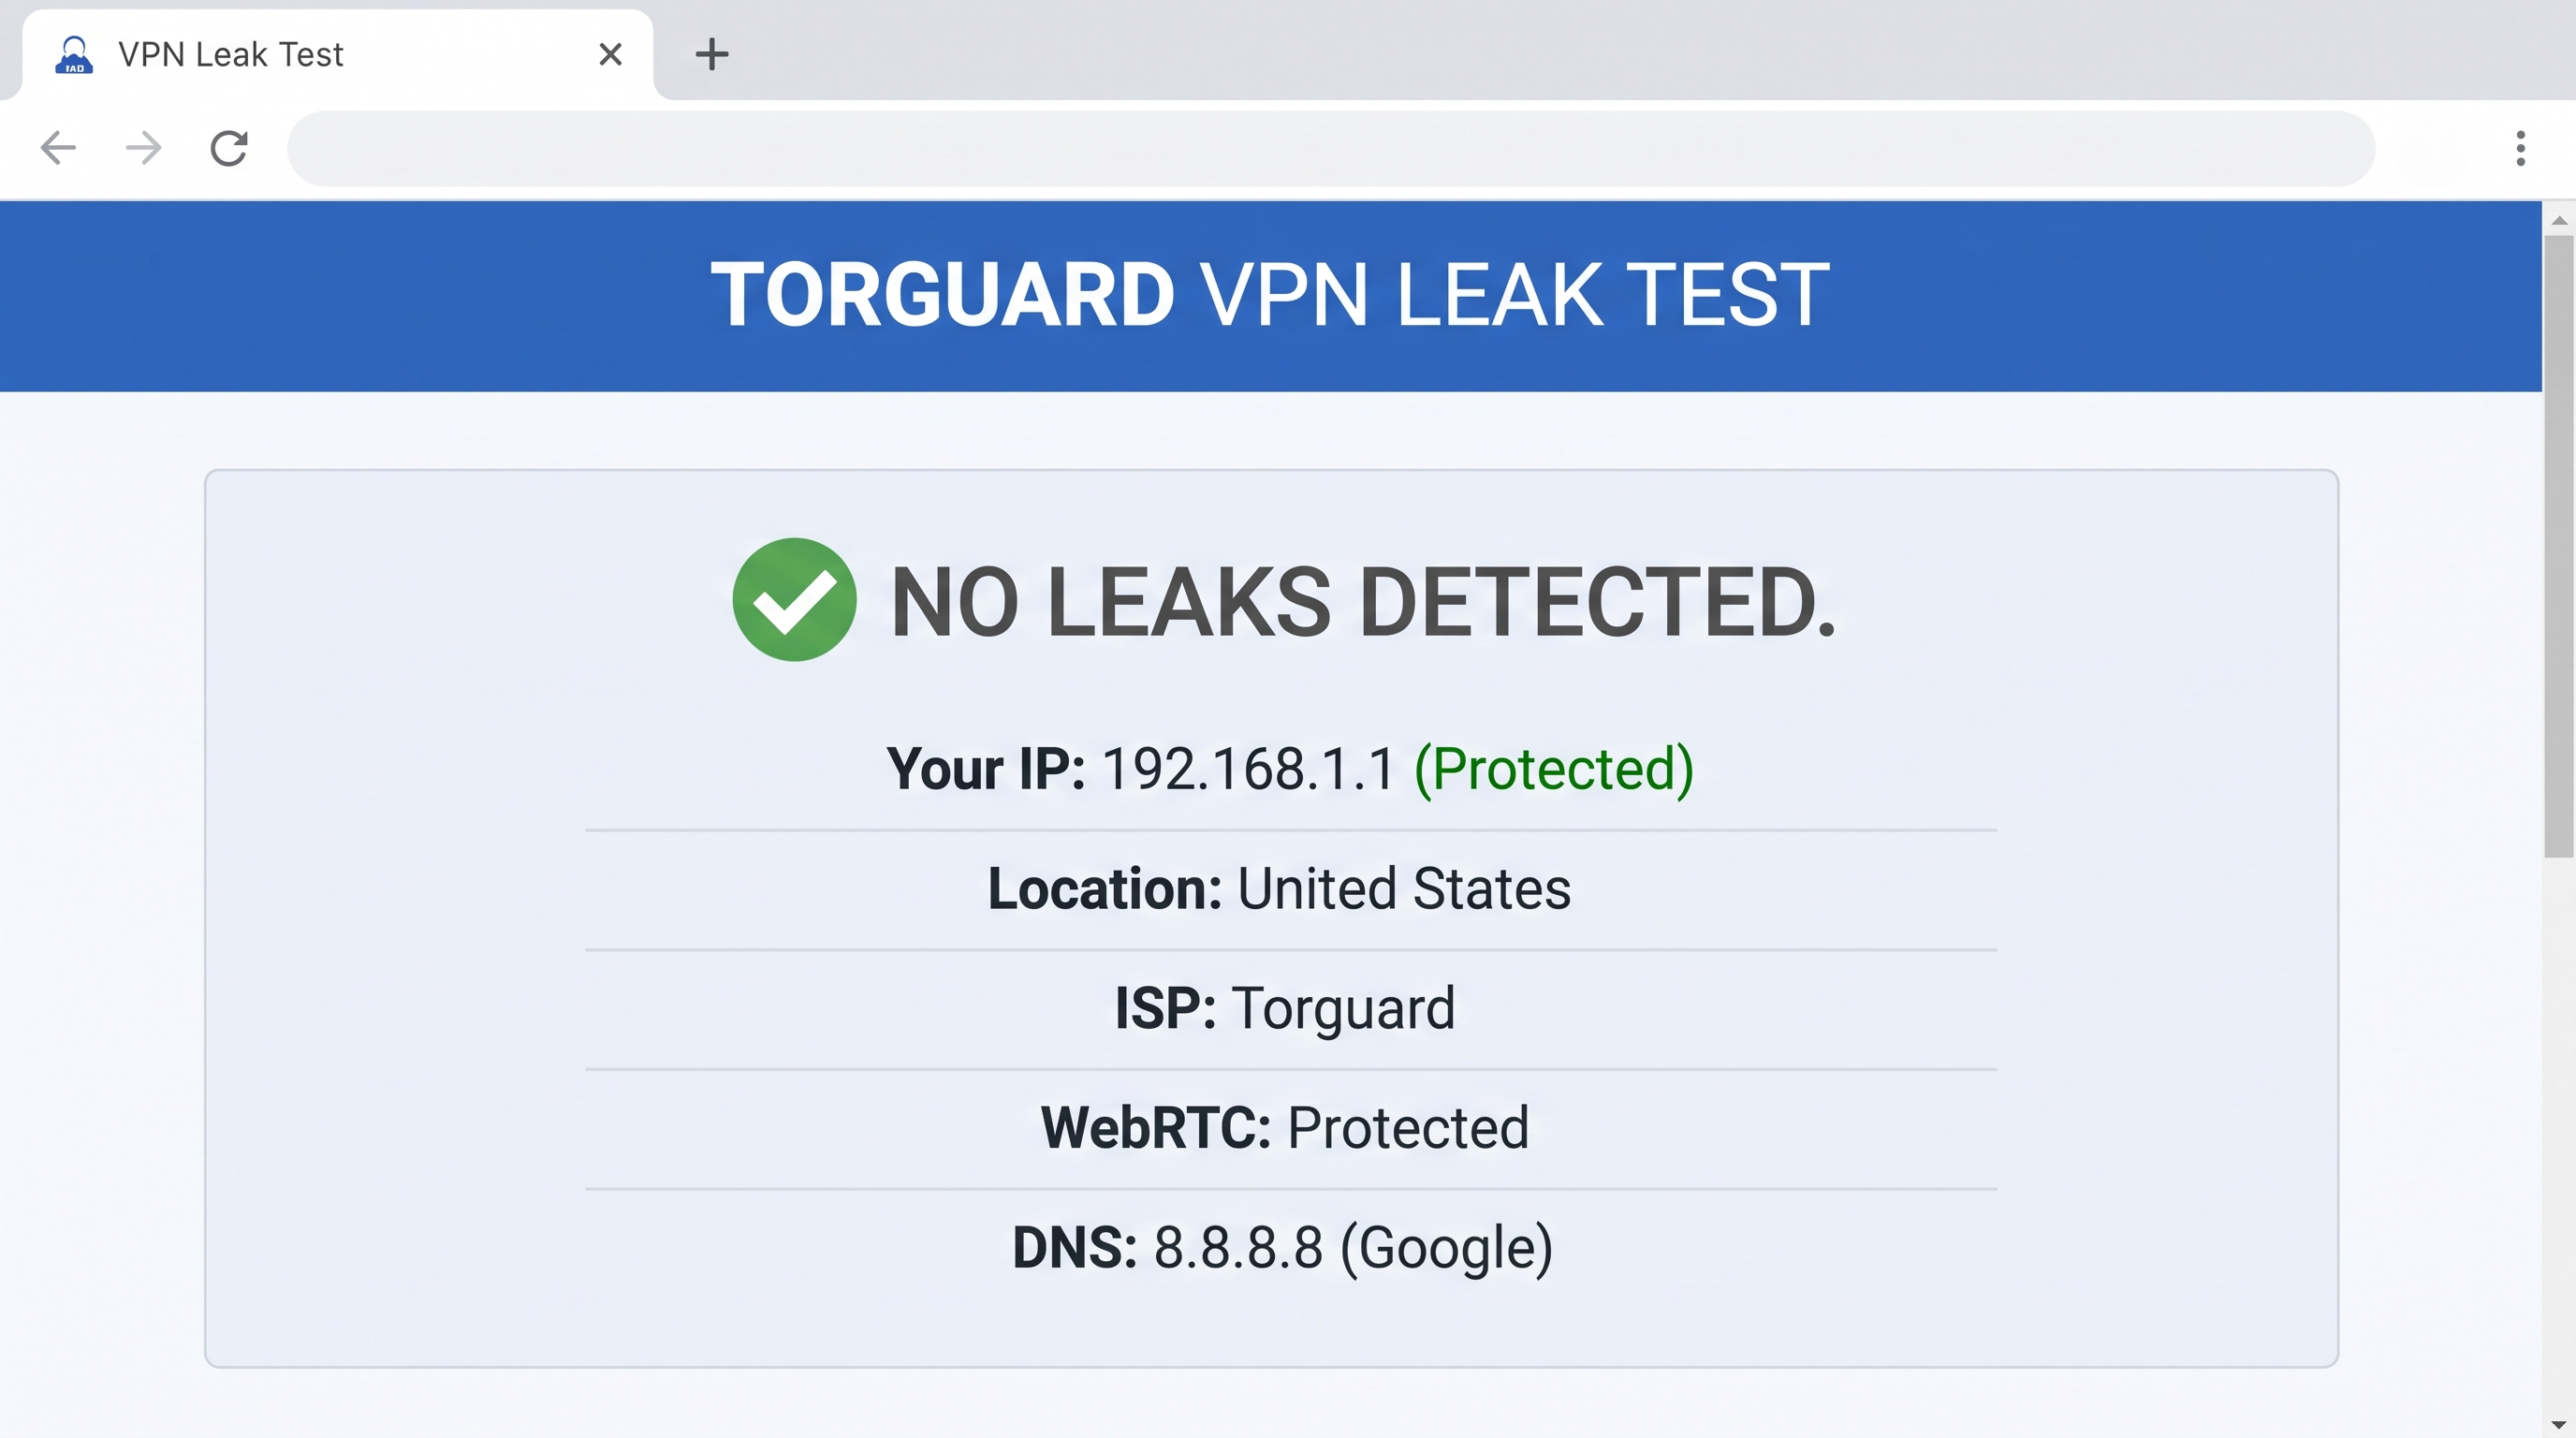
Use the free TorGuard VPN leak test page for a 30-second baseline; click “Start DNS Leak Test” followed by “Start WebRTC Test” and wait for the instant read-out.
Why start here?
Use the TorGuard leak page for a 30-second baseline. The provider-hosted page shows two panels, DNS and WebRTC, so you can answer the beginner’s first question: Is my real IP visible anywhere in the browser?
What to look for
- DNS panel: Resolver names and ASNs. Seeing your home ISP is a leak; seeing the VPN’s network is expected.
- WebRTC panel: Public candidate IP. If it matches the VPN server, you’re safe.
- IPv6 note: The page reports 0 IPv6 fields, so you’ll verify v6 later in Step 3.
Run TorGuard once with the VPN off, record the baseline, then repeat after connecting. A clean pass lets you skip straight to deeper tests without wasting time on a tool that tries to do everything at once.
Step 2: IPLeak.net, the browser-plus-torrent reality check
Visit the IPLeak.net test suite to cover six leak vectors at once: IPv4, IPv6, DNS, WebRTC, browser geolocation, and—critically—torrent egress. The interface looks busy, but every line earns its spot:
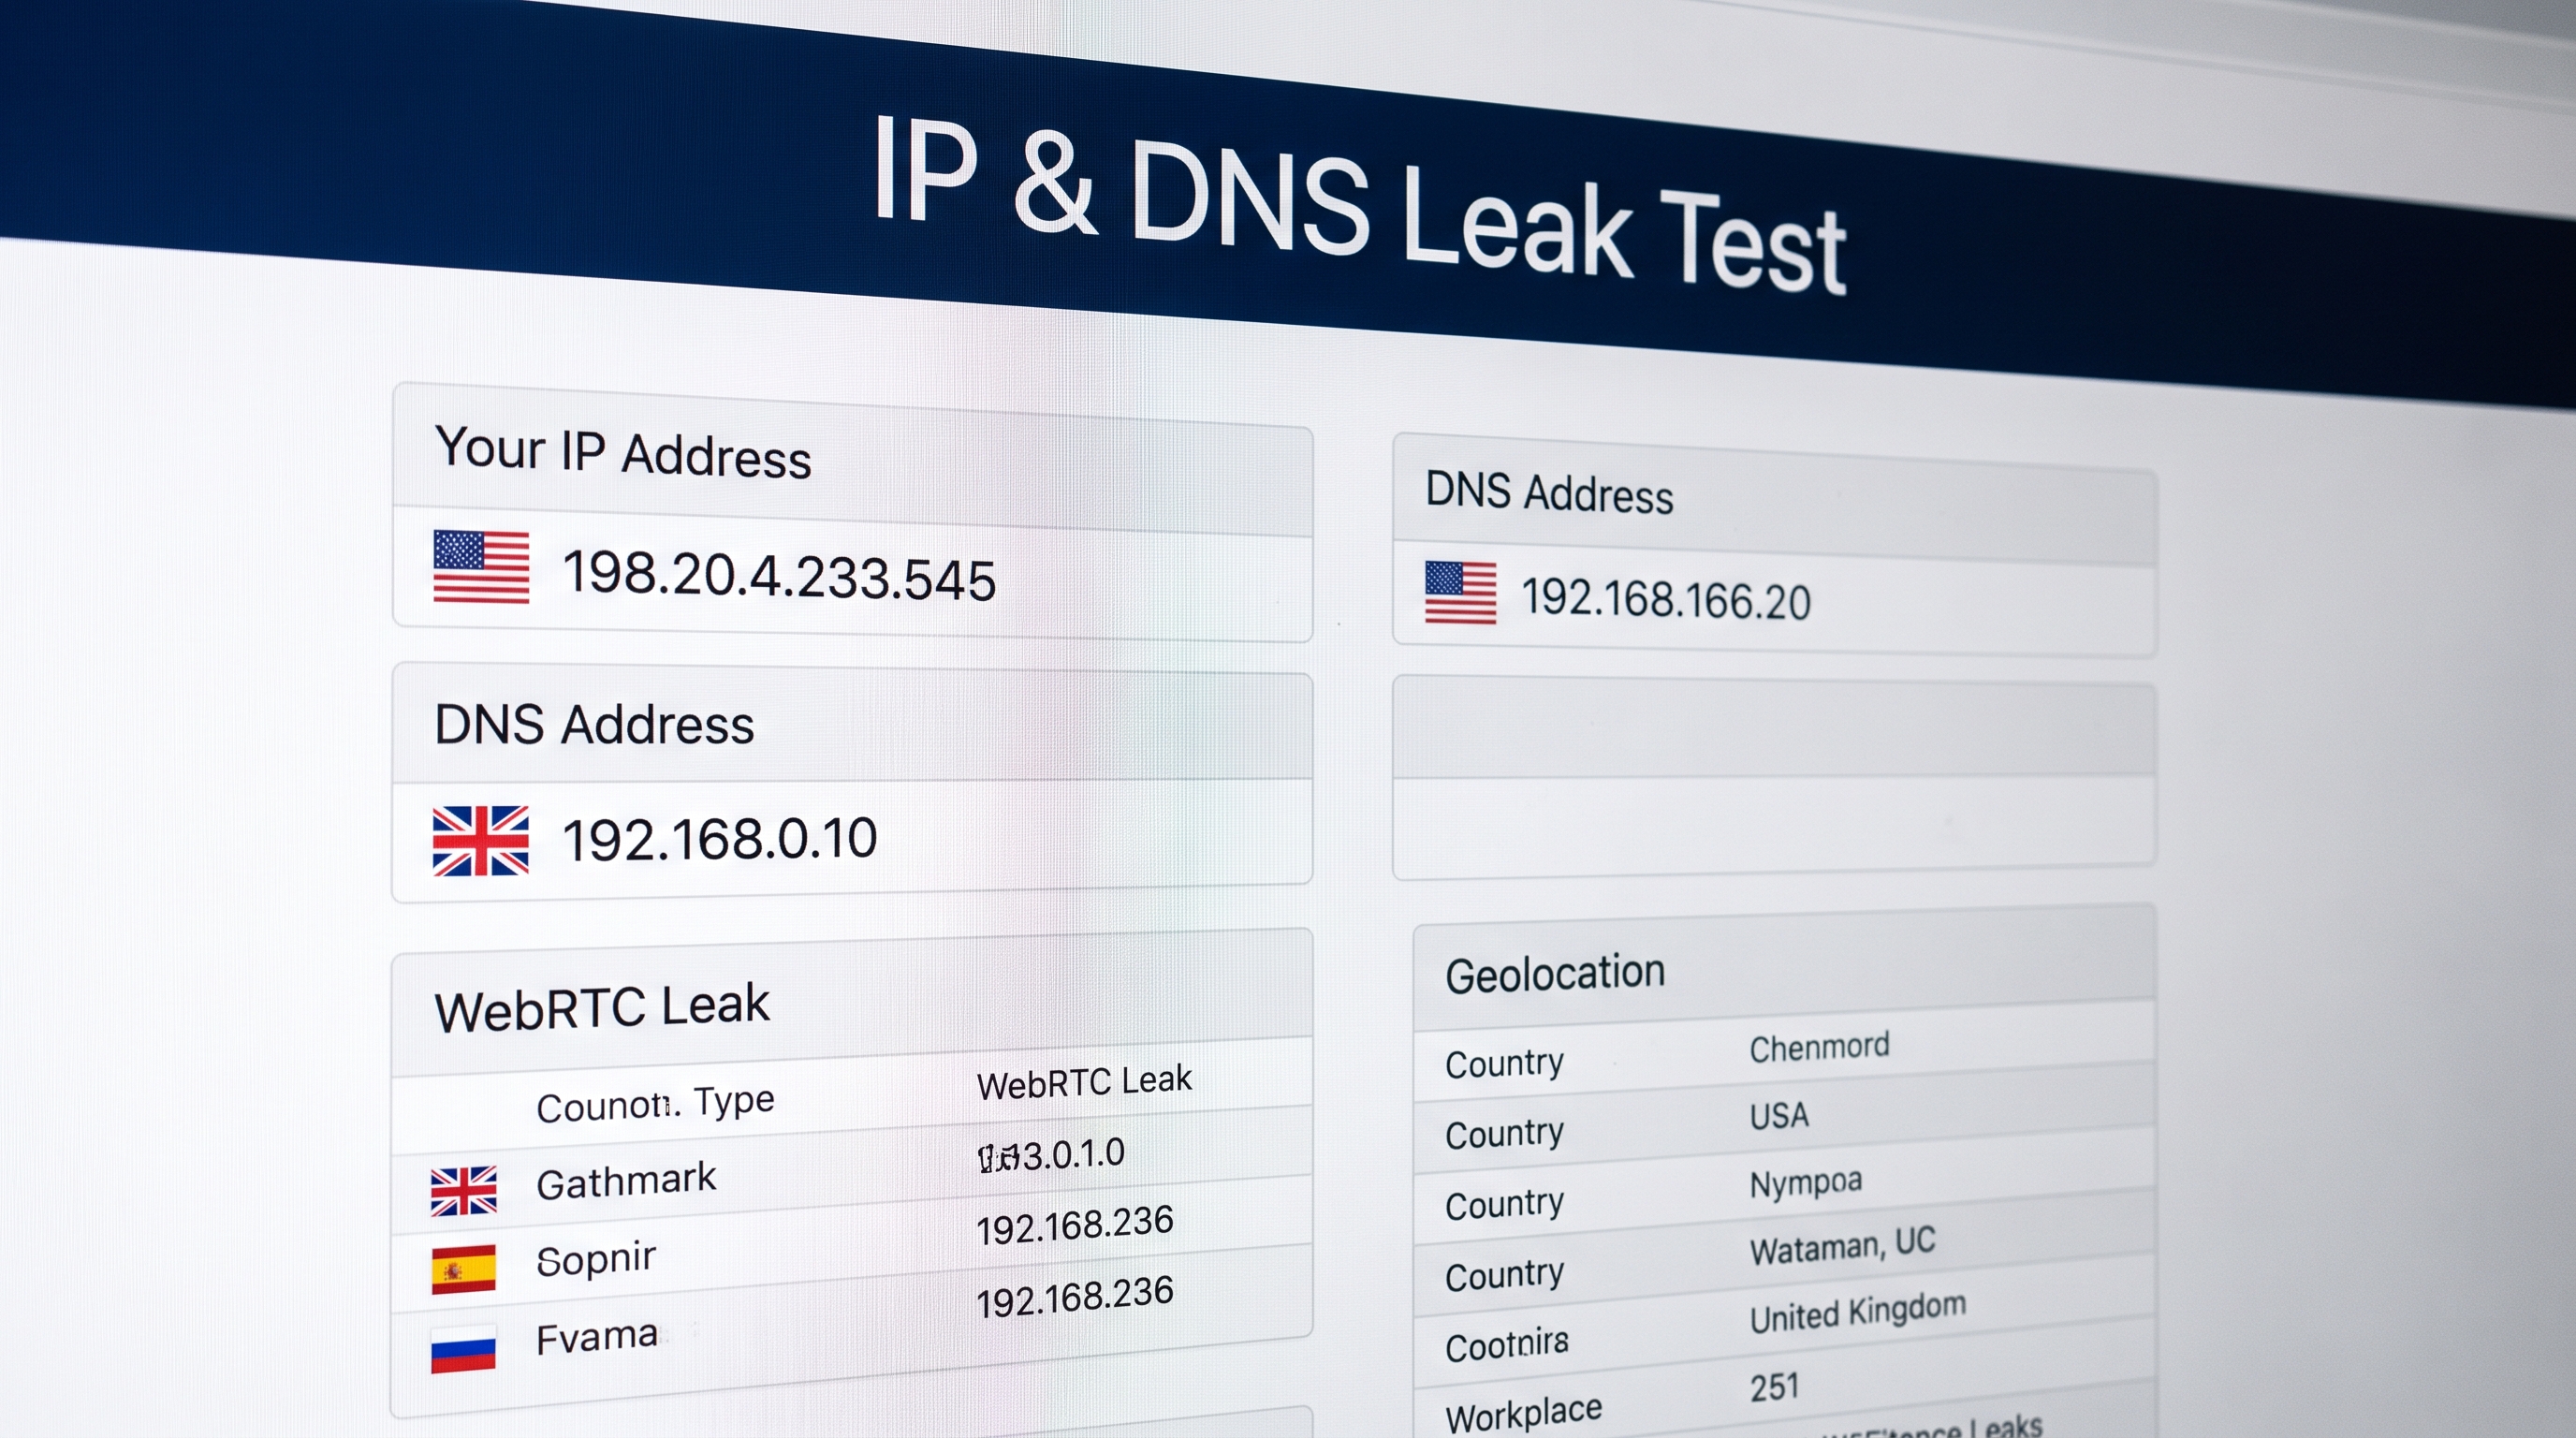
- Torrent magnet. Click Activate in the torrent section; your client downloads a harmless magnet that reports the IP it presents to peers. Wait about one minute, refresh, and read the “Torrent address” field.
- Match = traffic stays in the tunnel.
- Mismatch = real leak, often an unbound client or split tunneling.
- Alternate-port tab. Re-run the IP test on a high port to catch firewalls that rewrite only uncommon traffic.
Quick sanity loop
- Load IPLeak with the VPN on.
- Record IPv4, IPv6, DNS, WebRTC, and torrent results.
- Switch VPN servers and repeat; some providers reroute P2P in “streaming” regions.
- Toggle IPv6 in your OS, then retest; dual-stack networks leak v6 more often than v4.
Ownership note
IPLeak is maintained by AirVPN. The service is free and respected, but log only the data you need and avoid personal details.
Once both the browser and torrent fields show the VPN location, you’re ready to probe finer WebRTC and IPv6 edge cases in Step 3.
Step 3: BrowserLeaks, your magnifying glass for WebRTC and IPv6
Visit the BrowserLeaks IP suite to zoom in on three browser-specific blind spots: WebRTC candidates, IPv6 fields, and resolver behavior under Secure DNS.
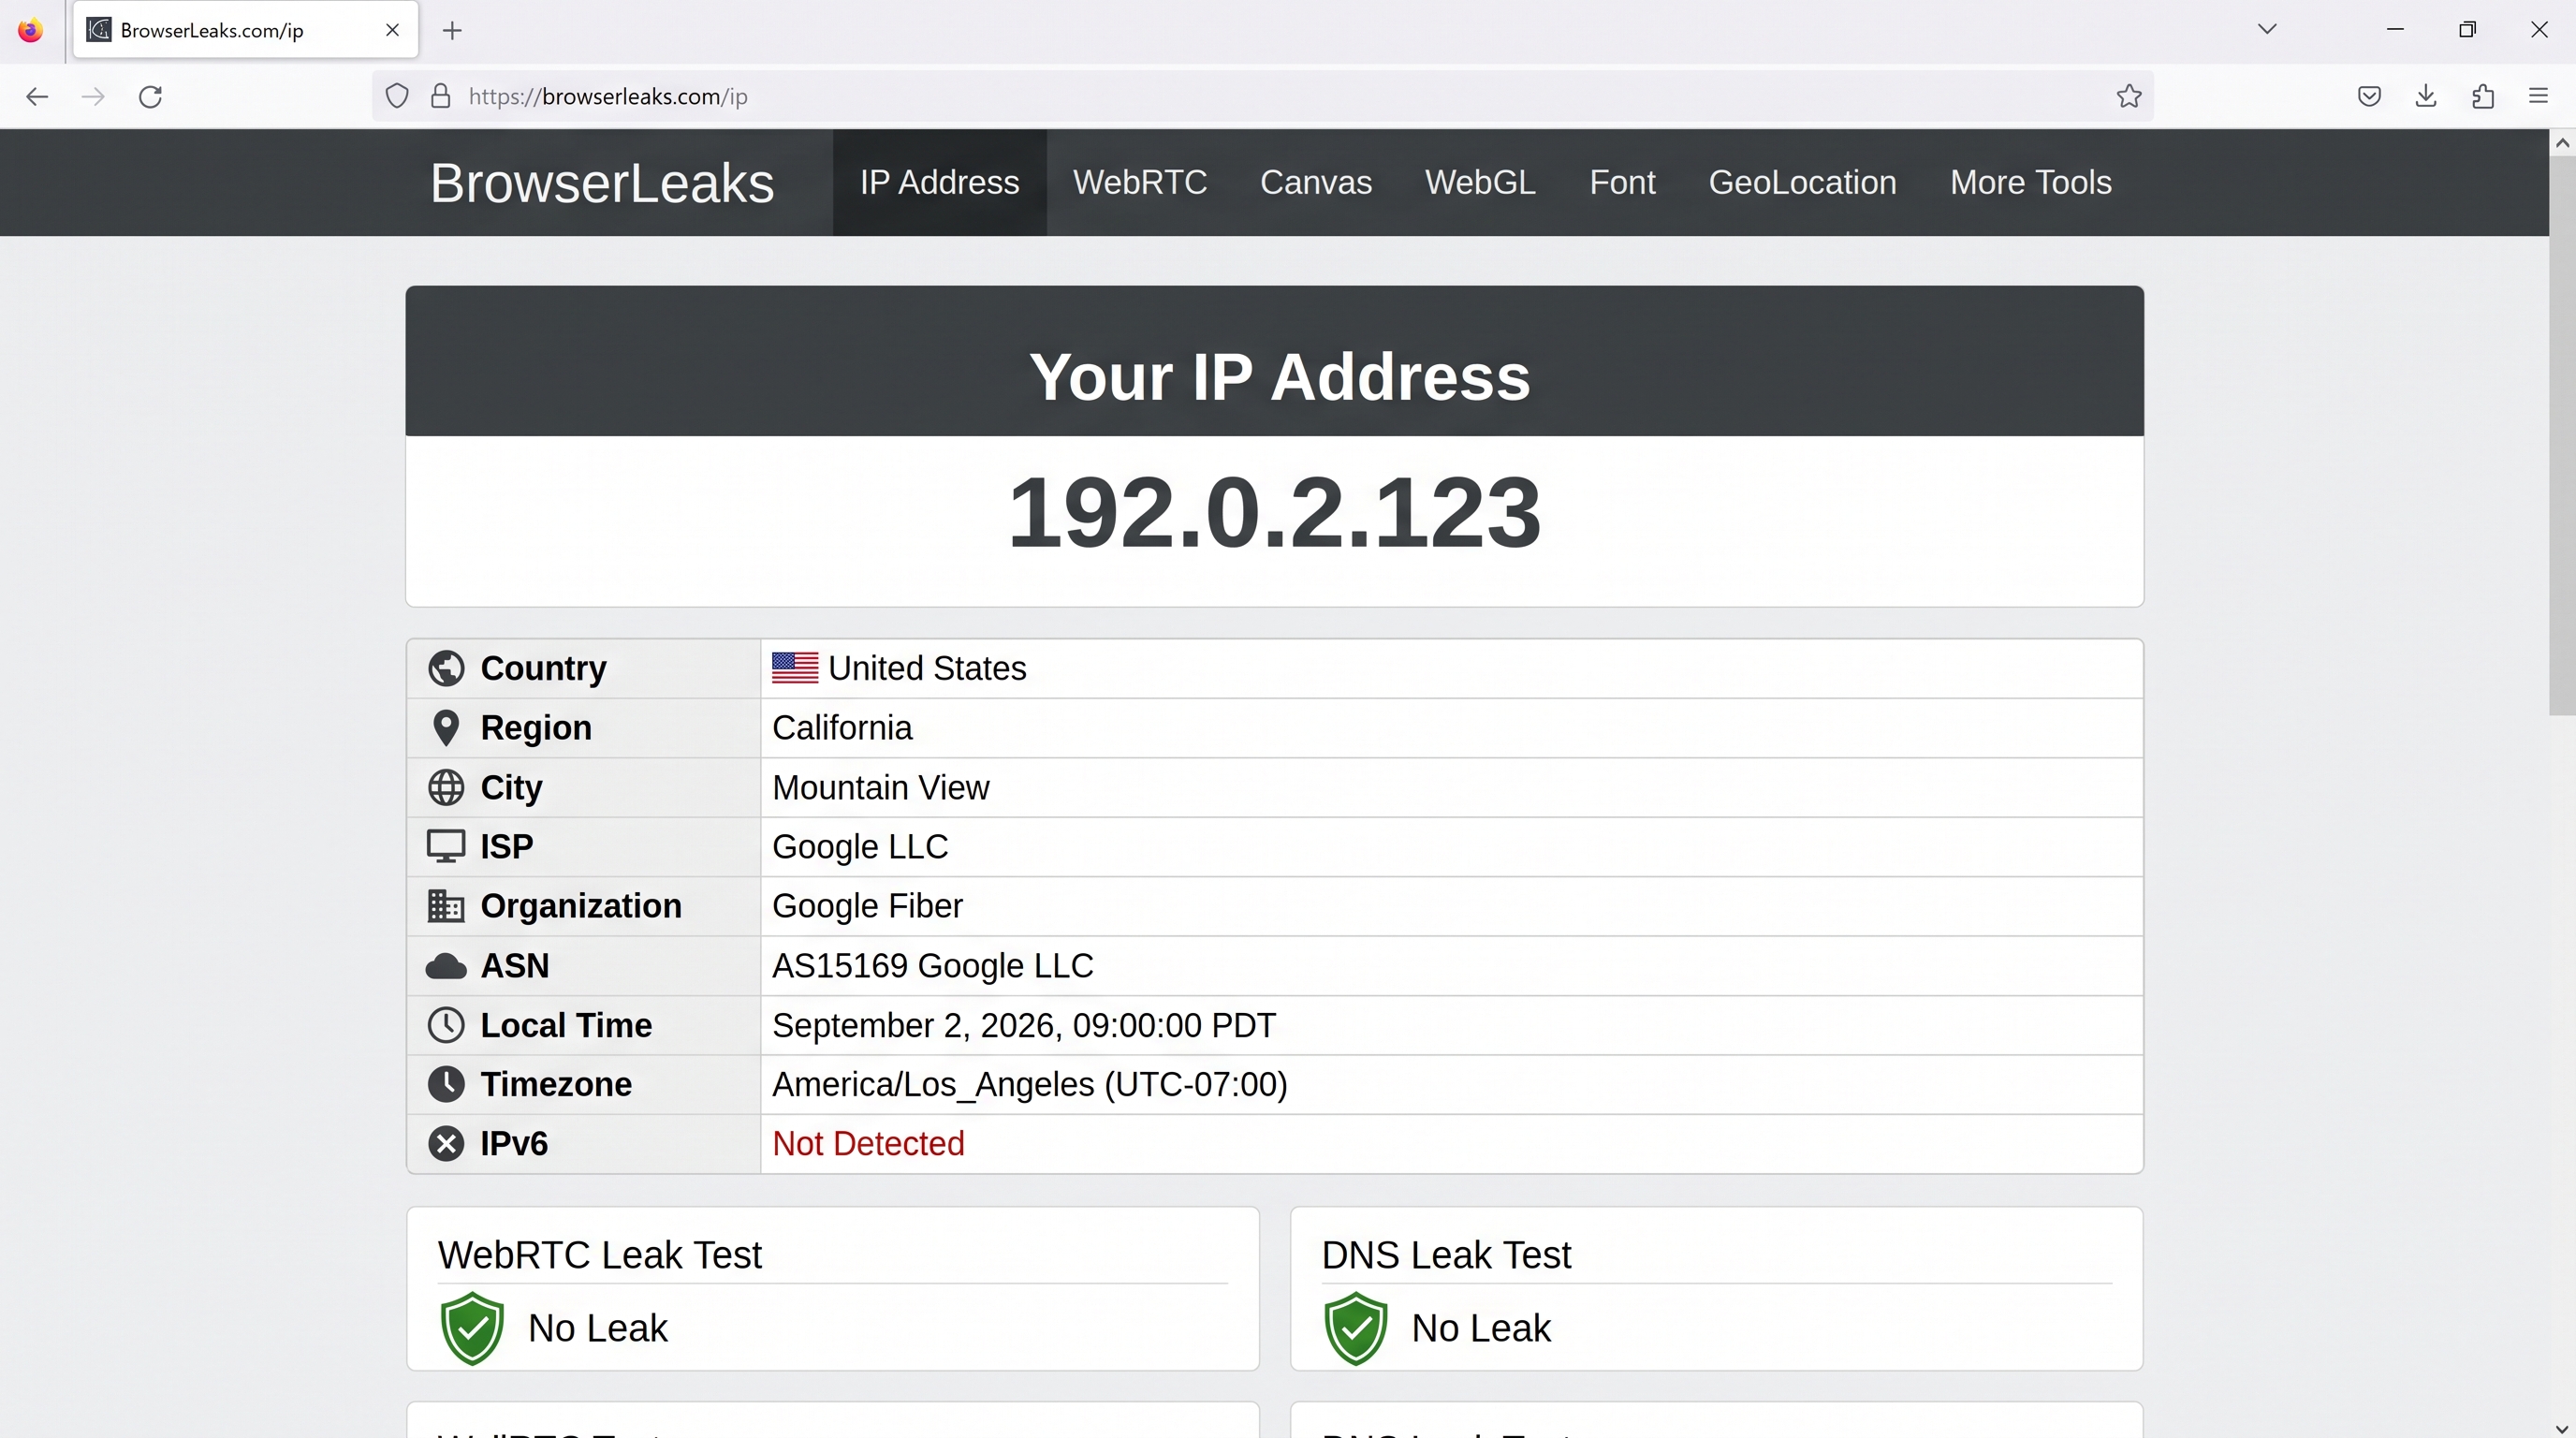
Start on the IP page. You’ll see rows for IPv4, IPv6, and Public IP (WebRTC). The WebRTC line should show the same VPN address you recorded in Steps 1 and 2. If it echoes your baseline ASN, WebRTC is leaking.
Next, open the WebRTC tab. Focus on the type column: host = private LAN addresses (harmless) | srflx or relay = public addresses that should match the VPN IP.
Then load the DNS tab. BrowserLeaks fires fifty random queries and lists the resolvers that answered. Compare each ASN with your VPN provider. Seeing your home ISP here signals a DNS leak, not just a different country code.
Header extras such as timezone, language, and locale travel outside the tunnel. They aren’t leaks but can reveal hints about you. Change the browser locale only if total anonymity matters.
Quick reality check
- Run the test in both Chrome/Chromium and Firefox; their WebRTC stacks and Secure DNS defaults differ.
- Note whether Secure DNS/DoH is On, Off, or With provider, then retest after toggling.
- Repeat with privacy extensions disabled; you need the browser’s everyday state, not a pristine lab profile.
Leave BrowserLeaks only after IPv6, WebRTC, and DNS rows all point to the VPN network. Next up is a forensic DNS dive in Step 4.
Step 4: dnscheck.tools, your forensic DNS autopsy
Open the dnscheck.tools dashboard to trace every resolver hop, not just the final IP.
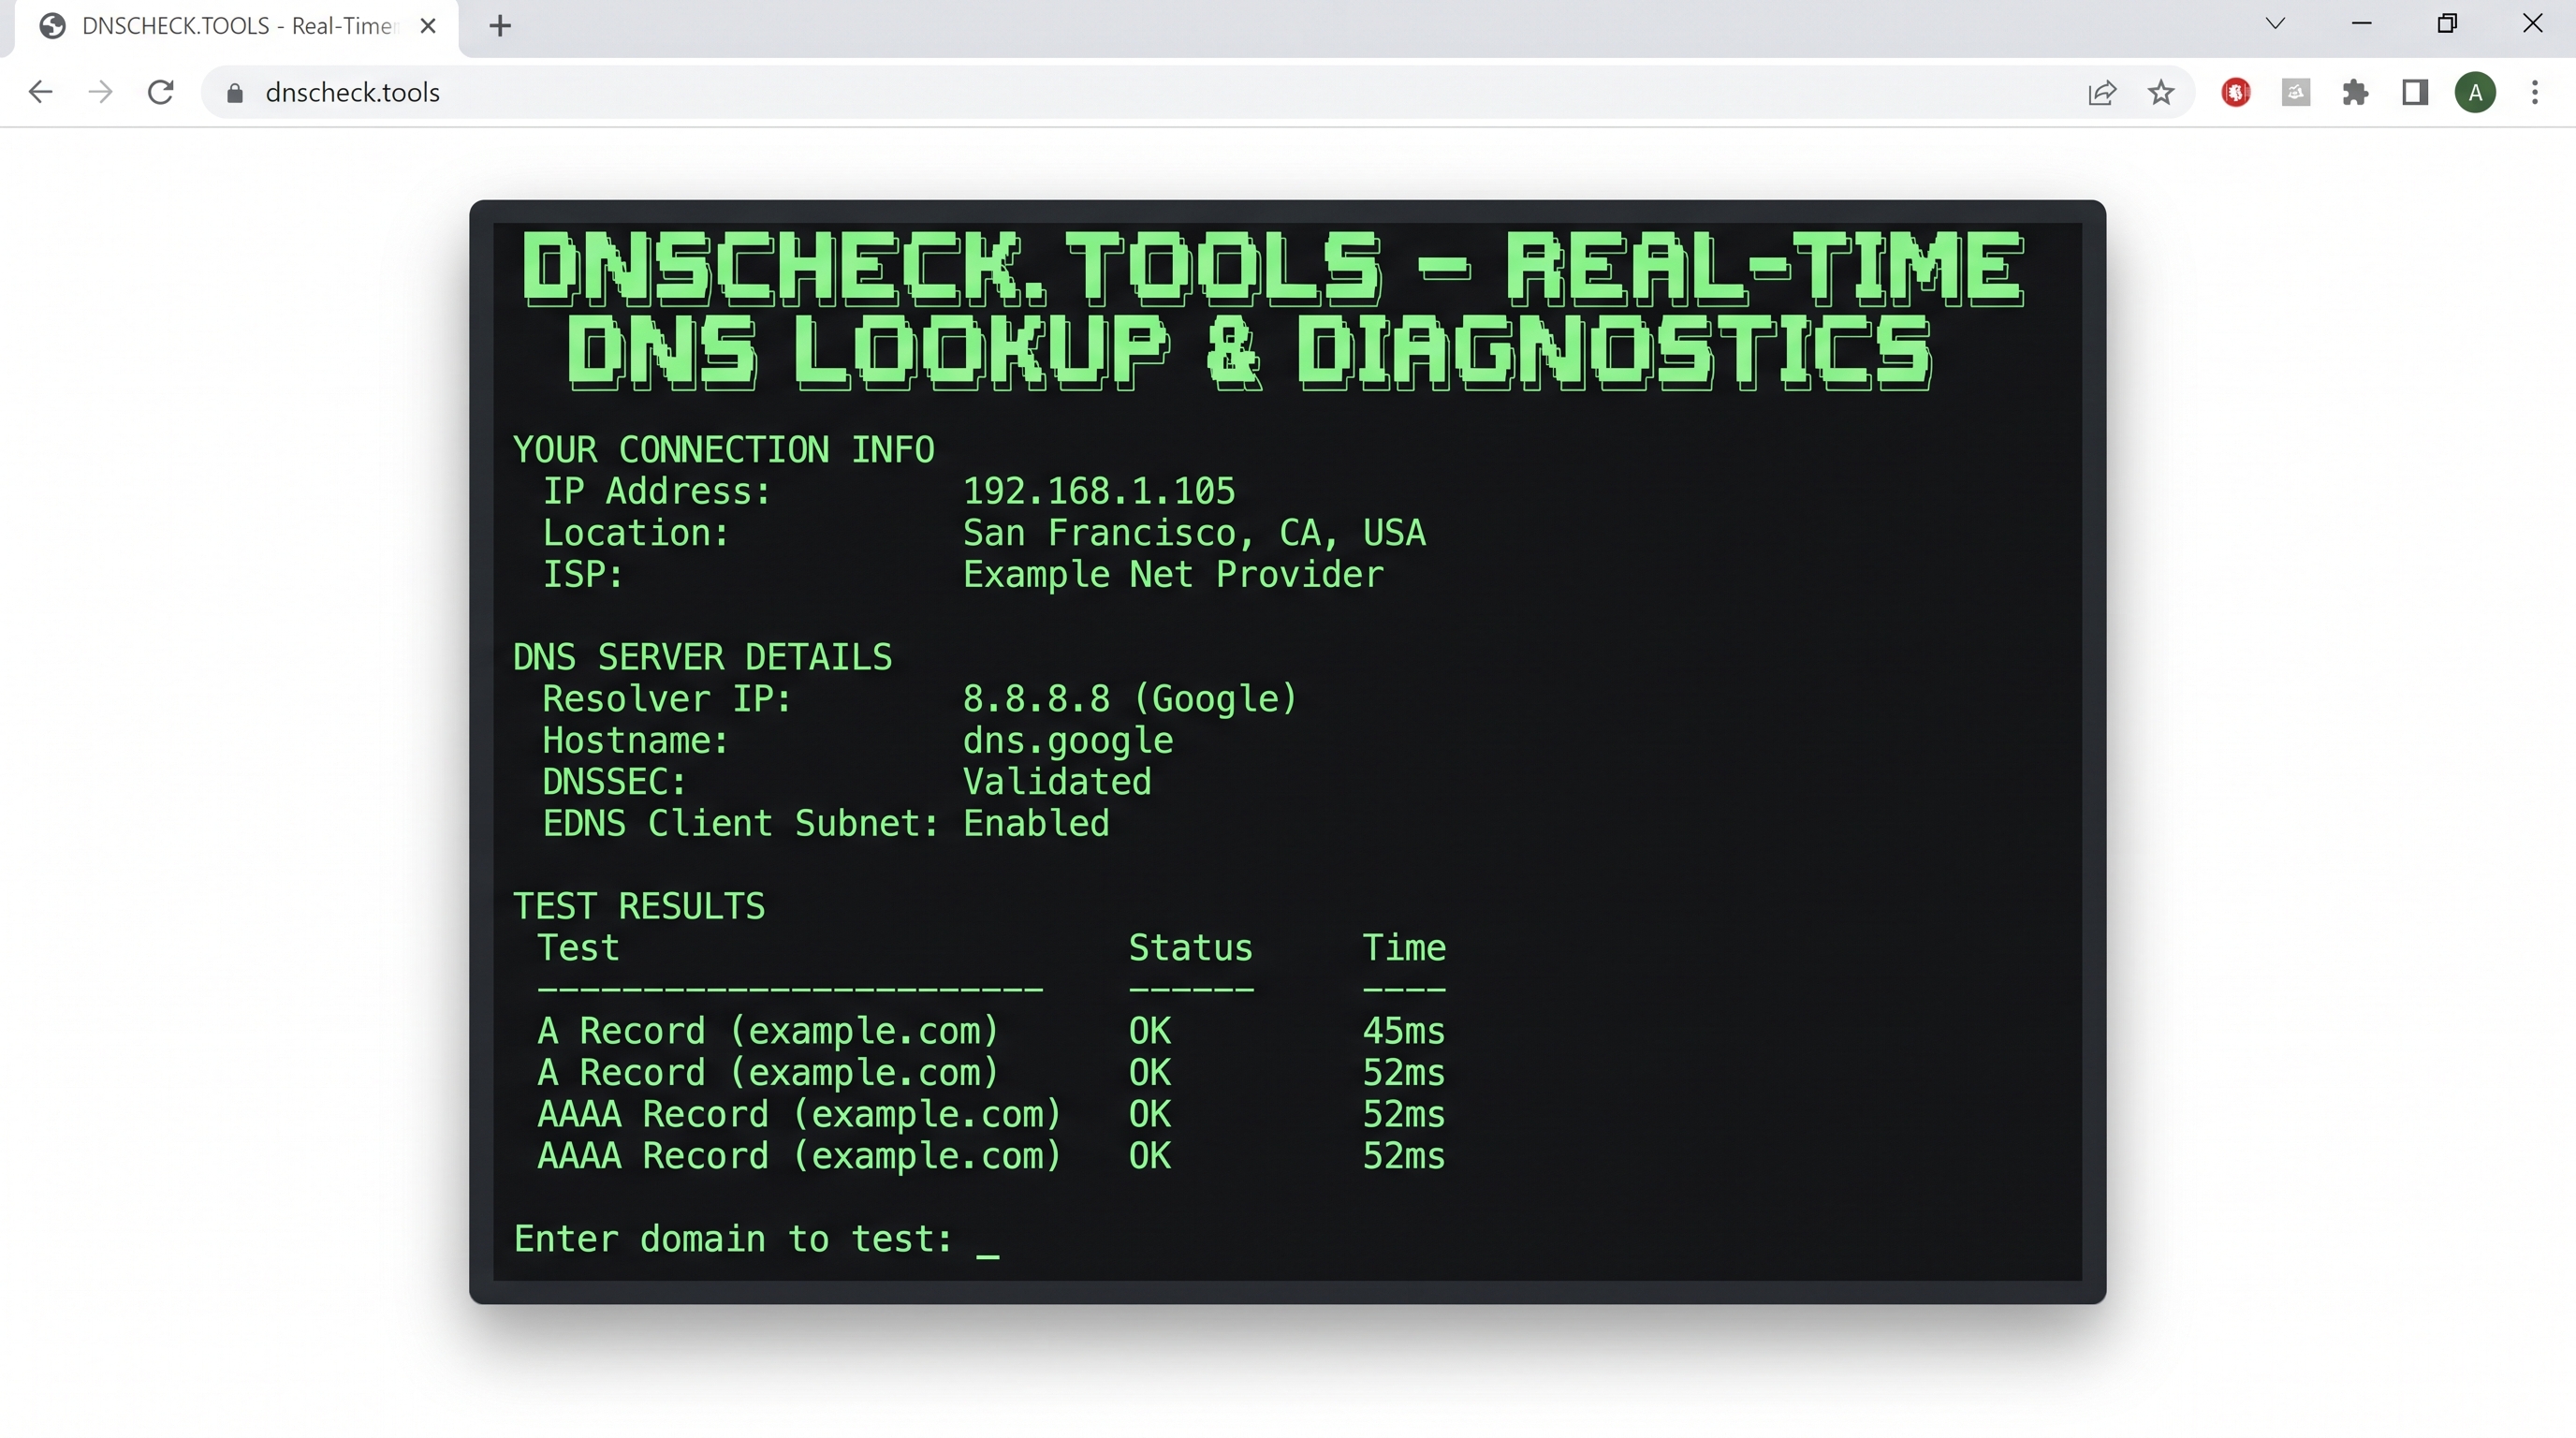
What happens under the hood
- The site fires fifty uniquely tagged DNS queries and records which recursive resolvers answer, their ASNs, countries, and whether DNSSEC validation survives.
- Results appear in two key columns: Resolvers (who answered) and Validation (DNSSEC status).
How to read the table
- Resolvers. Expect your VPN’s ASN or a third-party service listed in the provider docs. Your home ISP here equals a DNS leak. Google or Cloudflare may be normal if your VPN proxies through anycast; check the FAQ before sounding the alarm.
- Validation. A red DNSSEC mark means signatures were stripped, often by captive portals or parental-control filters rather than the VPN.
Repeat the test after each transition
- Change VPN servers.
- Toggle Secure DNS/DoH in the browser. Note the DoH state each time.
- Enable or disable split tunneling for the browser.
Consistency across runs equals safety. Random resolver swings signal a misconfiguration waiting to leak when conditions change.
Privacy note: dnscheck.tools stores no personal logs, but each query still reaches its authoritative zone. Close unrelated tabs and clear recent history if you are working on sensitive projects.
Once DNS results match your VPN policy in every scenario, you are ready for the final stage—packet capture during forced failures.
Step 5: Packet capture, watching traffic from the outside in
Packet capture moves you from symptoms to evidence. By recording every frame on the physical adapter, you can prove—packet by packet—whether the VPN’s kill switch holds during real-world failures.
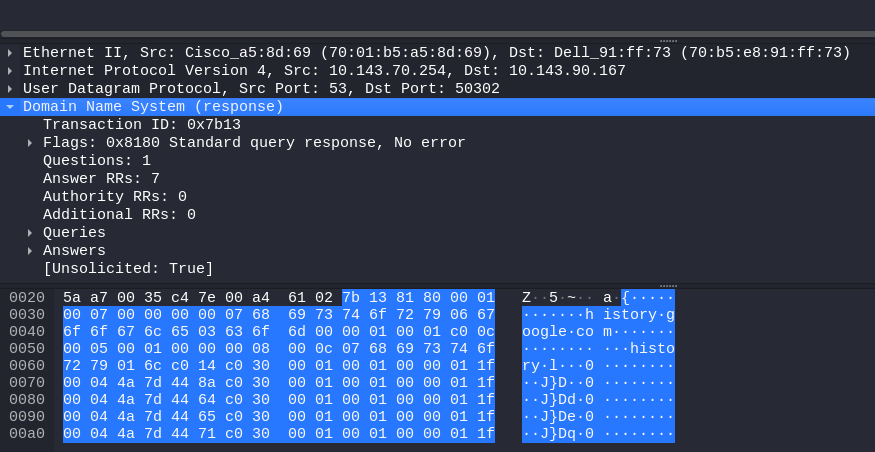
Quick setup (about two minutes)
- Install Wireshark or run tcpdump on Linux or macOS.
- Select the physical interface (en0, wlan0, Ethernet 1)—never the tun or wg tunnel.
- Start a capture and let it run for sixty seconds to establish a quiet baseline.
Generate harmless, continuous traffic
ping -i 1 example.com &
curl -s https://icanhazip.com > /dev/null &
Leave both commands running; they create a visible heartbeat in the trace.
Inject failure and watch the trace
| Failure event | Expected result |
|---|---|
| Force-quit VPN process | Capture stays silent until auto-reconnect |
| Unplug Ethernet or toggle Wi-Fi for five seconds | No clear-text DNS or HTTP before the tunnel resumes |
| Switch VPN servers | Only encrypted handshake plus new VPN IP appear |
| Sleep, then wake laptop | Zero packets during sleep; new handshake on wake |
| Reboot system | No outbound traffic before VPN auto-connect |
If you spot even one packet from your baseline IP, the kill switch failed.
Read the trace
- Filter
dnsorudp.port == 53for clear-text DNS. - Filter
stunfor WebRTC probes. - Sort by Time; leaks usually form a brief burst at the failure moment.
- A typical clean test produces less than one kilobyte of metadata (handshake) during reconnection.
Privacy reminder: PCAPs can expose hostnames, cookies, and tokens. Trim the capture to the failure window (-c 300 in tcpdump), then redact or encrypt the file before sharing with support.
Complete this step and you’ll have courtroom-grade proof that every other layer of testing holds—even when your VPN client crashes at two am.
Why packet capture is the gold standard
Browser tests show symptoms; packet capture shows evidence. Follow the same five-point routine: choose your tool, pick the physical interface, create a steady heartbeat, trigger failure, then parse the trace.
Why the fuss? An April 15 2026 RTINGS study found that nearly every one of twenty popular VPNs leaked at least one packet during forced crashes—results confirmed only through external packet capture.
Privacy tip: PCAPs can expose hostnames and cookies. Trim the file (-c 400 in tcpdump) and redact before sharing.
The 15-minute pre-purchase protocol
Follow these seven timed steps the day you install any new VPN, before the refund window closes.
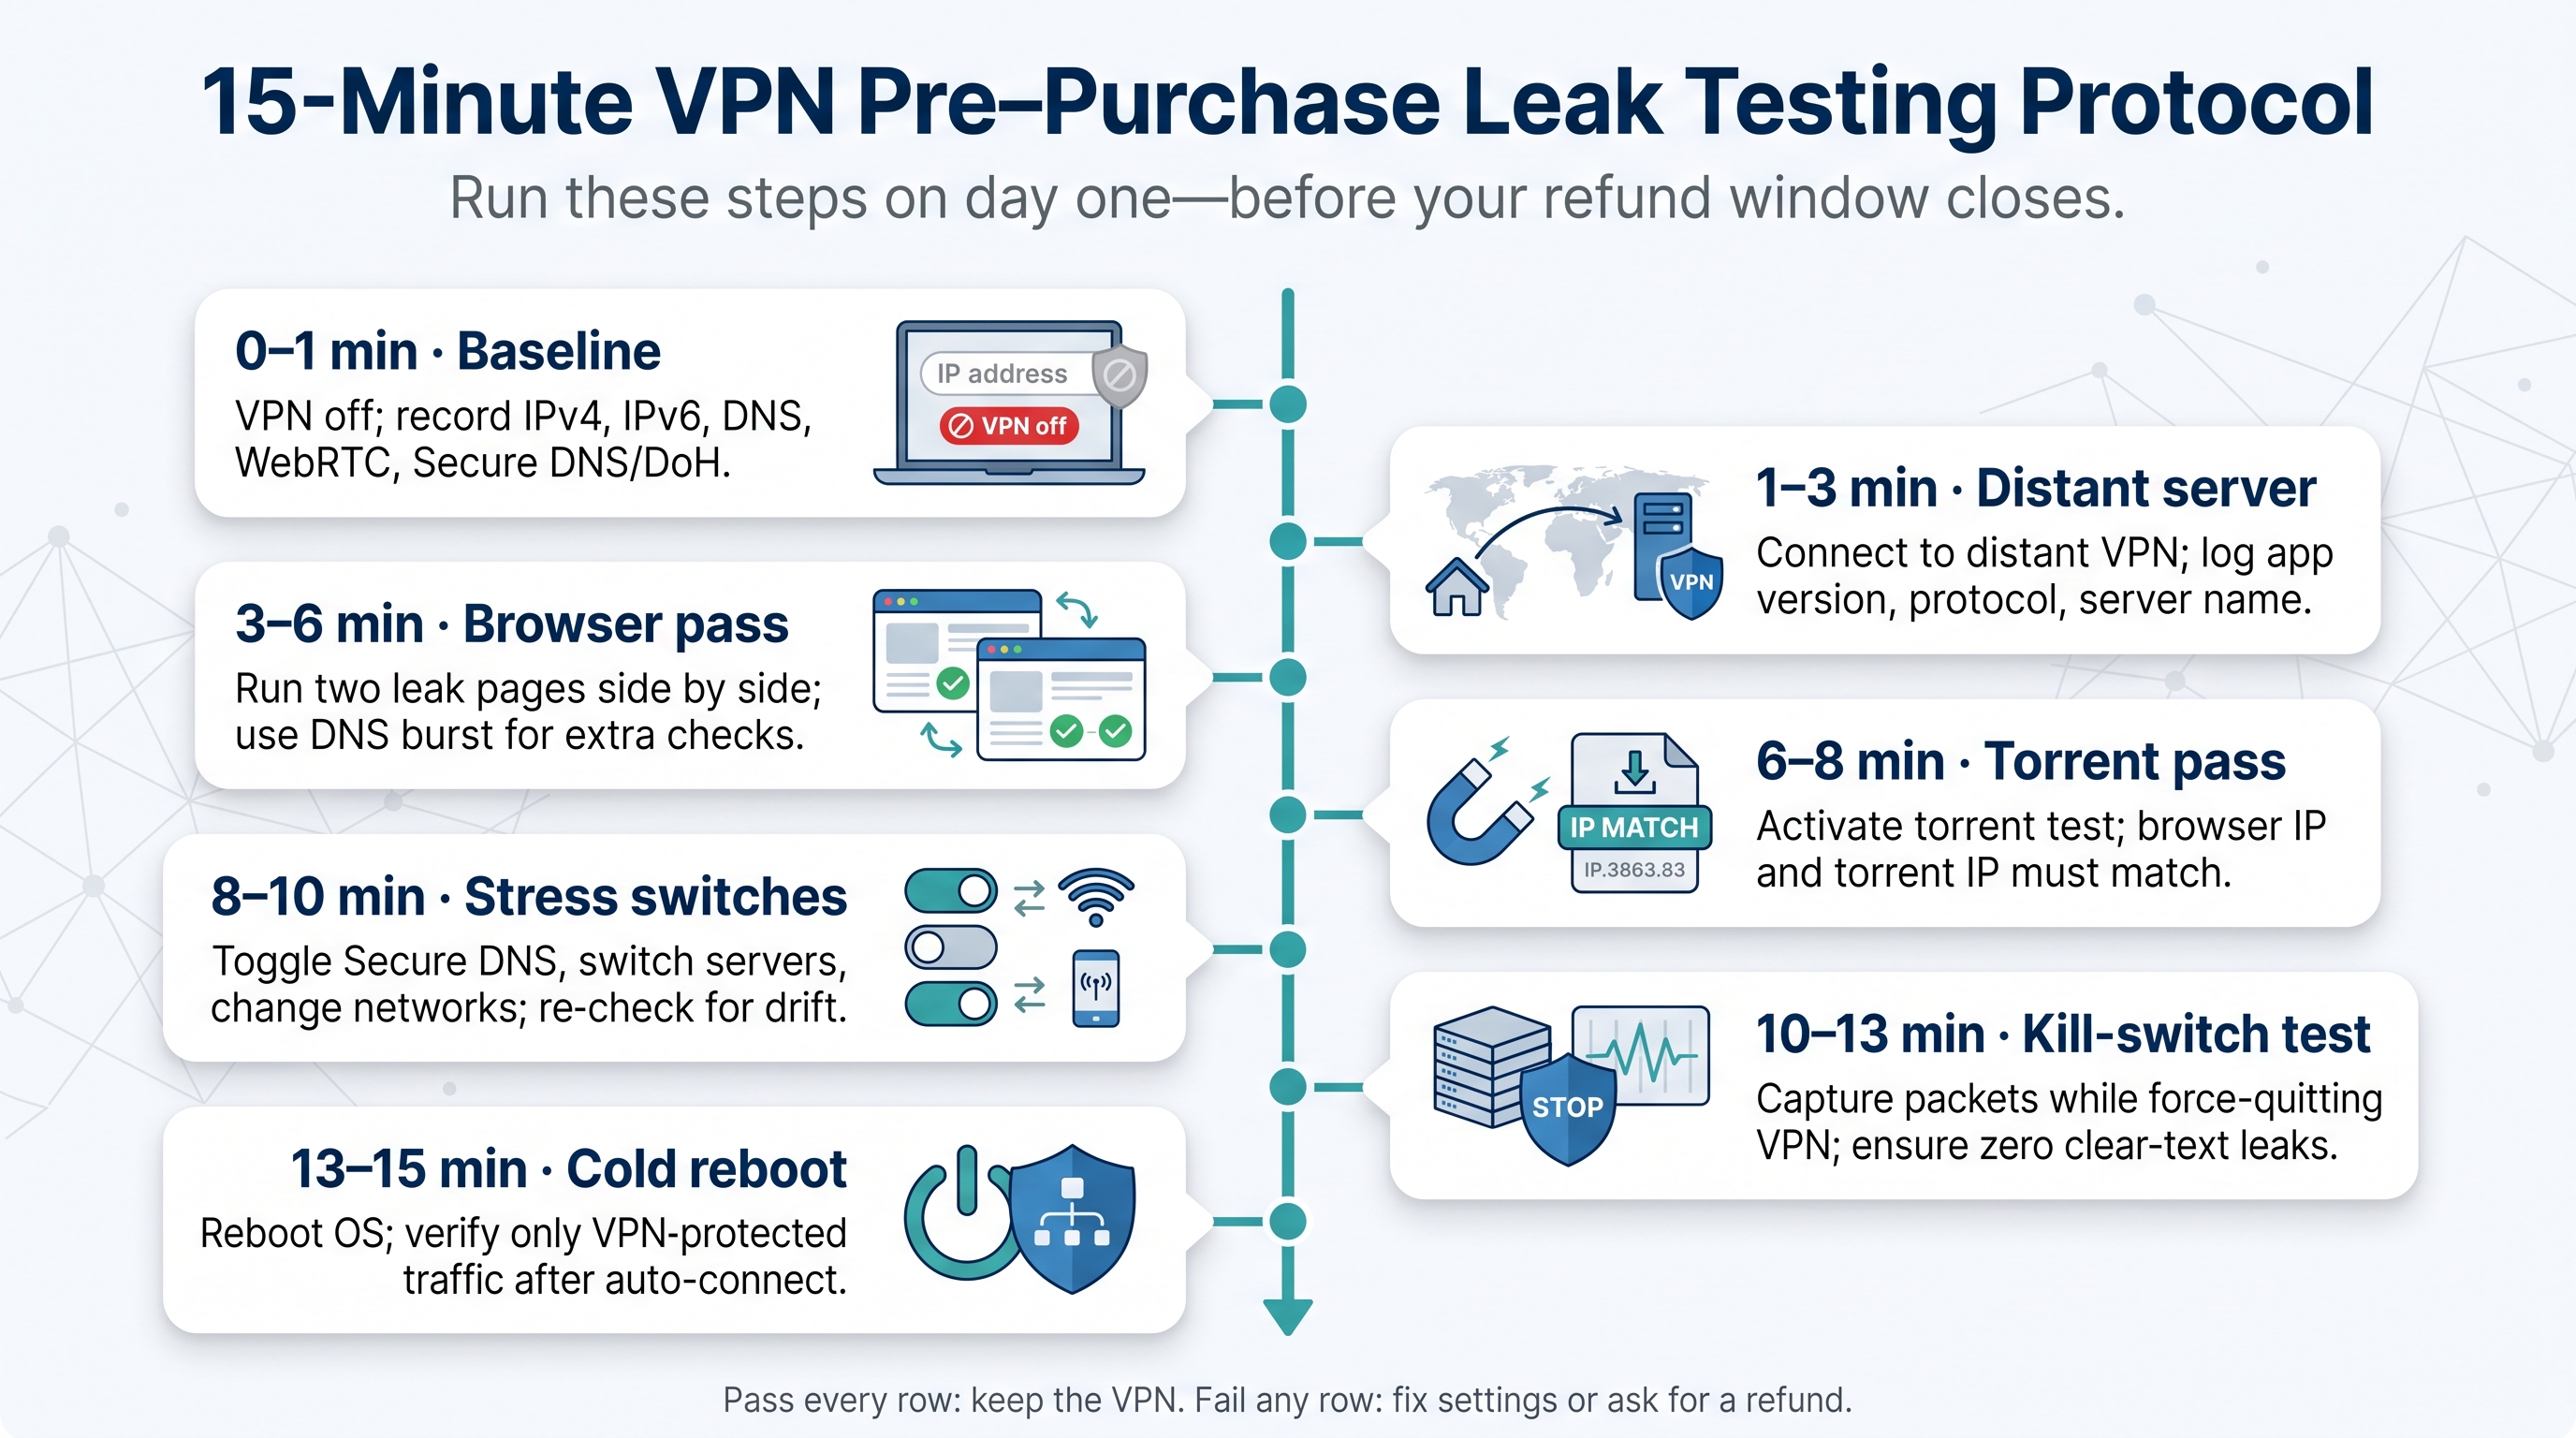
| Minute | Action | What to record |
|---|---|---|
| 0–1 | Baseline. VPN off. Load a leak checker and write down IPv4, IPv6, ISP/ASN, DNS resolvers, WebRTC public IP, Secure DNS or DoH state, and (Mac or iOS) Private Relay state. | “Before” photo |
| 1–3 | Distant server. Connect to a VPN location at least two time zones away; note app version, protocol, and server name. | Build, protocol |
| 3–6 | Browser pass. Run TorGuard and BrowserLeaks side by side. Then open BrowserLeaks → DNS page for the fifty-query burst. | Any baseline values? |
| 6–8 | Torrent pass. Visit IPLeak.net, activate the magnet, refresh after about sixty seconds. Browser IP and torrent IP must match. | Torrent IP |
| 8–10 | Stress switches. Toggle Secure DNS on and off, change VPN servers, swap Wi-Fi and mobile hotspot. After each change, reload IPLeak or TorGuard. | Resolver or IP drift |
| 10–13 | Kill-switch test. Start Wireshark on the physical adapter, run ping -i 1 example.com, then force-quit the VPN app. The trace should stay silent until reconnection. |
Packet log (save PCAP) |
| 13–15 | Cold reboot. Restart the OS without touching the VPN icon. Wireshark should show DNS failures until auto-connect, not direct ISP traffic. | Post-boot trace |
Store screenshots and PCAPs in a dated folder; redact hostnames before sharing with support.
Pass every row without seeing a baseline IP or ISP DNS, and you can keep the service. Fail any row, and either fix the settings or request a refund.
How to read your results, and avoid false alarms
Leak pages show data, not verdicts. Use this checklist to decide whether the numbers need a fix.
- Public IP — Match = VPN address. Baseline IP = real leak. Close the app or review split-tunnel rules.
- IPv6 — If only IPv4 moves to the VPN but baseline IPv6 remains, your tunnel is half-built. First, confirm whether the provider supports or blocks IPv6 by design. Disable IPv6 temporarily only if documentation is unclear; permanent blocking can break some services. TunnelCrack (2023) showed dual-stack leaks can bypass encryption via split routes.
- DNS — Resolver ASN equals home ISP → leak. Resolver ASN equals Google or Cloudflare → check Secure DNS or DoH settings before sounding the alarm.
- WebRTC — Public candidate must match the VPN IP. Host candidates in 192.168.x.x or fd00::/8 are private and safe.
- Kill-switch timing — A single clear-text packet during a forced crash counts as failure; RTINGS found nearly every one of twenty clients leaked in this window (April 15 2026 audit).
- Mobile edge case — Mullvad (May 3 2024) recorded DNS bursts on Android during tunnel renegotiation. Re-run your failure tests on Wi-Fi, LTE, and airplane-toggle.
Quick reference
| Test output | Likely cause | Next step |
|---|---|---|
| Baseline IPv4 or IPv6 | Direct leak | Disable split tunnel or review firewall rules |
| ISP DNS resolver | DNS leak | Check browser Secure DNS and OS resolver |
| Google or Cloudflare DNS | Not always bad | Confirm provider docs; retest with DoH off |
| VPN IP in WebRTC | Expected | No action |
| Only 192.168 or fd00 in WebRTC | Local addresses | Ignore |
| Packets during crash window | Kill-switch failure | Enable strict switch or change provider |
Work through the list calmly. Fix confirmed leaks; ignore artifacts that your VPN or browser intentionally generates.
What to do if your VPN leaks
Treat the leak as data, then work through these layers one change at a time.
- Update and reboot. A July 2026 TechRadar audit found that more than fifty percent of Windows VPN clients shipped with outdated OpenVPN code and leaked traffic until patched. Install the latest client, reboot, and rerun the quick TorGuard check.
- Pause split tunneling. Turn it off, restart the leaking app, and retest. If the leak disappears, re-enable tunneling only for apps you explicitly trust.
- Verify Secure DNS or DoH. Set Chrome or Firefox Secure DNS to Off or With current service, then reload the BrowserLeaks DNS page. If the resolver list now shows only VPN ASNs, the issue was browser-level.
- Confirm IPv6 policy. Check your provider’s docs.
- If they support IPv6, make sure it’s enabled in the client.
- If they block IPv6, leave OS IPv6 on but ensure test pages show “No IPv6.”
- Disable IPv6 system-wide only if documentation is unclear and the provider cannot resolve the leak.
- Enable the strict kill switch. Most clients hide it under Advanced. Toggle it on, crash the app, and watch Wireshark; a clean capture should show only the TLS handshake when the tunnel restarts.
- Gather evidence for support.
- Screenshots of baseline versus leak (IPLeak).
- Thirty-second PCAP around the failure moment.
- VPN version, OS build, and network type.
Send the bundle within the refund window. Good providers will replicate or refund without debate.
Still leaking after every step? Switch to a service that clears the five-step ladder on the first pass. A clean tunnel is non-negotiable.
VPN buying checklist
Use this eight-point list before committing to an annual plan:
| # | Must-have trait | Why it matters |
|---|---|---|
| 1 | Risk-free entry — free tier, seven-day trial, or at least thirty-day refund | Lets you run the fifteen-minute protocol without sunk costs |
| 2 | System-level kill switch on Windows, macOS, Linux, Android, and iOS | Blocks traffic in the firewall, not just in-app toggles |
| 3 | Clear IPv6 stance — full dual stack or documented block | Vague answers predict future leaks |
| 4 | Published DNS policy (resolver ASN, DNSSEC, Secure DNS interaction) | Prevents false positives and hidden third-party routing |
| 5 | Granular split tunneling on all desktop and mobile apps | Needed to avoid accidental bypass or to sandbox risky apps |
| 6 | Active changelog, security fixes less than sixty days apart on average | Silent repos often mask stalled development |
| 7 | CLI, Docker, or router docs if you work in terminals or containers | Ensures the tunnel can extend to non-GUI environments |
| 8 | Responsive technical support — send a DNSSEC or TunnelCrack question and time the reply | Real expertise shows up in pre-sales answers, not slogans |
Verify every line before your refund window closes; a provider that fails even one row today will likely disappoint next quarter.
FAQ
1. How can I tell if my VPN is leaking?
Run the five-minute quick test (see “Quick answer” section). If any baseline IP, IPv6, or DNS resolver reappears while the VPN is on, you’ve found a leak. For certainty, finish the full five-step ladder and record a sixty-second packet capture during a forced disconnect.
2. What’s the most accurate leak test?
External packet capture on the physical adapter. It confirms whether any packet escapes during crashes, reboots, or network hops—scenarios browser pages cannot see.
3. Can a VPN pass an IP test but still leak DNS?
Yes. Routing and name resolution follow different paths. Pair an IP checker with a DNS-focused tool such as dnscheck.tools.
4. Does WebRTC always show my real IP?
No. Seeing the VPN’s public IP is normal. Only your residential IP (or ISP ASN) in the srflx or relay lines indicates a leak.
5. Why do I see Google DNS even when the VPN is active?
Browsers often default to Google DoH. Disable Secure DNS or set it to “With current service,” then retest before declaring a leak.
6. How do I test a VPN kill switch?
Generate continuous traffic (ping, a small HTTP stream), start a packet capture, then crash the VPN app, pull the cable, or reboot. A real kill switch blocks all outbound packets until the tunnel re-establishes.
7. The browser looks fine—can other apps still leak?
Absolutely. Torrent clients, game launchers, and containers open their own sockets. Use IPLeak’s torrent magnet or packet capture to verify non-browser traffic.
8. How do I test on Linux?
Combine browser tools with resolvectl or dig for DNS, ip route for routing, and tcpdump on the physical adapter. Network namespaces can force apps to fail closed when the tunnel drops.
9. What about Docker containers?
Run the app container in the same namespace as a Gluetun (or similar) VPN container. Break only the VPN container; the app should lose connectivity until the tunnel returns.
10. Is disabling IPv6 or WebRTC an acceptable fix?
Only after confirming your provider’s policy. If the VPN supports dual stack, keep IPv6 enabled. Disabling features can mask deeper problems or break services like video calls.
Conclusion
Still leaking after every step? Switch to a service that clears the five-step ladder on the first pass. A clean tunnel is non-negotiable.