On this page
Use CyberVPN through the CyberVPN app, or download a separate configuration for the official WireGuard client. Both routes use your CyberVPN account. This guide explains where to start, how to connect, and how to keep each device’s setup separate.
iPhone availability, November 17, 2026: the CyberVPN iPhone app shown in the video is a release preview submitted to Apple and awaiting review. It is not yet a public App Store download. iPhone and iPad users can use the WireGuard setup below in the meantime. The CyberVPN Android app is available on Google Play.
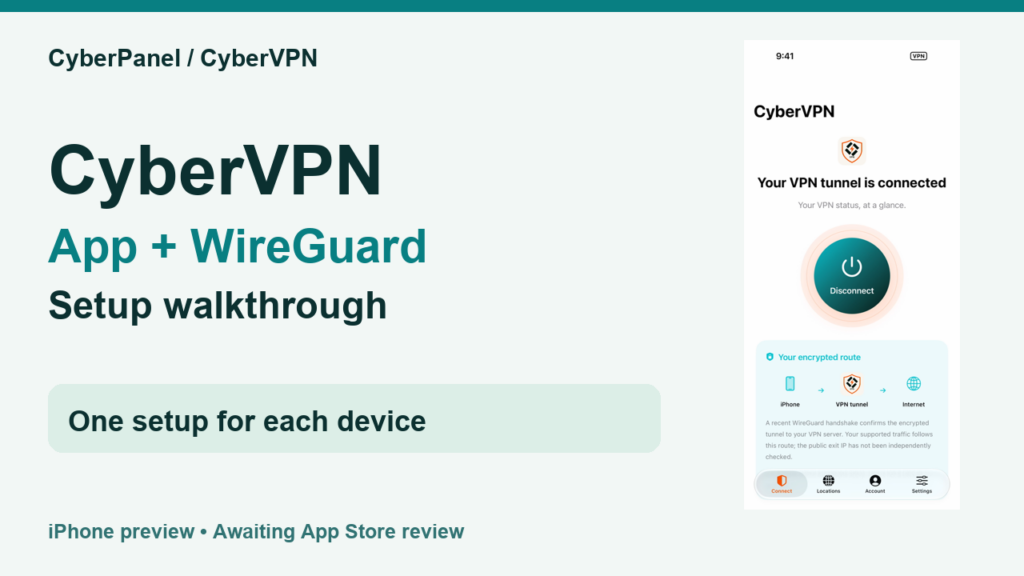
Watch the CyberVPN app preview
This recording shows the actual CyberVPN app on a physical iPhone. The account is already signed in. Connection time varies with the network and server; wait for the app to confirm the tunnel before using it.
1. Open your CyberVPN account
- Open the CyberVPN account page and sign in to your CyberPersons account, or complete the account registration shown there.
- Open your VPN dashboard. Review your current plan, connection limit and available server locations.
- Choose your connection method: the CyberVPN app, or Devices & WireGuard setup.
Use the same CyberVPN account when signing in to the app. Having an account and having an active VPN tunnel are separate: opening the dashboard or app does not by itself route your traffic through CyberVPN.
2. Connect with the CyberVPN app
- Install CyberVPN from the official store link for your platform. Android users can use the Google Play link above. The iPhone preview will require Apple’s approval before public release.
- Sign in to your CyberVPN account.
- Choose an available server in the app. In the iPhone preview, this is under Locations. The current choices are also shown in your dashboard.
- Open the connection screen and tap the connection button. Review and confirm the connection prompt. On first use, your operating system may ask permission to add a VPN configuration.
- Wait for the connected state. In the iPhone preview, the message is Your VPN tunnel is connected.
- Open a website to check that traffic works. When finished, return to CyberVPN and tap Disconnect.
The preview recording includes a real connection. In our accompanying physical-iPhone test, fresh HTTPS requests used the selected Los Angeles VPN exit, reopening the app retained that exit, and disconnecting restored the original network. This check is separate from the app’s displayed tunnel status.
3. Create a WireGuard setup for one device
WireGuard is useful when you prefer its client, need a desktop configuration, or want to connect an iPhone while the CyberVPN app awaits App Store approval.
- Install the official client using WireGuard’s installation page. It links to the supported platforms and their official downloads.
- In CyberVPN, open Devices & WireGuard setup.
- Enter a device name you will recognize, such as My iPhone or Work laptop.
- Choose an available server location, then select Create WireGuard setup.
- Open that device’s setup page and download its
.conffile.
Create a separate setup for every device. Reusing one configuration on several devices can make those devices compete for the same connection. The file and its QR code contain private connection credentials: keep them private and do not include them in screenshots or public posts.
Import on iPhone or iPad
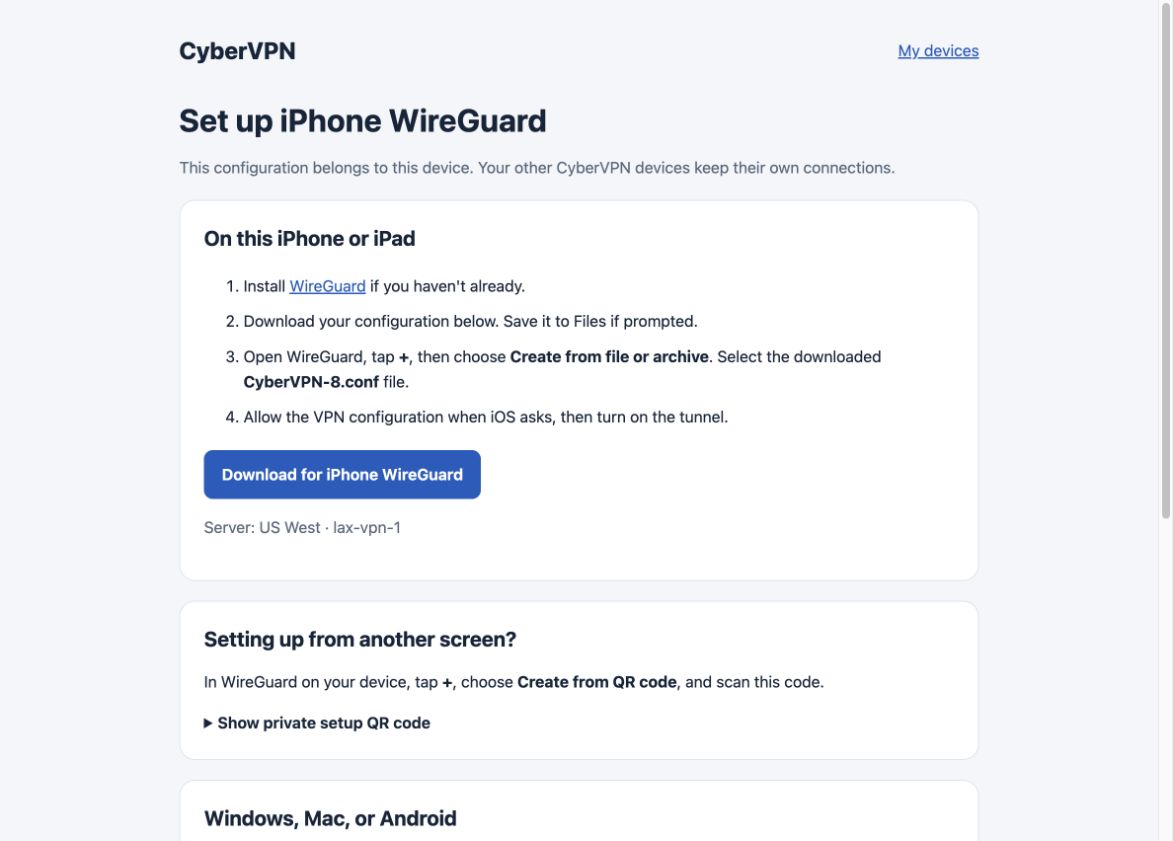
- Download the configuration on that iPhone or iPad and save it to Files if prompted.
- Open WireGuard, tap +, and choose Create from file or archive.
- Select the downloaded CyberVPN
.conffile. - Allow the VPN configuration when iOS asks, then turn on the tunnel.
- Open a website to confirm traffic works. Turn the tunnel off in WireGuard when finished.
If you are viewing the setup page on another screen, you can instead reveal the private QR code and choose Create from QR code in WireGuard on the intended device. Keep the code out of recordings and shared screenshots.
Import on Android, Windows or Mac
Download that device’s configuration, open the official WireGuard client and use its import-from-file option. Select the .conf file, approve the operating system’s VPN prompt if requested, then activate the tunnel. Button labels can differ by platform. Use WireGuard’s official installation page above to find the correct client.
4. Manage devices and change servers
With independent devices enabled, CyberVPN app connections and separately registered WireGuard devices can stay connected independently within your plan’s limit. Plus supports up to five devices and Unlimited supports up to ten. Check your own dashboard for the effective connection limit; older shared configurations can still have a one-connection limit until the account uses independent devices.
Monthly bandwidth is shared across the account. Devices connected to the same server share the plan’s speed limit. Adding devices does not multiply that speed allowance.
To change a WireGuard device’s server, open its setup page, choose the new server and select Prepare configuration. Download and import the updated file on that same device. To retire a device, use its removal control on the device-management page; do not remove a device you still use.
If the VPN connects but websites do not load
- Turn the tunnel off and check whether the normal Wi-Fi or cellular connection works.
- Make sure only the VPN connection you intend to use is active.
- Check the server’s availability in your CyberVPN dashboard.
- Confirm that the imported file belongs to this device and is the latest file for its chosen server.
- Reconnect and test a website again. If it still fails, contact support from your CyberPersons account with the device type, server and error message. Do not send your private key or configuration file in a public post.
Open your CyberVPN dashboard or manage your WireGuard devices.