
How to Use WordPress Manager in CyberPanel
WordPress Manager provides one place to open WordPress Admin, manage plugins and themes, create staging sites and backups, review the database, and control common WordPress settings.
If WordPress has not been installed yet, start with How to Deploy WordPress in CyberPanel.
Step 1: Open a WordPress site
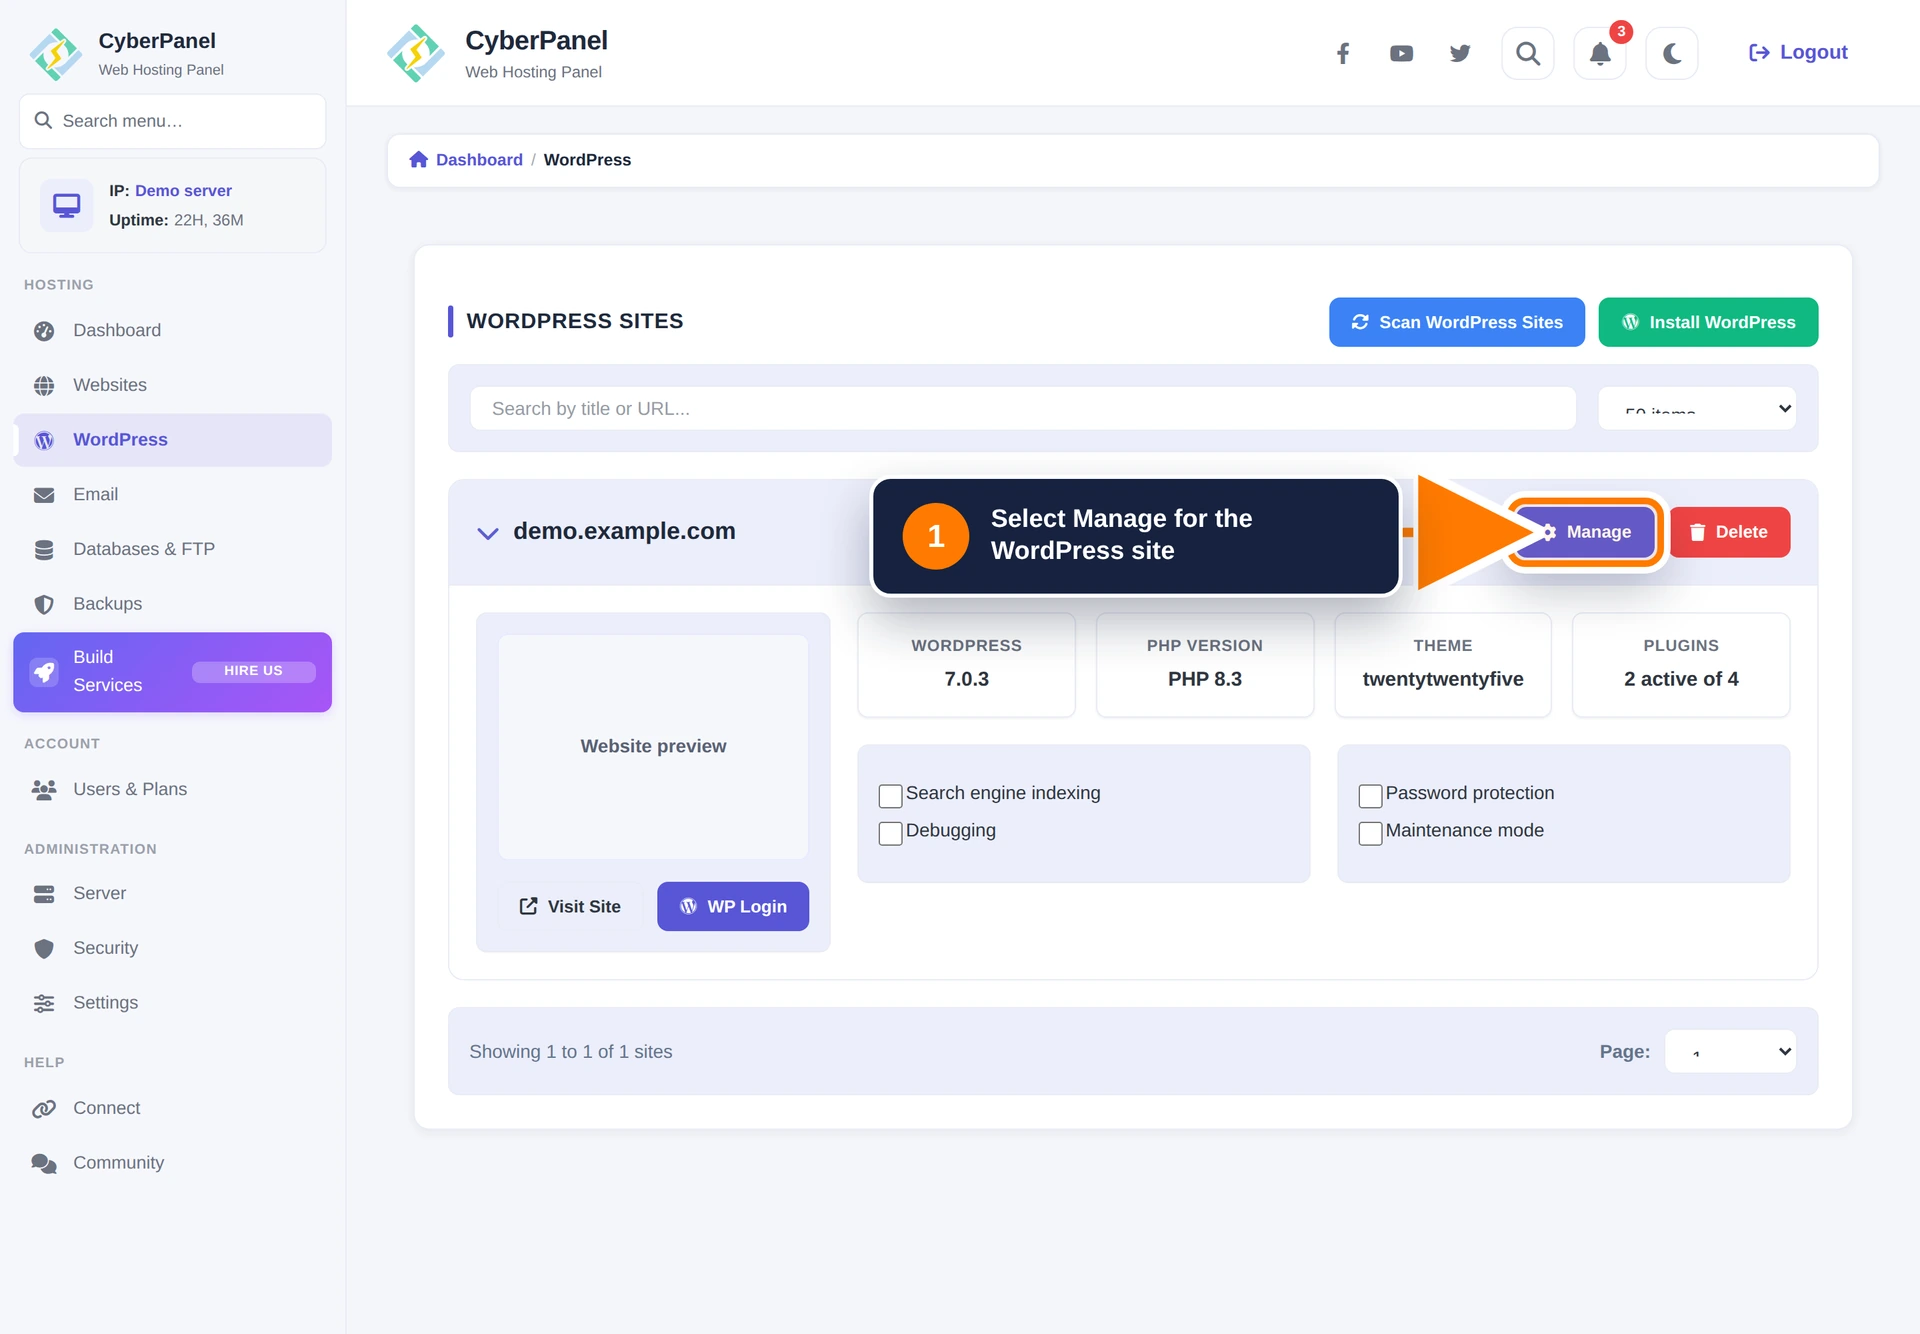
Select WordPress in the CyberPanel sidebar. Find the site and select Manage. If an existing installation is missing, select Scan WordPress Sites. Use Install WordPress to launch the deployment workflow for a new site.
The expanded site card shows the WordPress and PHP versions, active theme, plugin count, indexing, debugging, password-protection, and maintenance-mode state. WP Login opens WordPress Admin through CyberPanel.
Step 2: Review the General overview
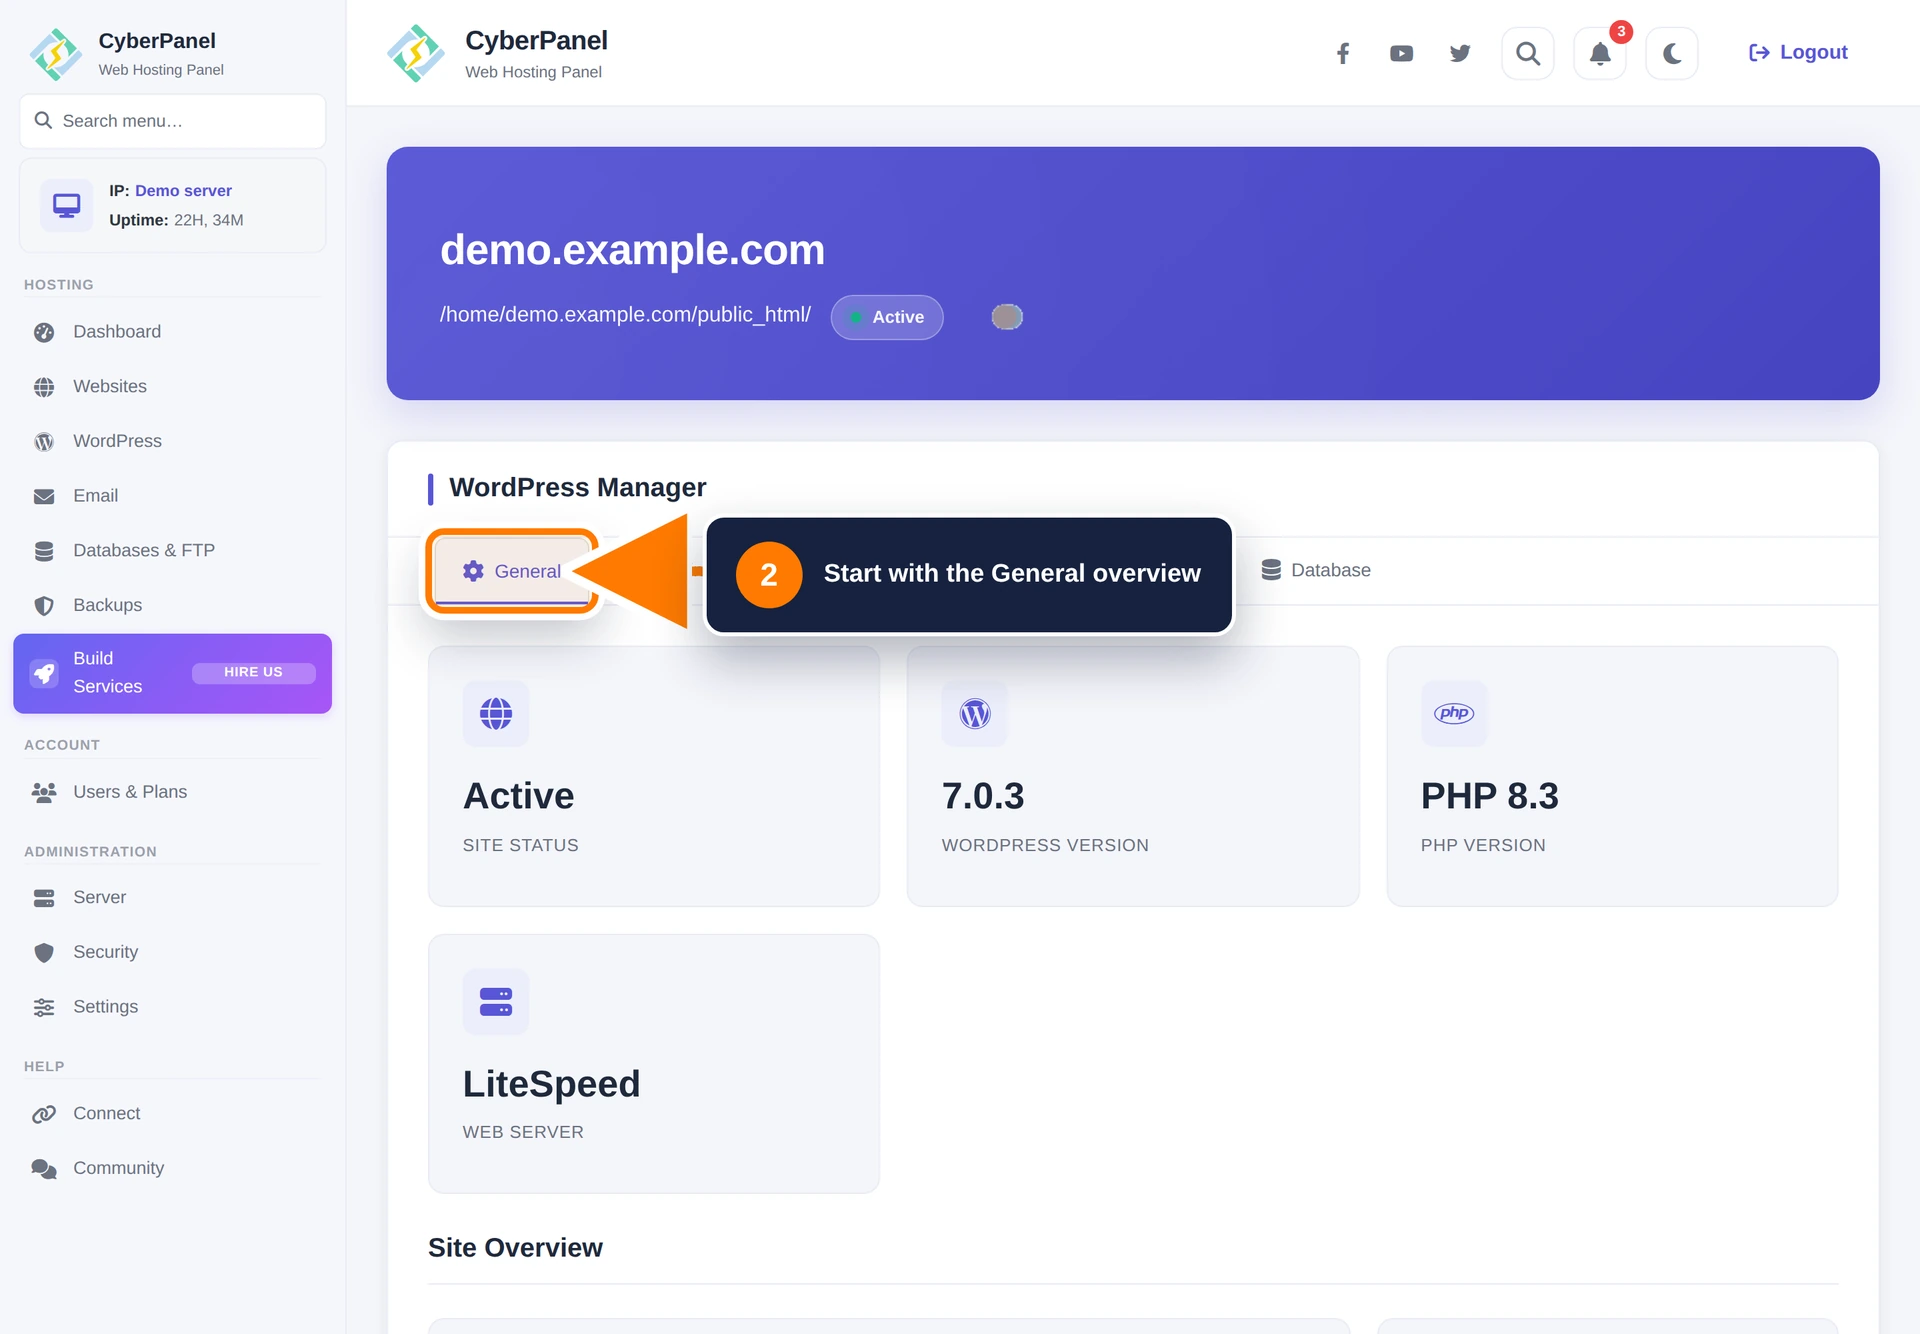
The General tab shows site status, WordPress version, PHP version, and web server. Use these values first when diagnosing compatibility or update problems.
Step 3: Use Quick Actions
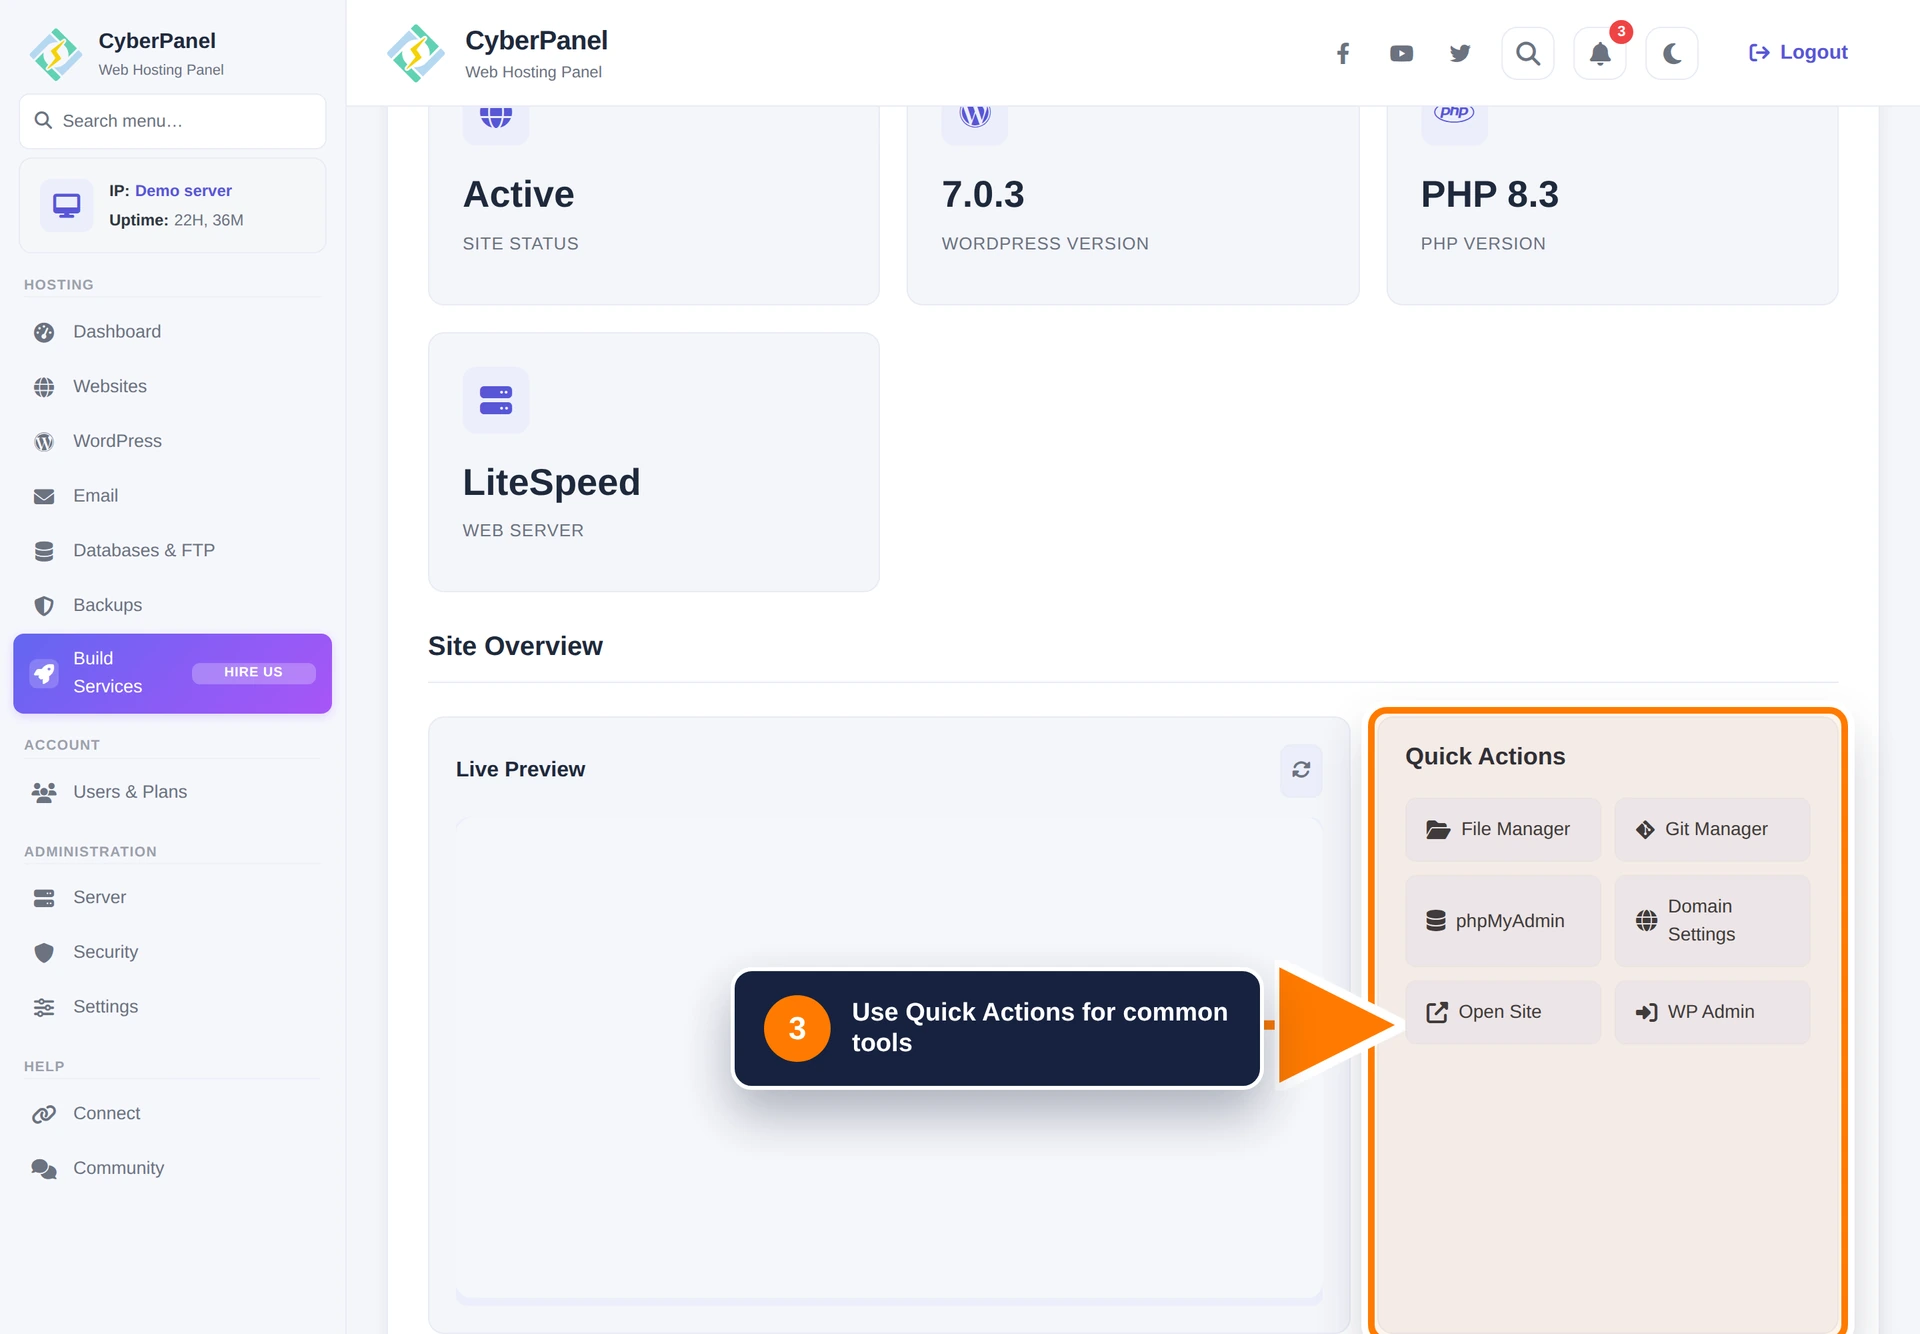
The General tab provides direct access to:
- File Manager: open the WordPress document root.
- Git Manager: manage source-control deployment for the domain.
- phpMyAdmin: inspect, export, or repair the database.
- Domain Settings: open the website’s detailed settings.
- Open Site: visit the public site.
- WP Admin: sign in to the WordPress dashboard.
For the domain-level workspace behind these tools, see How to Use Website Home in CyberPanel.
Step 4: Configure WordPress site settings
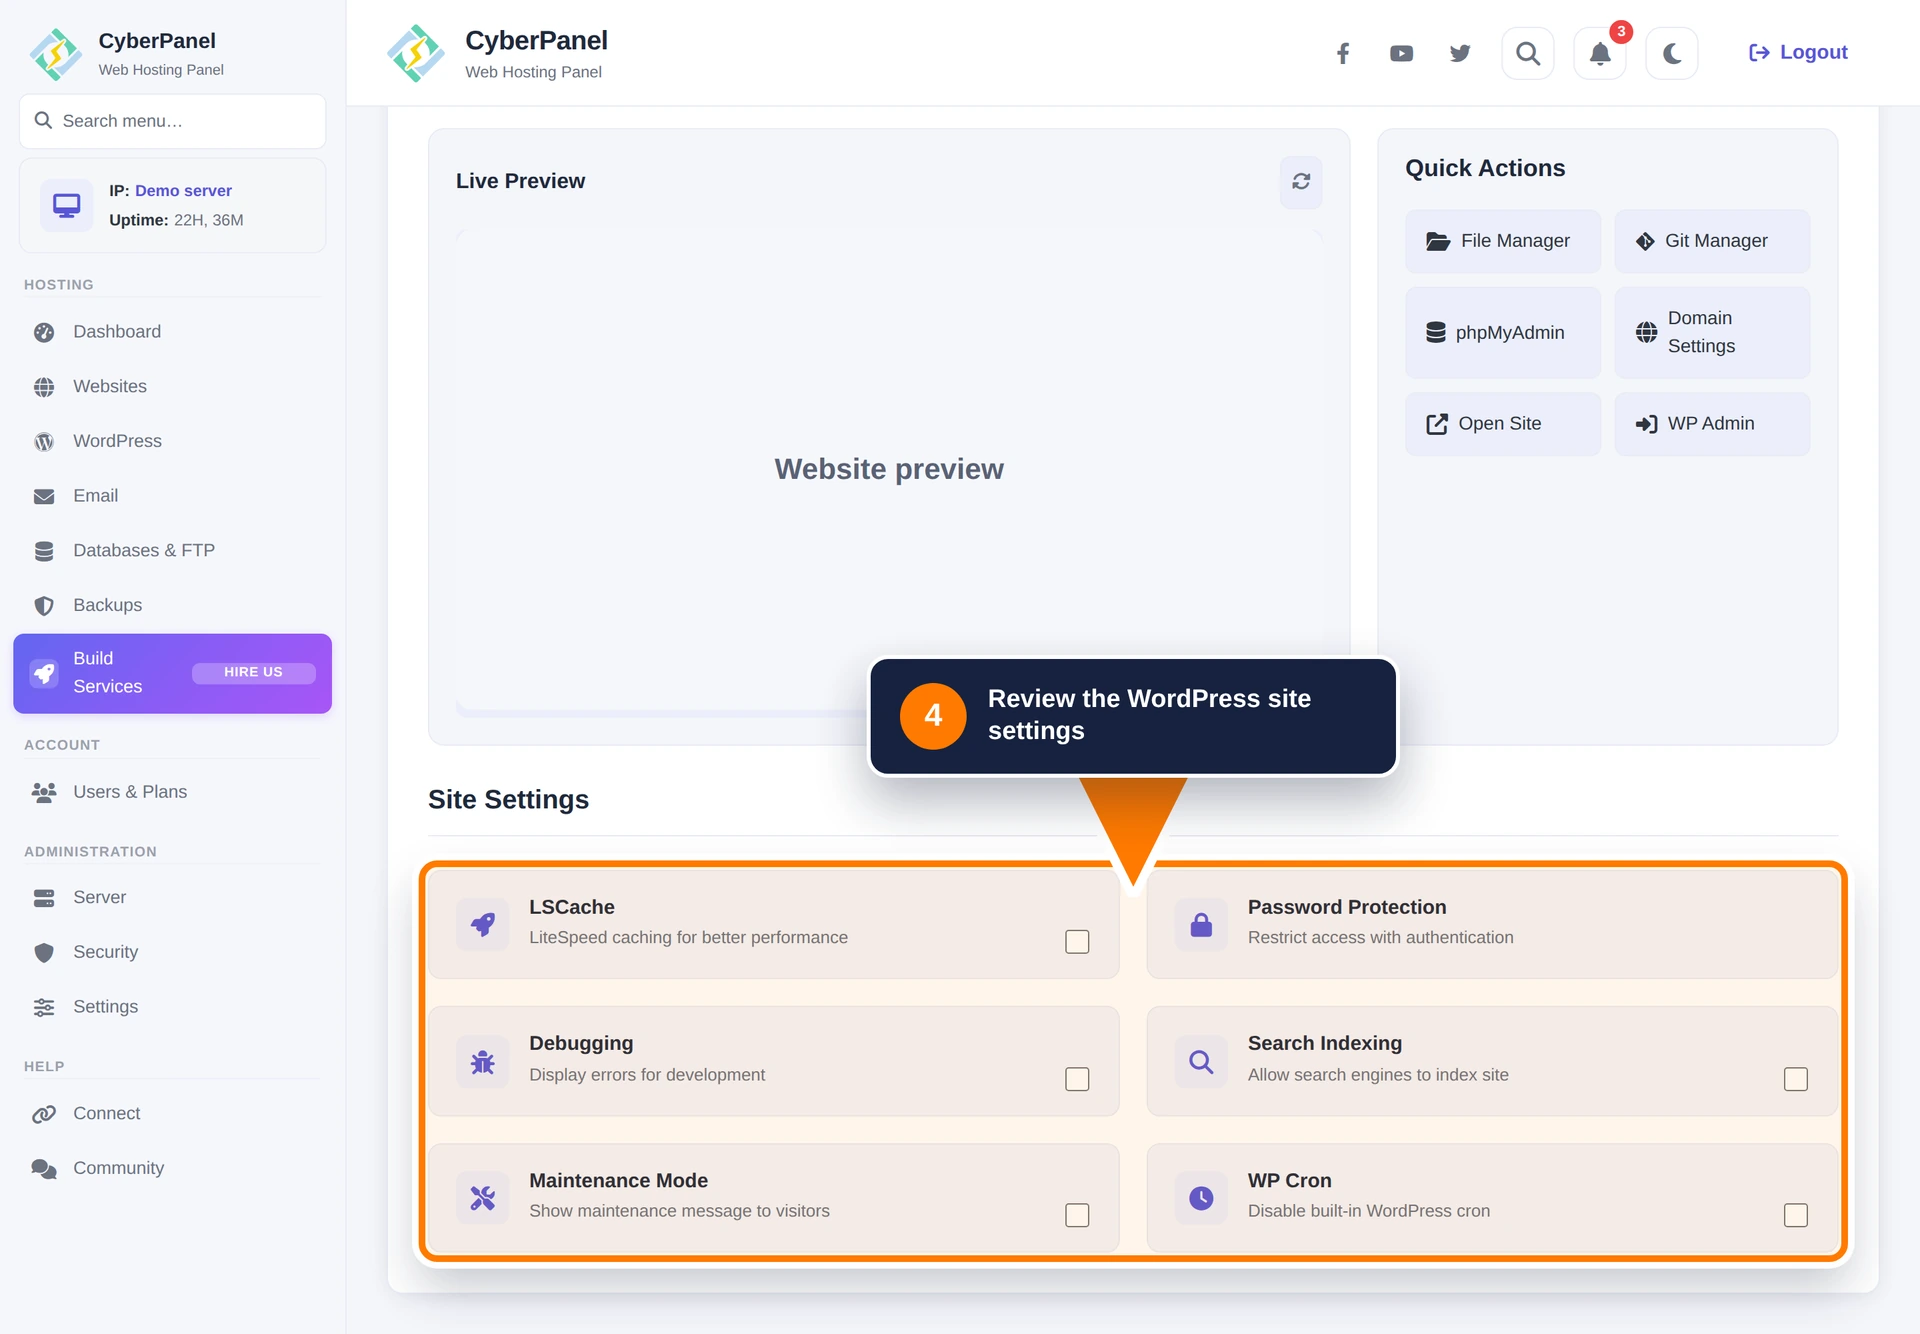
Review each switch before changing it:
- LSCache: controls LiteSpeed caching for compatible WordPress installations.
- Password Protection: restricts public access with authentication.
- Debugging: displays development errors. Enable it only while diagnosing a problem and turn it off afterward.
- Search Indexing: controls whether search engines may index the site. Keep staging and private sites out of search results.
- Maintenance Mode: shows a maintenance response while work is in progress.
- WP Cron: disables WordPress’s built-in cron when selected. Use it only when a working system cron replaces WordPress cron.
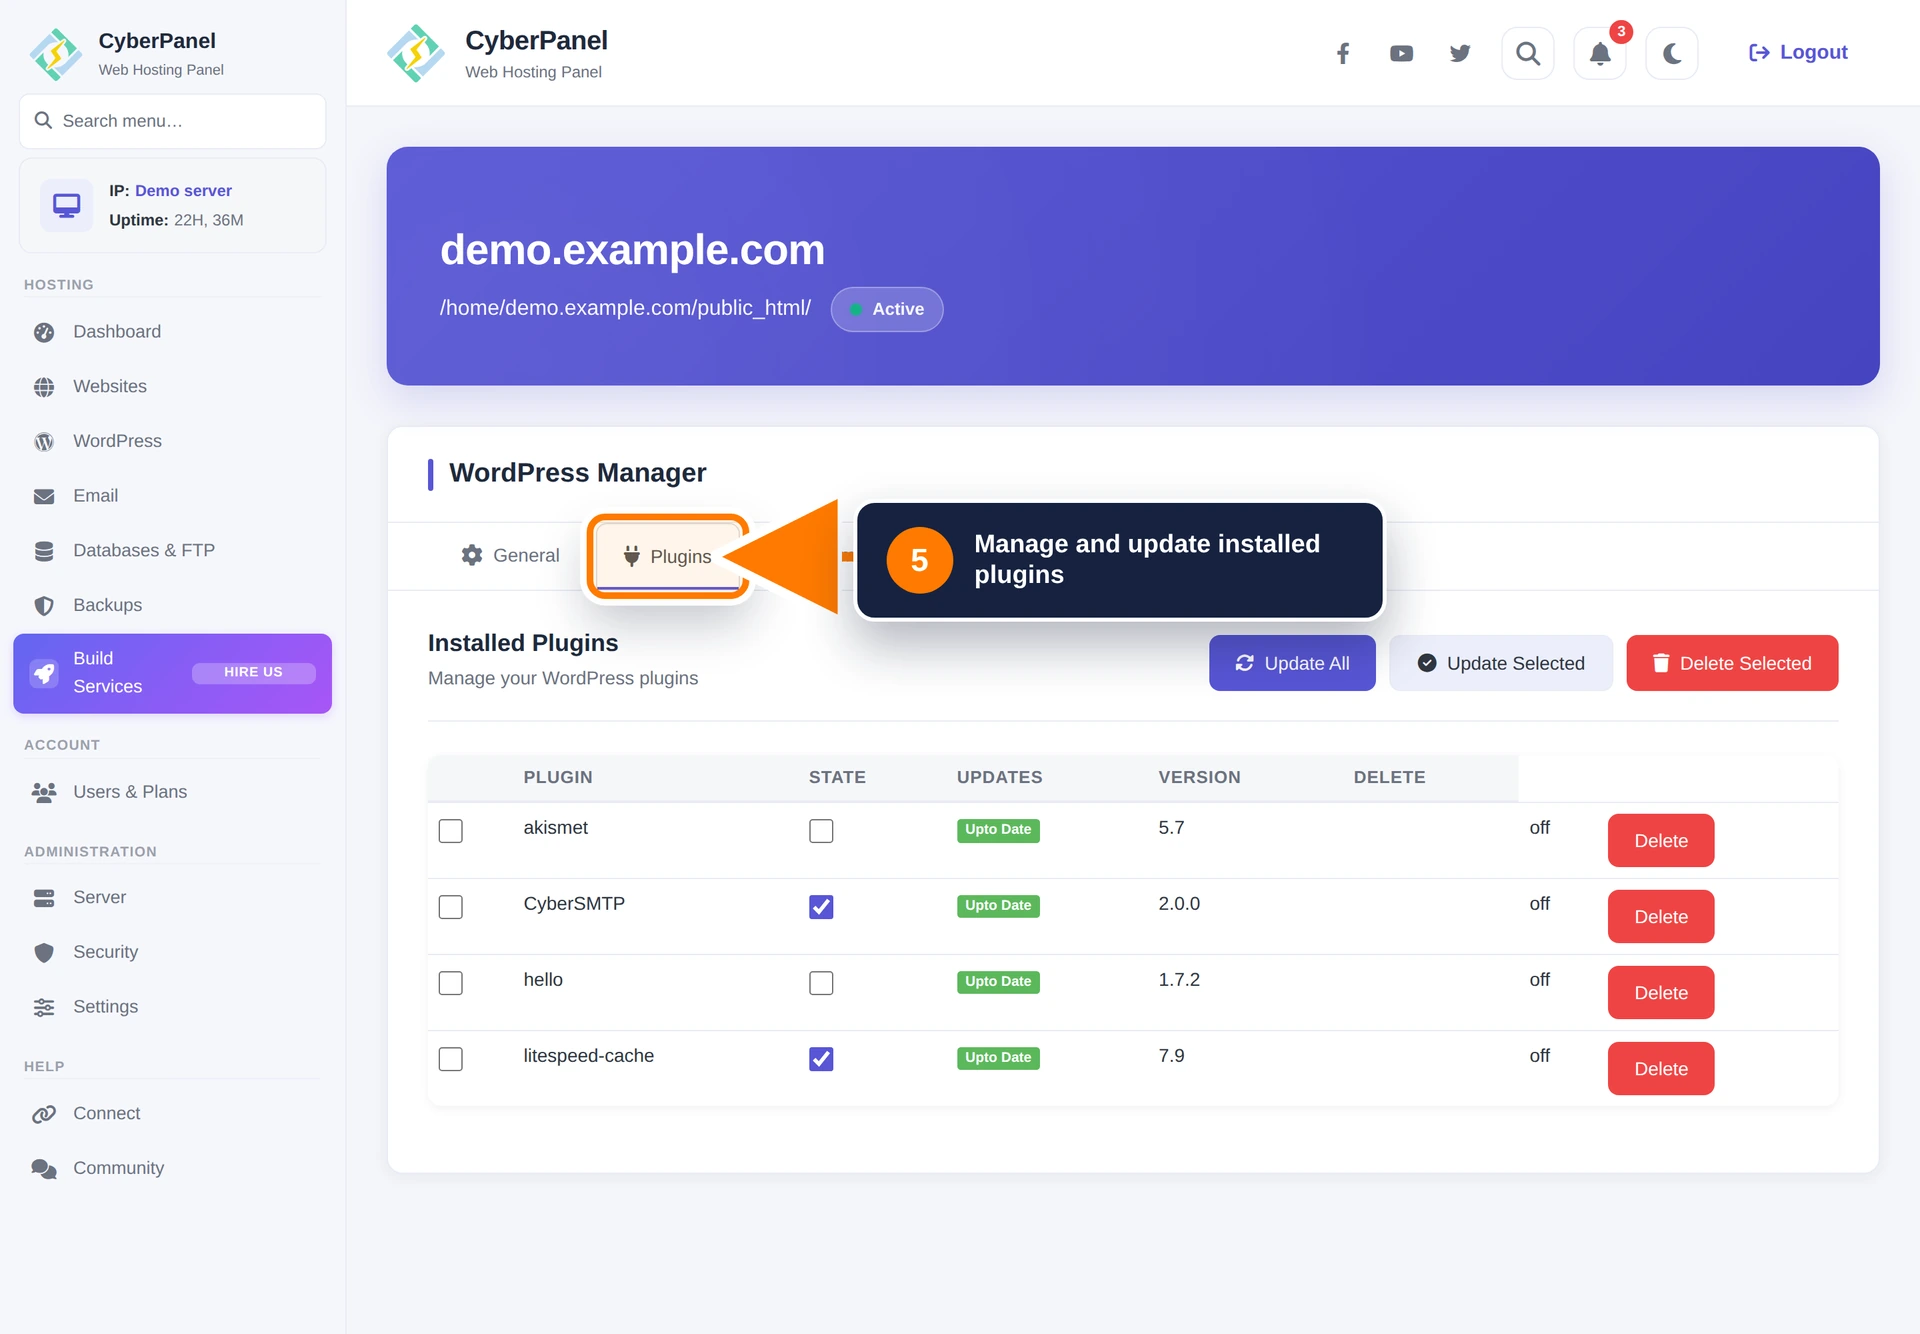
Step 5: Manage plugins
Open Plugins to review installed plugins, activation state, update state, and version. Select individual plugins before using Update Selected or Delete Selected. Update All processes every plugin shown by the Manager.
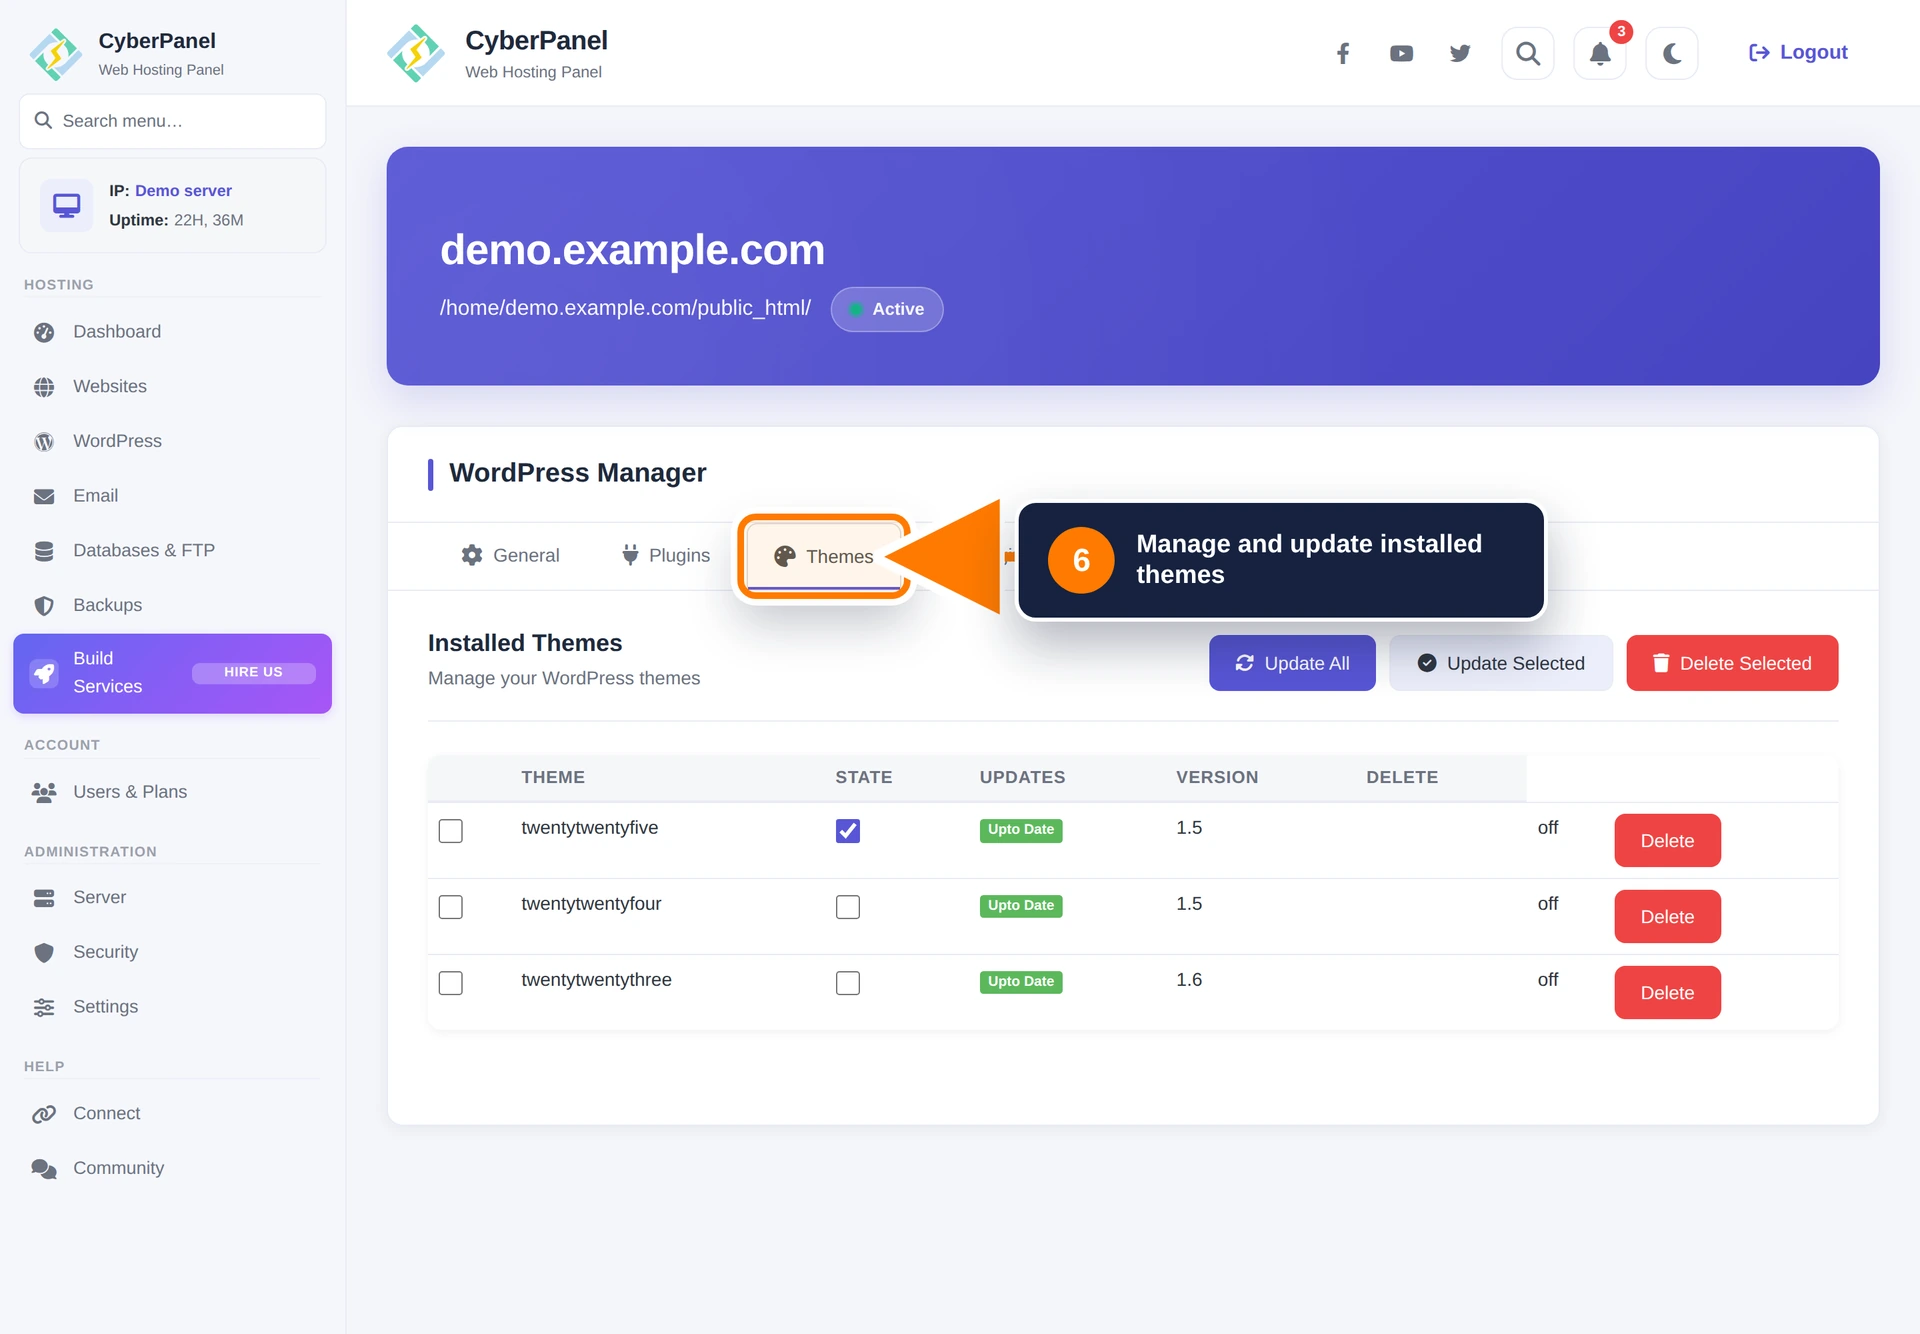
Step 6: Manage themes
Open Themes to review the active theme, available updates, versions, and installed inactive themes. Use selected or bulk updates only after taking a backup. Do not delete the active theme, and keep a standard fallback theme when possible.
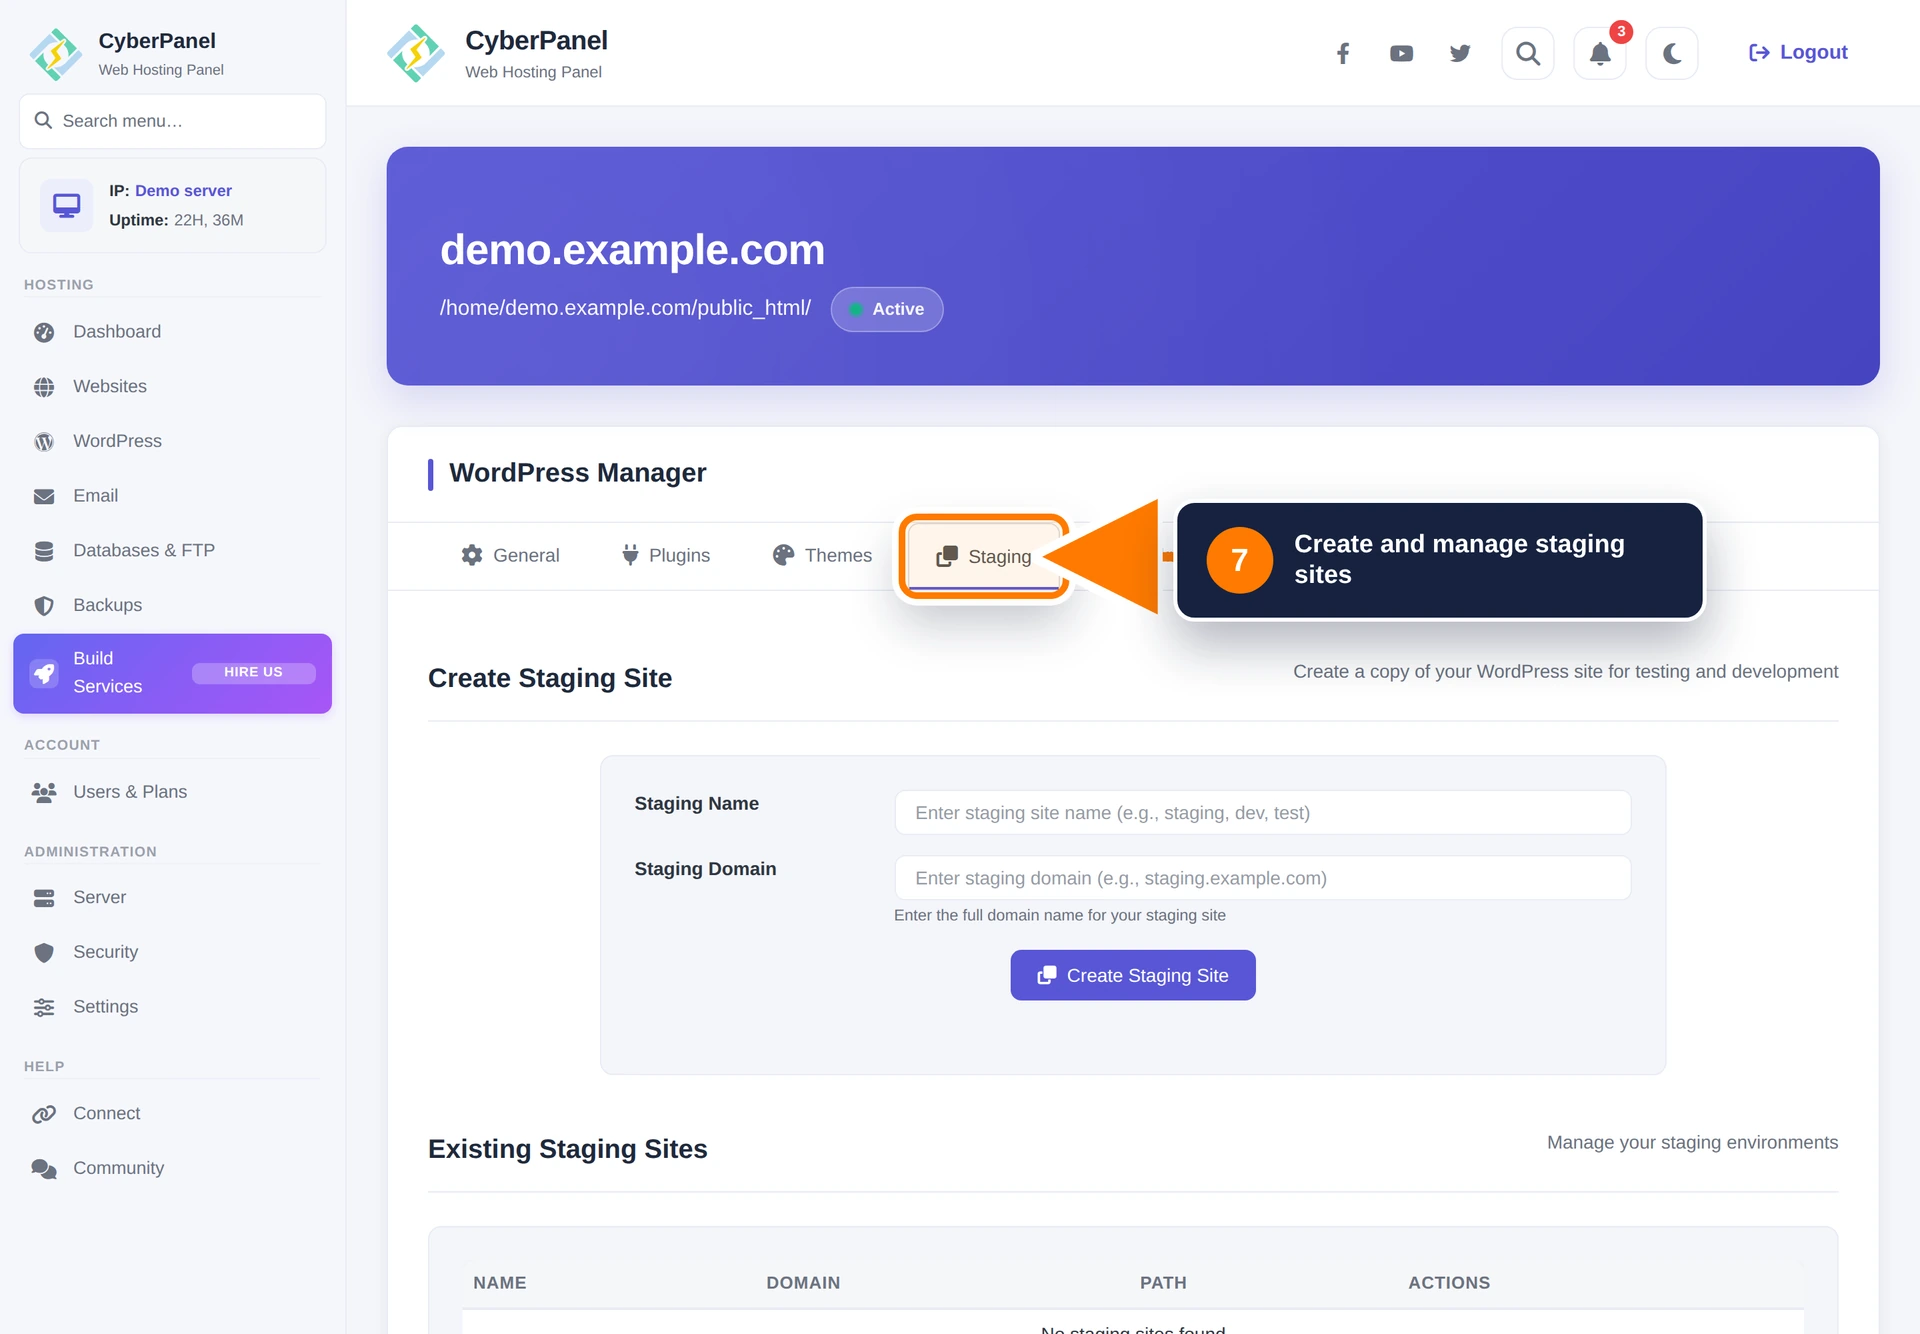
Step 7: Create a staging site
Open Staging, enter a short staging name and the full staging domain, then select Create Staging Site. Point the staging domain to this server before using it. Protect staging from public indexing and test updates there before applying them to production.
Existing staging environments appear in the lower table, where their domain, path, and available actions can be reviewed.
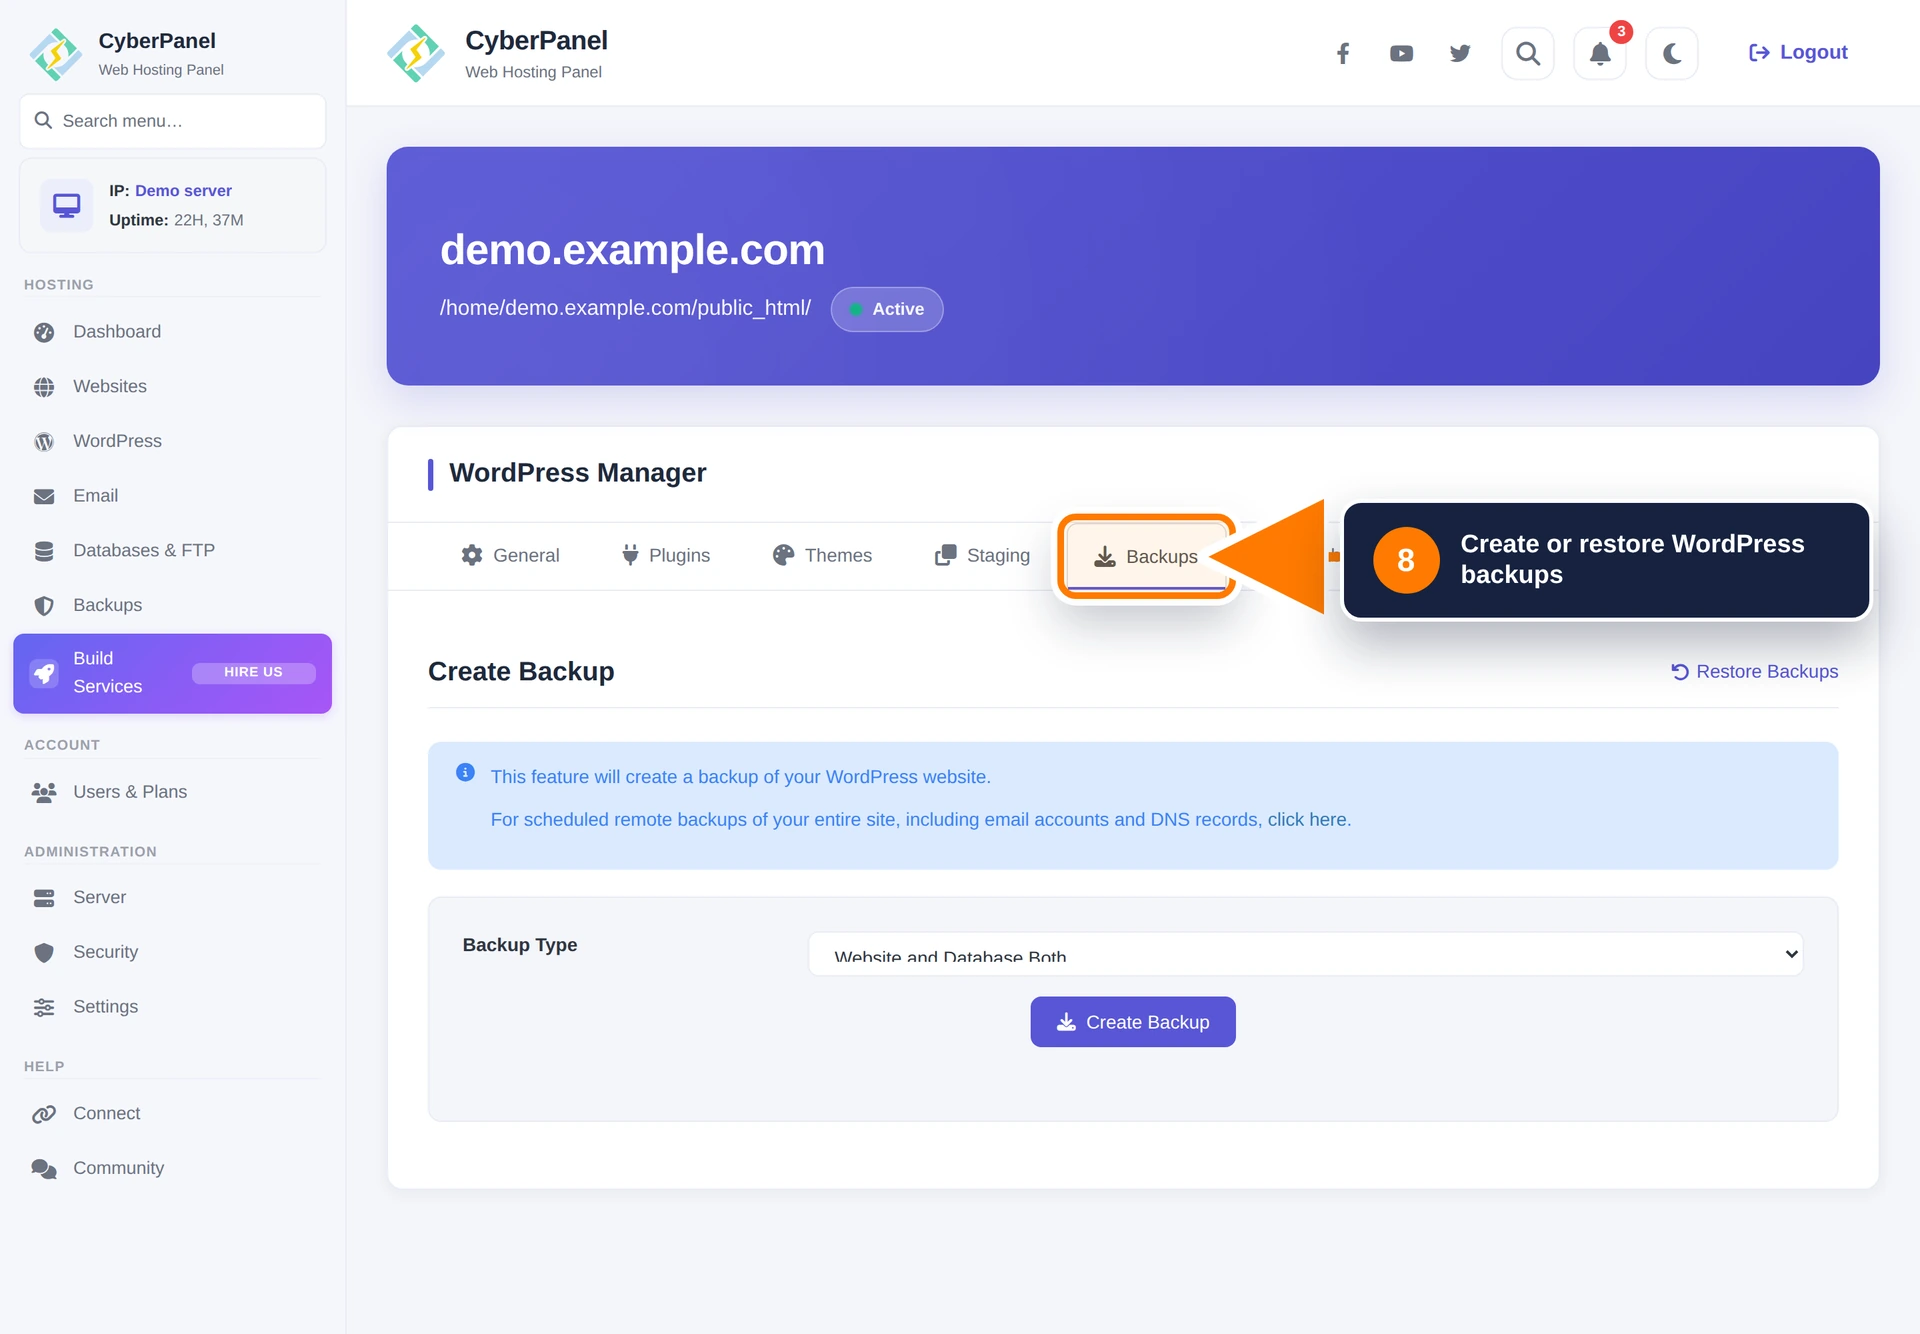
Step 8: Create or restore a WordPress backup
Open Backups and choose one of these backup types:
- Website and Database Both: the complete WordPress application.
- Only Website Data: files without the database.
- Only Database: database content without website files.
Select Create Backup and wait for completion. Use Restore Backups to find WordPress Manager backups. For scheduled, off-server, email, and DNS protection, use the full CyberPanel Backup and Restore guide.
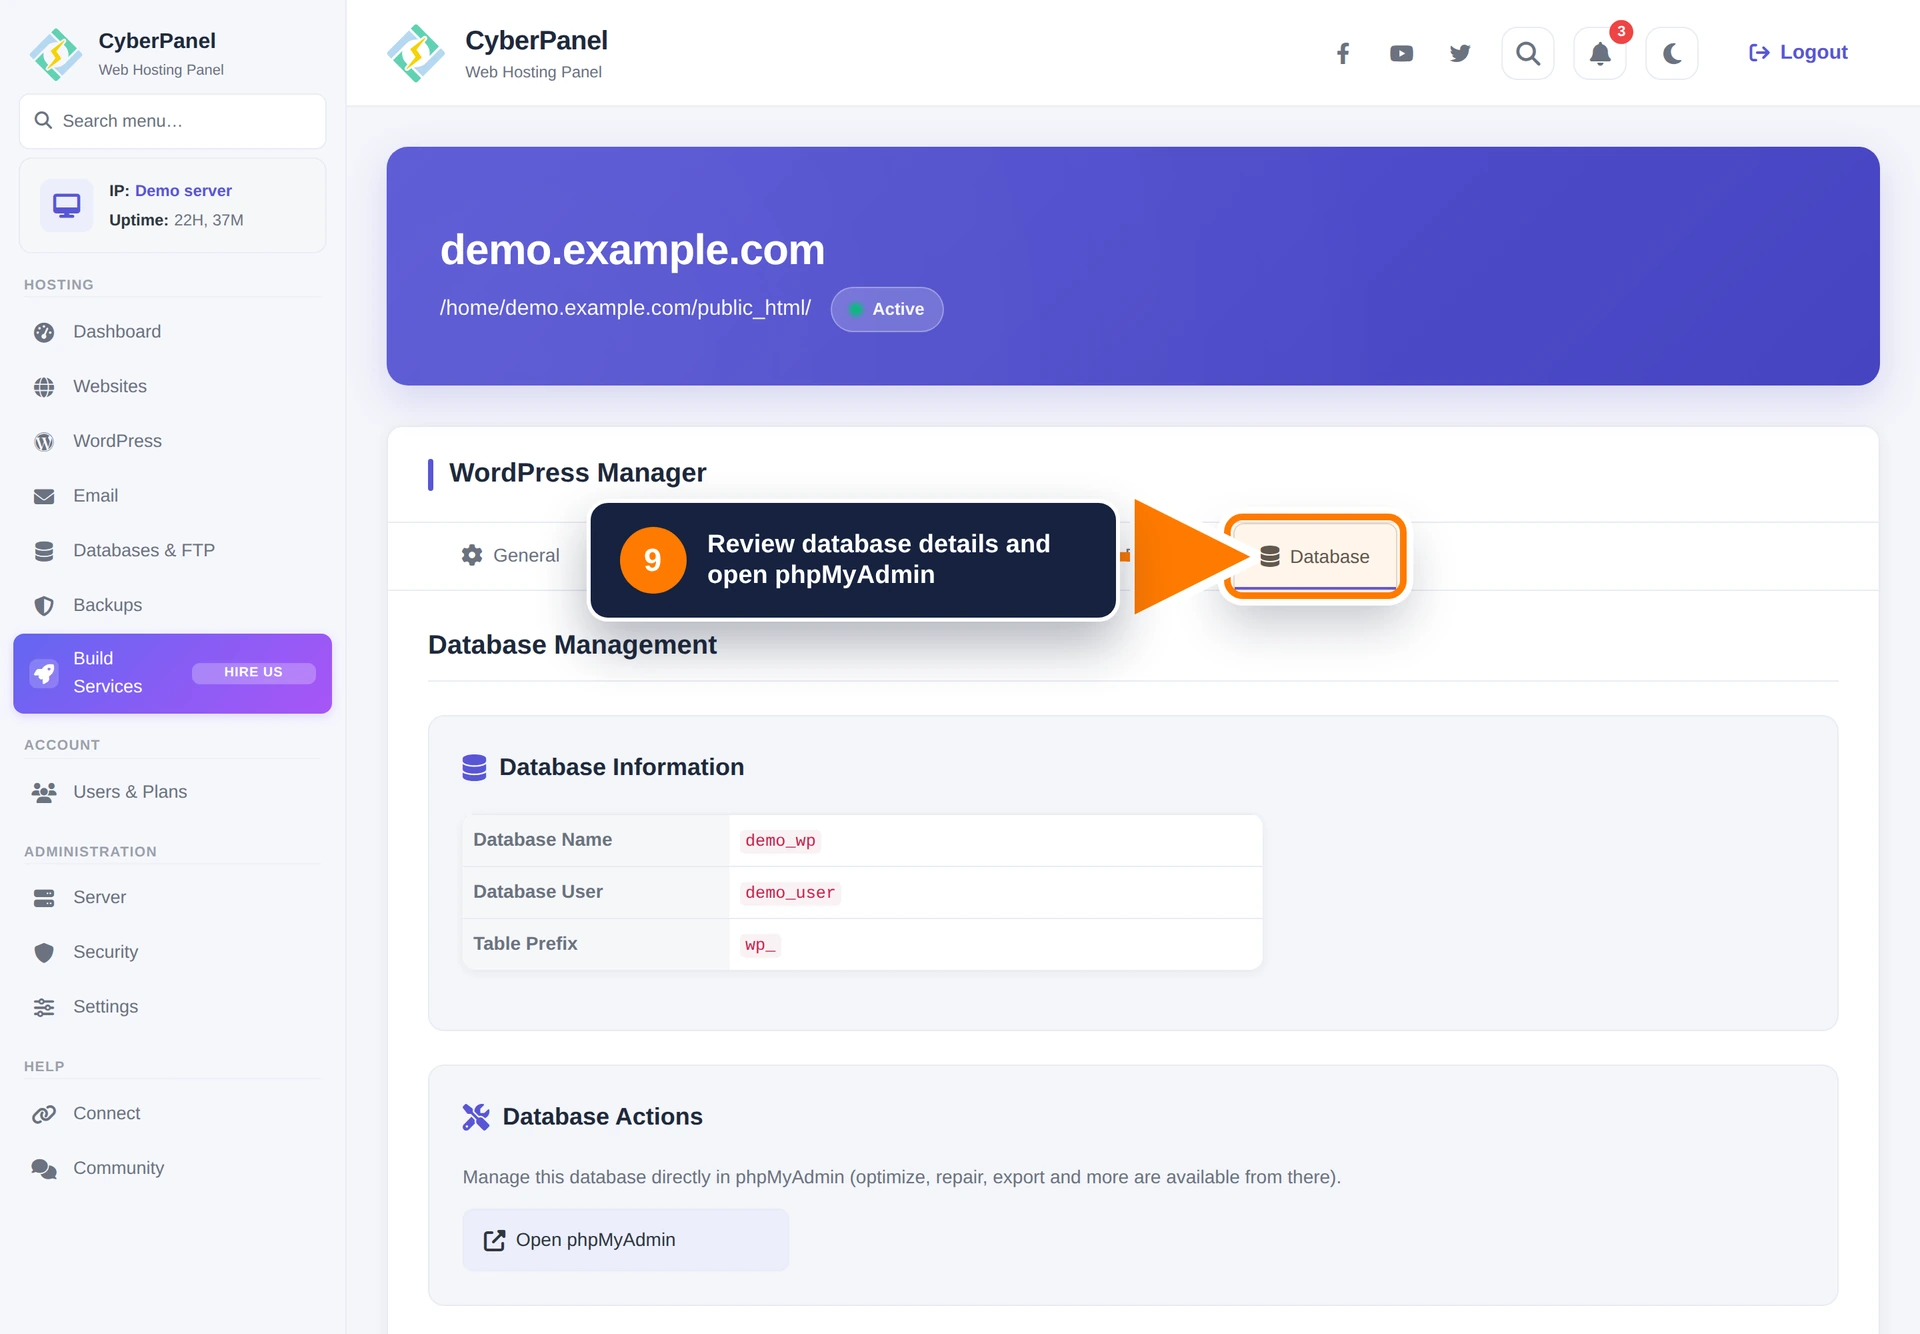
Step 9: Review the WordPress database
Open Database to see the database name, database user, and WordPress table prefix. Select Open phpMyAdmin for export, optimization, repair, or direct database work.
For creating separate databases and users, see Database Management in CyberPanel.
Recommended operating order
- Take a current backup.
- Create or refresh a staging site for significant changes.
- Apply and test updates on staging.
- Update production during a maintenance window.
- Test the public site, WordPress Admin, forms, checkout, mail, and scheduled tasks.
- Keep debugging and maintenance controls disabled after the work is complete.