On this page
LSCache for WordPress is a powerful caching solution that stores ready-to-serve versions of WordPress pages so your server does not have to generate the same page for every visitor. It can reduce PHP and database work, improve page load times, and help a WordPress site handle more traffic.
But installing the LiteSpeed Cache plugin is only the first step. To get the most from LScache WordPress, you need the right server setup, cache settings, exclusions, and optimization options.
This guide explains what LSCache is, how it works, how to configure it, and which settings you should change or leave alone.
What Is LSCache for WordPress?
LSCache is a full-page caching system developed by LiteSpeed. Unlike many traditional WordPress caching plugins that rely heavily on PHP to create and serve cached pages, LSCache can cache pages at the web server level.
For WordPress, the LiteSpeed Cache plugin connects WordPress with the LiteSpeed caching system. It provides controls for page caching, cache purging, browser caching, object caching, image optimization, CSS and JavaScript optimization, lazy loading, and other performance features.
The important distinction is that LSCache is not just a WordPress optimization plugin. Its main purpose is full-page caching. The other optimization tools are additional features.
LiteSpeed’s own beginner documentation recommends starting with the basic cache settings instead of changing every available option at once.
How Does LSCache Work With WordPress?
A normal WordPress request can involve several steps.
- A visitor requests a page.
- The web server sends the request to WordPress.
- PHP processes WordPress code.
- WordPress queries the database.
- The page is generated.
- The finished HTML is sent to the visitor.
This process happens repeatedly when the page is not cached.
With LSCache, a cacheable page can be stored after it is generated. When another visitor requests the same page, the cached version can be served without rebuilding the page through PHP and the database.
This reduces server processing and can make repeated page requests much faster.
LSCache vs Traditional WordPress Cache
| Feature | Traditional Page Cache | LSCache |
|---|---|---|
| Full-page caching | Yes | Yes |
| Server-level integration | Usually limited | Yes |
| WordPress plugin | Often required | Required for WordPress controls |
| Cache varies by rules | Depends on plugin | Yes |
| Cache purge controls | Yes | Yes |
| Object cache support | Often available | Yes |
| Page optimization | Depends on plugin | Yes |
| Requires LiteSpeed server for full LSCache | No | Yes |
The LiteSpeed Cache plugin can still provide optimization features when the website does not run on a LiteSpeed server. However, the actual LiteSpeed server caching functionality requires a compatible LiteSpeed environment or an appropriate QUIC.cloud setup.
What Do You Need Before Configuring LSCache?
Before changing the plugin settings, check your hosting environment.
For full LSCache functionality, your website should use one of these setups:
- LiteSpeed Web Server
- OpenLiteSpeed
- LiteSpeed Web ADC
- A supported QUIC.cloud configuration
The server-side cache must be configured before the WordPress plugin can use it for page caching. If you are on shared hosting, the hosting provider normally handles this part.
Can You Use LSCache With CyberPanel?
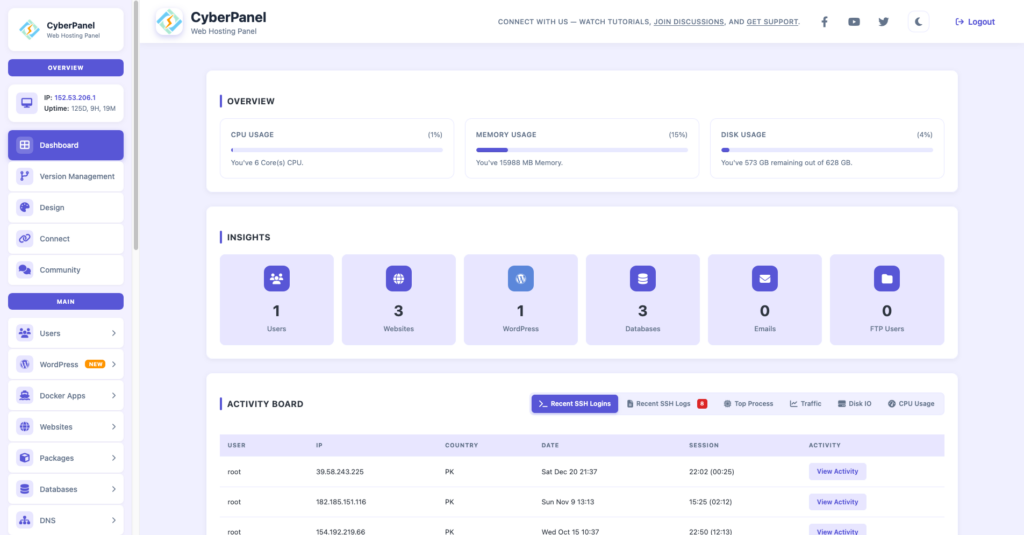
Yes. CyberPanel is a free and open-source web hosting control panel. It is a natural environment for LSCache because it integrates with OpenLiteSpeed. If your WordPress site is hosted on CyberPanel with a compatible LiteSpeed setup, you can install the LiteSpeed Cache plugin in WordPress and configure its caching features from the WordPress dashboard.
CyberPanel also provides WordPress management controls that include LSCache for compatible installations.
How to Install LSCache for WordPress
Installing the plugin is straightforward.
Step 1: Open WordPress Plugins
Log in to your WordPress dashboard and go to:
Plugins → Add New
Search for:
LiteSpeed Cache
Install the official LiteSpeed Cache plugin and activate it.
Step 2: Open LiteSpeed Cache Settings
After activation, open:
LiteSpeed Cache
The plugin provides several sections for cache and performance management.
Step 3: Enable Cache
Go to:
LiteSpeed Cache → Cache → Cache
Find:
Enable Cache
Set it to:
ON
This is the primary switch that enables the plugin’s page caching functionality. LiteSpeed documentation identifies this as the final plugin-level step for enabling caching.
How to Configure LSCache for WordPress
If you are wondering how to configure LScache WordPress, start with the cache settings before touching advanced optimization features.
A safe configuration process is:
- Confirm the server supports LSCache.
- Install the LiteSpeed Cache plugin.
- Enable page cache.
- Check cache TTL values.
- Configure exclusions where necessary.
- Enable object cache if your server provides Redis or Memcached.
- Configure browser cache.
- Test optimization features individually.
- Purge the cache after major changes.
- Verify that pages are actually being cached.
This approach makes troubleshooting much easier than enabling every performance option at the same time.
Which LSCache Settings Should You Change?
The Cache section contains several important options.
Enable Cache
Set this to:
ON
Without this option, the WordPress plugin will not perform its normal page caching function.
Cache Logged-in Users
This option controls whether pages for logged-in users can use private caching.
For a normal public website, you usually do not need to enable this unless your site has a specific reason to cache personalized pages.
Be careful with membership sites, dashboards, customer accounts, and other areas containing user-specific information.
Cache Commenters
This controls caching behavior for visitors who have submitted comments.
If your site has active comments, test this setting with your comment workflow before making changes.
Cache Login Page
The login page is normally not something you need to cache. The current LiteSpeed documentation lists this option as OFF by default.
Cache Mobile
Most modern WordPress themes are responsive, meaning the same page adapts to different screen sizes.
In that situation, you generally do not need a separate mobile cache.
You may need separate mobile caching when a website serves genuinely different content or uses a mobile-specific version of a page.
What Is Cache TTL in LSCache?
TTL means Time To Live.
It determines how long a cached page remains valid before it expires.
For example:
| TTL | Duration |
|---|---|
| 300 seconds | 5 minutes |
| 1800 seconds | 30 minutes |
| 3600 seconds | 1 hour |
| 86400 seconds | 1 day |
| 604800 seconds | 7 days |
LiteSpeed’s current default public cache TTL is 604800 seconds, or one week. The appropriate value depends on how frequently your content changes.
What TTL Should You Use?
For a blog or informational website that does not change every few minutes, a longer TTL can work well.
For example:
Static content: Longer TTL
Frequently updated content: Shorter TTL
Personalized content: Private cache or no cache
You should not reduce TTL simply because a smaller number sounds faster. A longer cache lifetime can reduce repeated page generation when the content does not change often.
How Do You Exclude Pages From LSCache?
Not every WordPress page should be publicly cached.
Common examples include:
- Cart pages
- Checkout pages
- Account pages
- Personalized dashboards
- Certain membership pages
- Dynamic API responses
- Pages containing user-specific information
LSCache provides options for excluding URLs, query strings, cookies, user agents, and other conditions from caching.
For example, WooCommerce sites require special care because shopping carts, checkout pages, and customer-specific content cannot be treated like ordinary public blog pages.
The Do Not Cache URIs option can be used to exclude specific URL patterns. LiteSpeed also provides cookie and user-agent exclusions for more advanced cases.
What Is Object Cache in LSCache?
Page caching and object caching are different.
Page cache stores generated pages.
Object cache stores frequently used data from WordPress and its database operations.
For example, a WordPress site may repeatedly request the same options, queries, or other database-related objects. A persistent object cache can reduce repeated database work.
LSCache supports object caching through systems such as:
- Redis
- Memcached
If your server provides Redis, it is commonly a good choice for WordPress object caching. If you want to understand how Redis works specifically with WordPress, see our guide to Redis Object Cache for WordPress on Linux VPS.
How to Enable Object Cache
Open:
LiteSpeed Cache → Cache → Object
Then configure the object cache according to the service available on your server.
Do not enable Redis or Memcached just because the option exists. The corresponding service must actually be installed and available on the server.
If the service is not running, the connection will fail.
LiteSpeed’s documentation also recommends persistent connections for object caching when properly configured.
How to Configure Browser Cache
Browser caching is another important part of WordPress performance because it allows visitors to reuse static files instead of downloading them on every request. Browser caching stores static files on the visitor’s device.
These can include:
- CSS files
- JavaScript files
- Images
- Fonts
- Other static assets
When the visitor returns, the browser may reuse those files instead of downloading them again.
LiteSpeed currently documents a one-year browser cache TTL of 31557600 seconds as a recommended value for static assets. However, cache headers should be configured carefully so they do not cause outdated content to remain in the browser.
Should You Enable Every Page Optimization Setting?
No.
This is one of the most common mistakes when configuring LSCache.
The plugin includes optimization features for:
- CSS
- JavaScript
- HTML
- Images
- Lazy loading
- CSS delivery
- JavaScript loading
- Media optimization
These features can improve performance, but they can also break layouts or interactive functionality if configured incorrectly.
A better approach is to enable one feature at a time and test the website after each change.
For example, if you enable JavaScript optimization and your menu, slider, checkout, or form stops working, you can identify the setting responsible.
If you enable ten optimization features simultaneously, finding the problem becomes much harder.
What Is the Best LSCache Configuration for a WordPress Blog?
For a typical content website, start with a simple configuration.
| Setting | Recommended Starting Point |
|---|---|
| Enable Cache | ON |
| Cache Logged-in Users | OFF unless required |
| Cache Mobile | OFF for responsive themes |
| Cache Login Page | OFF |
| Public Cache TTL | 604800 seconds |
| Private Cache TTL | 1800 seconds |
| Object Cache | ON if Redis/Memcached is available |
| Browser Cache | ON |
| Page Optimization | Test individually |
| Guest Mode | Test before using |
| Crawler | Enable only when properly configured |
These are starting points, not universal rules. WooCommerce, membership websites, multilingual websites, and highly dynamic applications can require different cache rules.
How to Purge LSCache
Sometimes you need to remove an existing cached version of a page.
This process is called purging the cache.
You may want to purge cache after:
- Updating a theme
- Changing CSS
- Changing JavaScript
- Publishing major site changes
- Changing important WordPress settings
- Installing or removing certain plugins
- Making design changes
LSCache can also automatically purge related cached content when WordPress content changes.
You should not manually purge the entire cache after every small edit unless there is a specific reason to do so.
How Do You Know if LSCache Is Working?
Installing the plugin does not automatically prove that your pages are being cached.
You should verify the cache.
LiteSpeed provides an LSCache Check Tool that can inspect a URL and report whether LiteSpeed caching is detected. It can also display relevant response headers.
You can also inspect the response headers in your browser’s developer tools.
Look for LiteSpeed-related cache headers such as:
<code>X-LiteSpeed-Cache</code>A cache hit and a cache miss can provide useful information during testing.
Why Is LSCache Not Working?
If LSCache is enabled but pages are not being cached, check these areas first.
1. The Server Is Not LiteSpeed
The WordPress plugin can provide optimization without a LiteSpeed server, but full LSCache page caching requires the appropriate server-side setup.
2. Server Cache Is Disabled
The cache engine must be enabled at the server or virtual-host level before the WordPress cache settings can work correctly.
3. The Page Is Excluded
Check your:
Do Not Cache URIs
Do Not Cache Cookies
Do Not Cache User Agents
and related exclusion settings.
4. The Page Is Personalized
Pages containing user-specific information may not be suitable for public caching.
5. Another Plugin Is Changing Cache Behavior
Security, membership, e-commerce, optimization, or dynamic-content plugins can affect caching.
6. You Are Testing While Logged In
A logged-in WordPress session can behave differently from a normal visitor request.
Test the page in a private browser window when troubleshooting public page cache behavior.
LSCache vs a WordPress Caching Plugin
You may wonder whether LSCache is necessary if another caching plugin is already installed.
The answer depends on your hosting environment.
If your server uses LiteSpeed, LSCache has direct integration with the LiteSpeed caching system. Running multiple plugins that perform overlapping page caching or optimization can create unnecessary conflicts.
Before replacing an existing caching plugin, document its current settings and test the site after making the change.
Do not run multiple full-page caching systems simply because each one claims to improve performance.
If you are comparing LSCache with another popular WordPress caching solution, see our detailed WP Rocket vs LiteSpeed Cache comparison.
Does LSCache Work With OpenLiteSpeed?
Yes, but there are differences between OpenLiteSpeed and LiteSpeed Web Server.
OpenLiteSpeed supports LSCache functionality, but some features available with commercial LiteSpeed products are not available in the same way. For example, LiteSpeed’s documentation states that OpenLiteSpeed does not support ESI.
This is important when following tutorials written specifically for LiteSpeed Web Server.
Always check whether a configuration applies to:
LiteSpeed Web Server
or
OpenLiteSpeed
before applying server-level instructions.
LSCache Configuration Best Practices
Follow these rules when configuring LSCache for WordPress:
- Start with page caching.
Do not change every setting immediately. - Keep default settings where possible.
LiteSpeed recommends starting with its default configuration for beginners. - Exclude dynamic pages.
Never publicly cache personalized content without understanding the consequences. - Use Redis or Memcached only when available.
The service must exist on the server. - Test optimization settings individually.
This makes troubleshooting much easier. - Test logged-out pages.
Public visitors can receive different cache behavior from administrators. - Purge cache after major changes.
This ensures you are testing the latest version. - Check cache headers.
Do not assume the cache is working simply because the plugin is active. - Avoid overlapping caching plugins.
Multiple caching systems can create conflicts. - Monitor the website after configuration.
Check forms, menus, search, checkout, login, and other interactive features.
Can LSCache Improve WordPress Performance?
Yes, LSCache can reduce the amount of work required to serve frequently requested pages. This can also help reduce the server-side processing involved in generating WordPress pages. If your WordPress site still has a slow initial response after caching is configured, check your initial server response time and investigate the hosting and server-side factors affecting it.
The biggest benefit usually comes from serving cacheable pages without repeatedly executing the full WordPress request cycle.
But caching is only one part of WordPress performance.
A slow website can still have problems caused by:
- Slow hosting
- Large images
- Poorly written plugins
- Heavy themes
- Too many database queries
- Slow external scripts
- Unoptimized CSS
- Unoptimized JavaScript
- Poor server resources
LSCache can help reduce some of this workload, but it cannot fix every performance problem by itself.
Frequently Asked Questions
Is LSCache better than other WordPress caching plugins?
The answer depends on your hosting environment and requirements. LSCache has direct integration with LiteSpeed’s server-side caching technology, which makes it particularly relevant for websites hosted on LiteSpeed-based infrastructure.
Does LSCache work without LiteSpeed?
The plugin can provide optimization features without a LiteSpeed Web Server, but its full server-level page caching functionality requires a compatible LiteSpeed setup or supported QUIC.cloud configuration.
Should I use Redis with LSCache?
If Redis is installed and configured correctly on your server, object caching can reduce repeated database-related work. Do not enable the Redis option unless the Redis service is actually available.
How do I check whether LSCache is working?
Use the LiteSpeed Cache Check Tool or inspect the page response headers. LiteSpeed provides an official tool specifically for checking whether a URL is using LSCache.
Is LSCache free for WordPress?
The LiteSpeed Cache for WordPress plugin is available free of charge. The exact caching features available to your website depend on your server environment and configuration.
Final Thoughts
LSCache for WordPress can significantly reduce the work required to serve frequently requested pages, but the best configuration is not the one with every option enabled.
Start with the page cache. Confirm that the server supports LSCache, enable caching, configure sensible exclusions, and verify the result. Then add object caching and optimization features one at a time.
If you are using a LiteSpeed-based hosting environment such as CyberPanel with a supported web server, LSCache can become an important part of your WordPress performance setup.
Start with caching, test every optimization, and keep dynamic content out of the public cache.