On this page
The LiteSpeed Cache plugin for WordPress helps make WordPress websites faster by combining server level page caching with a wide range of performance optimization tools. It can cache dynamic pages, optimize images, reduce CSS and JavaScript overhead, and improve how content is delivered to visitors.
The plugin is free and open source. However, its full page caching features work with LiteSpeed powered servers or QUIC.cloud CDN. If your website uses another web server, you can still use many of its optimization features, but the LiteSpeed server level cache will not be available.
This guide explains how LiteSpeed Cache works, how to install it, which settings matter most, and how to configure it without creating unnecessary conflicts.
What Is the LiteSpeed Cache Plugin for WordPress?
LiteSpeed Cache for WordPress, often called LSCWP, is a WordPress performance plugin built to communicate with LiteSpeed’s server level cache.
Unlike a basic WordPress caching plugin that mainly works through PHP, LiteSpeed Cache can communicate directly with the LiteSpeed cache engine. This allows the server to serve cached pages without rebuilding the same WordPress page for every visitor.
The plugin also includes optimization features that work separately from page caching.
These include:
- Page caching
- Browser caching
- Object cache support
- Image optimization
- Lazy loading
- CSS and JavaScript optimization
- Database optimization
- CDN support
- Cache management
- QUIC.cloud services
- Cache crawling
- Private caching
LiteSpeed describes LSCache as a server level cache designed to handle dynamic content efficiently while reducing server load.
How Does LiteSpeed Cache Work?
When a visitor opens a WordPress page for the first time, WordPress may need to process PHP, query the database, load plugins, generate the page, and return the HTML.
With page caching enabled, LiteSpeed can store the generated response.
A later visitor may then receive the cached version instead of forcing WordPress to generate the page again.
The basic process looks like this:
Visitor → LiteSpeed Server → Cached Page → Browser
Instead of:
Visitor → LiteSpeed Server → PHP → WordPress → Database → HTML → Browser
This can reduce processing time and server workload, especially on websites that receive repeated requests for the same pages.
How Does CyberPanel Work With LiteSpeed Cache?
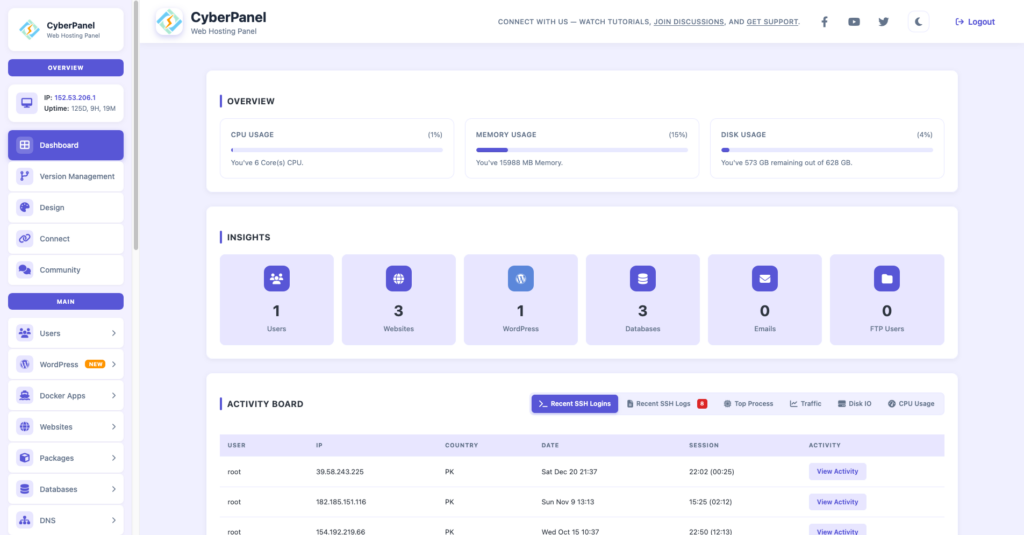
If your WordPress website runs on CyberPanel, LiteSpeed Cache is a natural choice for caching and performance optimization. CyberPanel is a free, open-source web hosting control panel powered by OpenLiteSpeed, so WordPress websites hosted through CyberPanel can take advantage of LiteSpeed’s server level caching technology.
CyberPanel helps you manage your server, websites, databases, SSL certificates, email, and other hosting tasks through a web based interface. LiteSpeed Cache then works at the WordPress level to connect your website with the LiteSpeed caching system and provide additional optimization features.
This creates a simple relationship:
CyberPanel → Manages the server and website environment
OpenLiteSpeed → Handles the web server and cache engine
LiteSpeed Cache → Connects WordPress with LiteSpeed caching and provides optimization tools
For a WordPress website hosted on CyberPanel, you can install the LiteSpeed Cache plugin directly from the WordPress dashboard and configure its caching and optimization features from there.
You should still verify that OpenLiteSpeed and the required cache configuration are active on the server before assuming that server level caching is working.
Does LiteSpeed Cache Work on Any WordPress Website?
Yes, but there is an important distinction.
The LiteSpeed Cache plugin can be installed on websites using different web servers, including Apache and Nginx. However, its full page caching functionality requires a LiteSpeed server product or QUIC.cloud CDN. Optimization features such as CSS and JavaScript minification, image optimization, lazy loading, database optimization, and browser caching can still be used without a LiteSpeed server.
| Server setup | Plugin optimization | LiteSpeed page cache |
|---|---|---|
| LiteSpeed Web Server | Yes | Yes |
| OpenLiteSpeed | Yes | Yes |
| LiteSpeed Web ADC | Yes | Yes |
| QUIC.cloud CDN | Yes | Yes |
| Apache | Yes | No |
| Nginx | Yes | No |
This distinction is important because installing the plugin alone does not automatically give every WordPress website LiteSpeed’s server level caching.
What Are the Benefits of LiteSpeed Cache for WordPress?
The main advantage is that LiteSpeed Cache combines caching and optimization features inside one plugin.
1. Server Level Page Caching
The plugin can communicate with LiteSpeed’s built in cache engine to store dynamically generated pages.
This means visitors can receive cached pages without WordPress processing every request from scratch.
2. Lower Server Workload
Serving more requests from cache can reduce the amount of PHP and database processing required for repeated page views.
This can be especially useful for content heavy websites and websites receiving large amounts of traffic.
3. Image Optimization
LiteSpeed Cache can optimize images through QUIC.cloud services.
Smaller image files can reduce the amount of data browsers need to download, which can help improve page loading performance.
4. CSS and JavaScript Optimization
The plugin provides options for minifying and, where appropriate, combining CSS and JavaScript files.
These features can reduce unnecessary file size and requests, although aggressive optimization can sometimes cause layout or functionality problems.
5. Lazy Loading
Images and other media can be loaded when they are needed instead of loading every asset immediately.
This can reduce the amount of content a browser needs to download during the initial page load.
6. Browser Cache
Browser caching allows certain static files to be stored locally in a visitor’s browser.
When the visitor returns, the browser may reuse those files instead of downloading them again.
7. Database Optimization
The plugin includes tools for cleaning certain types of unnecessary database data.
This can help keep a WordPress database organized, although database optimization should not be treated as a replacement for good WordPress maintenance.
How Do You Install LiteSpeed Cache in WordPress?
Installing the LiteSpeed Cache plugin for WordPress is straightforward.
Before installing it, check whether your website already has another full page caching plugin enabled.
LiteSpeed recommends using only one full page cache at a time. Other types of caching, such as object caching or browser caching, can still be used when configured correctly.
Step 1: Open WordPress Plugins
Log in to your WordPress dashboard.
Go to:
Plugins → Add New Plugin
Search for:
LiteSpeed Cache
Step 2: Install the Plugin
Find the official LiteSpeed Cache plugin and click:
Install Now
Then click:
Activate
After activation, a new LiteSpeed Cache section will appear in your WordPress dashboard.
Step 3: Enable Cache
Go to:
LiteSpeed Cache → Cache → Cache
Set:
Enable Cache → ON
Then save the changes.
This is the main switch that activates the plugin’s caching functionality.
Step 4: Check Whether Caching Is Working
Do not assume caching is working simply because the plugin is activated.
LiteSpeed provides an LSCache Check Tool that can check the response headers of a URL.
A working setup may show headers such as:
X-LiteSpeed-Cache: hit
or
X-LiteSpeed-Cache: miss
These headers indicate that LiteSpeed caching is being used.
How Should You Configure LiteSpeed Cache for WordPress?
The plugin contains many settings, so beginners often make the mistake of enabling everything.
That is not necessary.
A better approach is to start with caching and then enable optimization features one at a time.
LiteSpeed itself provides presets designed for different levels of configuration. Its Essentials preset focuses on basic caching and browser caching, while more advanced presets progressively enable image optimization, minification, Guest Mode, CSS optimization, JavaScript optimization, and other features.
For most websites, start with the basic settings and test the website after each major change.
Which LiteSpeed Cache Settings Should You Enable?
There is no single configuration that is perfect for every WordPress website.
Themes, plugins, page builders, WooCommerce stores, advertisements, tracking scripts, and custom JavaScript can all behave differently.
A practical starting configuration looks like this:
| Feature | Recommended starting point | Why |
|---|---|---|
| Page Cache | ON | Enables full page caching |
| Browser Cache | ON | Stores static resources in the browser |
| Image Optimization | ON | Reduces image file sizes |
| Lazy Load Images | Test and enable | Reduces initial image loading |
| CSS Minify | Test | Can reduce CSS size |
| JS Minify | Test | Can reduce JavaScript size |
| CSS Combine | Usually leave OFF initially | Can create conflicts |
| JS Combine | Usually leave OFF initially | Can create conflicts |
| Database Optimization | Use when needed | Helps with database cleanup |
| Object Cache | Enable when supported | Reduces repeated database work |
| Guest Mode | Test carefully | Changes first visit behavior |
| Guest Optimization | Advanced users | Can use substantial optimization resources |
The exact settings can change depending on your theme and plugins.
Should You Use LiteSpeed Cache Presets?
Presets can be useful if you do not want to configure every setting manually.
LiteSpeed provides several preset levels, including Essentials, Basic, Advanced, Aggressive, and Extreme.
Essentials focuses on basic caching and browser caching.
Basic adds image optimization and mobile cache.
Advanced adds more optimization features, including CSS, JavaScript, and HTML minification.
Aggressive adds more advanced CSS and JavaScript optimization.
Extreme enables additional aggressive features such as lazy loading, viewport image generation, delayed JavaScript, and other optimizations.
For a beginner, there is little reason to immediately jump to the most aggressive preset.
Start with a simpler configuration.
Then test.
How Do You Optimize Images With LiteSpeed Cache?
Large images are one of the most common causes of slow WordPress pages.
LiteSpeed Cache includes image optimization through QUIC.cloud.
The system can process images and provide optimized versions that are smaller and faster to transmit.
You can access these features from the LiteSpeed Cache image optimization section.
One important rule is to avoid running multiple image optimization systems on the same images.
LiteSpeed specifically warns against using another image optimization plugin at the same time as its own image optimization service because this can cause processing problems.
Before enabling image optimization, check whether your hosting setup or another plugin is already handling this task.
Should You Enable CSS Minification?
CSS minification removes unnecessary whitespace, line breaks, and comments from CSS files.
For example, readable CSS may contain:
body {
    margin: 0;
    padding: 0;
}A minified version removes unnecessary characters.
This can reduce file size.
However, CSS minification should still be tested after activation.
Check:
- Homepage
- Navigation
- Mobile layout
- Forms
- Buttons
- Popups
- Blog pages
- Product pages
If something looks broken, disable the setting or identify the affected CSS file and exclude it from optimization.
Should You Combine CSS and JavaScript Files?
Not necessarily.
Combining files sounds useful because it can reduce the number of files requested by the browser.
However, modern WordPress websites can have complex themes, plugins, page builders, and third party scripts.
Combining files can sometimes introduce conflicts.
LiteSpeed’s documentation warns that optimization settings should be thoroughly tested before being enabled on a production website.
For that reason, do not turn every CSS and JavaScript option on at once.
Enable one setting.
Test the site.
Then continue.
How Do You Optimize JavaScript in LiteSpeed Cache?
JavaScript can affect page loading because browsers may need to process scripts before completing certain parts of the page.
LiteSpeed Cache provides several JavaScript optimization options.
Depending on the configuration, you can use features such as:
- JavaScript minification
- JavaScript combination
- Deferred JavaScript
- Delayed JavaScript
- JavaScript exclusions
The safest approach is to begin with basic optimization.
After making changes, test interactive elements such as:
- Menus
- Search
- Login forms
- Contact forms
- Sliders
- Popups
- Shopping carts
- Checkout
- Cookie banners
A page can score well in a speed test and still have a broken user interface.
That is why real browser testing matters.
What Is Object Cache in LiteSpeed Cache?
Page caching and object caching are different.
Page caching stores generated pages so they can be served faster.
Object caching stores frequently requested database results and other objects so WordPress does not need to perform the same database work repeatedly.
LiteSpeed Cache supports object caching through compatible systems.
Common object cache technologies include:
- Redis
- Memcached
If your hosting provider supports Redis, enabling Redis object caching can be useful for WordPress sites that perform many database queries.
However, object caching should be configured at the server and application level correctly. Do not enable Redis simply because it appears in a performance checklist.
What Is QUIC.cloud in LiteSpeed Cache?
QUIC.cloud provides online services that integrate with LiteSpeed Cache.
These services can support features such as:
- CDN delivery
- Image optimization
- Critical CSS
- Unique CSS
- Low Quality Image Placeholders
- Viewport Image Generation
LiteSpeed’s current documentation states that QUIC.cloud services need to be enabled when using these online optimization services.
Some services have free quotas while certain usage levels can involve charges.
If you are configuring a production website, check the current QUIC.cloud dashboard before relying heavily on quota based services.
Should You Enable Guest Mode?
Guest Mode is designed to serve a cached version of a page to a visitor’s first request and then use an AJAX request to load the appropriate version for that visitor.
This can improve the perceived speed of the first request.
However, it is not a setting that should be enabled blindly.
Guest Mode and Guest Optimization can introduce additional cache variations and may increase crawler or resource usage depending on the configuration.
For a normal website, first make sure basic caching and optimization work correctly.
Then test Guest Mode if you actually need it.
How Do You Clear LiteSpeed Cache?
Sometimes you need to purge the cache after changing a website.
For example, you may have:
- Updated a page
- Changed CSS
- Changed JavaScript
- Updated a theme
- Modified a plugin
- Changed website settings
If the old version continues appearing, clear the relevant cache.
You can usually purge the cache from the LiteSpeed Cache controls in WordPress.
Do not confuse cache purging with deleting your WordPress content.
Purging removes cached copies. It does not delete the original page or post.
How Do You Fix a Broken WordPress Site After LiteSpeed Optimization?
If your website breaks after enabling an optimization feature, do not panic.
The most common cause is a conflict involving CSS, JavaScript, themes, or plugins.
Use this process:
1. Identify the Last Setting You Changed
If the website worked before enabling JavaScript optimization, start there.
2. Disable the Problematic Optimization
Turn the relevant setting off.
3. Purge the Cache
Clear LiteSpeed Cache after changing the setting.
4. Test in an Incognito Window
This helps prevent your browser’s existing cache from confusing the test.
5. Check the Console
Open your browser’s developer tools and check for JavaScript or loading errors.
6. Exclude the Problematic File
If a particular CSS or JavaScript file causes the conflict, LiteSpeed’s tuning and exclusion options can be used to prevent that file from being processed.
LiteSpeed recommends testing page optimization settings and using exclusions when conflicts occur.
What Should You Not Do With LiteSpeed Cache?
A fast website is not created by turning every switch ON.
Avoid these common mistakes:
Using Multiple Full Page Cache Plugins
Running several full page caching systems can cause conflicts.
Use one primary full page cache.
Enabling Every Optimization at Once
If ten settings are changed simultaneously and the website breaks, finding the cause becomes much harder.
Change one group of settings at a time.
Using Multiple Image Optimizers
Choose one image optimization system.
LiteSpeed specifically advises against using multiple image optimization plugins simultaneously.
Chasing a Perfect PageSpeed Score
A 100 score is not the same thing as a perfect website.
Real users care about how quickly the page appears, how smoothly it works, and whether they can interact with it.
Ignoring Mobile Users
Always test the mobile version after changing CSS, JavaScript, lazy loading, or image settings.
Forgetting to Test Dynamic Pages
A blog may work perfectly while a WooCommerce cart, login page, or form breaks.
Test the important user journeys on your website.
LiteSpeed Cache vs a Normal WordPress Cache Plugin
The main difference is where the caching work happens.
A traditional WordPress caching plugin may generate and serve cached content through WordPress and PHP.
LiteSpeed Cache can communicate with LiteSpeed’s server level cache engine.
This gives it access to caching functions that depend on the server environment.
LiteSpeed also combines page caching with optimization features, making it more than a basic cache plugin.
| Feature | LiteSpeed Cache | Basic cache plugin |
|---|---|---|
| WordPress page cache | Yes | Usually |
| Server level LSCache | Yes with supported setup | No |
| Image optimization | Yes | Depends on plugin |
| CSS optimization | Yes | Depends on plugin |
| JavaScript optimization | Yes | Depends on plugin |
| Object cache support | Yes | Depends on plugin |
| QUIC.cloud integration | Yes | No |
| Database optimization | Yes | Depends on plugin |
| Browser cache | Yes | Usually |
| Requires LiteSpeed for full page cache | Yes | Depends on plugin |
The important point is that plugin choice should match the hosting environment.
Is LiteSpeed Cache Free?
Yes.
The LiteSpeed Cache WordPress plugin is free and open source.
However, using the full server level caching functionality requires an appropriate LiteSpeed environment or QUIC.cloud CDN.
Some QUIC.cloud online services may also have usage limits or paid levels.
So there are two separate questions:
Is the WordPress plugin free?
Yes.
Is every LiteSpeed or QUIC.cloud service free at every usage level?
No.
Check the applicable service and usage limits before assuming that every online optimization feature is unlimited.
How Do You Know LiteSpeed Cache Is Working?
The easiest way is to inspect your website’s response headers.
A properly configured LiteSpeed cache may return:
X-LiteSpeed-Cache: hit
or:
X-LiteSpeed-Cache: miss
A cache hit generally means the requested page was served from cache.
A cache miss means the page was not already available in the requested cache state and may need to be generated before being cached.
LiteSpeed also provides a cache checking tool for verifying these headers.
If you do not see the expected LiteSpeed cache headers, check your server configuration and hosting environment.
Does LiteSpeed Cache Improve Core Web Vitals?
It can help with the technical factors that influence website performance, but the plugin alone cannot guarantee good Core Web Vitals.
Performance also depends on:
- Hosting resources
- Server response time
- Theme quality
- Plugin usage
- Image sizes
- Fonts
- Third party scripts
- Page structure
- JavaScript execution
- Content size
- Network conditions
LiteSpeed Cache can reduce caching and optimization related bottlenecks, but it cannot fix every performance problem.
For example, an extremely heavy theme with dozens of third party scripts may still be slow after installing a caching plugin.
A Safe LiteSpeed Cache Setup for Beginners
If you are new to the plugin, do not start with the most aggressive configuration.
Use this general workflow:
Step 1: Install LiteSpeed Cache.
Step 2: Confirm your server supports LiteSpeed caching.
Step 3: Enable Page Cache.
Step 4: Confirm cache headers are working.
Step 5: Enable browser caching.
Step 6: Connect QUIC.cloud if you need its online services.
Step 7: Optimize images.
Step 8: Test CSS and JavaScript minification.
Step 9: Test lazy loading.
Step 10: Configure object caching if your hosting supports it.
Step 11: Purge the cache after major configuration changes.
Step 12: Test desktop and mobile pages.
This gradual approach makes troubleshooting much easier.
LiteSpeed Cache Troubleshooting Checklist
If your website is still slow or something stops working after configuration, check these areas first.
| Problem | What to check |
|---|---|
| Cache is not working | Server type and cache headers |
| Old content appears | Purge the relevant cache |
| Layout looks broken | CSS optimization or combination |
| Buttons stop working | JavaScript optimization |
| Images look wrong | Image optimization or lazy loading |
| Mobile page behaves differently | Mobile cache settings |
| WooCommerce behaves strangely | Cache exclusions and dynamic content |
| Website becomes slower | Over-aggressive optimization |
| Redis does not work | Hosting and Redis configuration |
| QUIC.cloud features fail | Online Services connection and quota |
Do not immediately reinstall WordPress or delete all plugins.
First identify which layer is causing the problem.
FAQs
Is LiteSpeed Cache good for WordPress?
LiteSpeed Cache provides both server level caching and WordPress optimization features. When the website is hosted on a supported LiteSpeed environment, the plugin can use LiteSpeed’s cache engine in addition to its optimization tools.
Does LiteSpeed Cache replace a CDN?
Not completely. LiteSpeed Cache handles WordPress caching and optimization, while a CDN distributes content through edge locations closer to visitors. LiteSpeed Cache can integrate with QUIC.cloud CDN and supports CDN related functionality.
Does LiteSpeed Cache work with WooCommerce?
Yes. LiteSpeed Cache supports WooCommerce, but ecommerce websites need more careful cache configuration because carts, checkout pages, account pages, and other personalized content should not be treated like ordinary public pages.
Can LiteSpeed Cache break a WordPress website?
Some optimization settings can cause conflicts with themes, plugins, CSS, or JavaScript.
That is why LiteSpeed recommends testing optimization settings before using them on a production website.
Is LiteSpeed Cache better than other cache plugins?
The answer depends on the hosting environment and website requirements.
One important difference is that LiteSpeed Cache can communicate with the LiteSpeed server’s cache engine. Other caching plugins may use different caching methods.
The practical choice should therefore consider your server, existing optimization tools, theme, plugins, and website type.
Final Thoughts
The LiteSpeed Cache plugin for WordPress is more than a simple page caching plugin. It combines server level caching with image optimization, CSS and JavaScript optimization, browser caching, object cache support, database tools, and other performance features.
The biggest advantage appears when WordPress is running on LiteSpeed infrastructure because the plugin can communicate directly with the server’s cache engine.
But installing the plugin is only the first step.
A good configuration is one that makes the website faster without breaking its design or functionality.
Start with page caching. Confirm that it works. Then optimize images, CSS, JavaScript, and other resources gradually. Test every major change on both desktop and mobile devices.
If you are using LiteSpeed powered hosting, this gives you a practical way to improve WordPress performance while keeping caching and optimization tools in one place.
Ready to speed up your WordPress website? Start with LiteSpeed Cache, enable page caching first, and optimize the remaining settings one step at a time.