
How to Manage Docker Containers in CyberPanel
The CyberPanel container workspace shows ownership, image, tag, status, resource use, published ports, actions, and logs for containers created through the panel.
If a container does not exist yet, follow How to Create a Docker Container in CyberPanel.
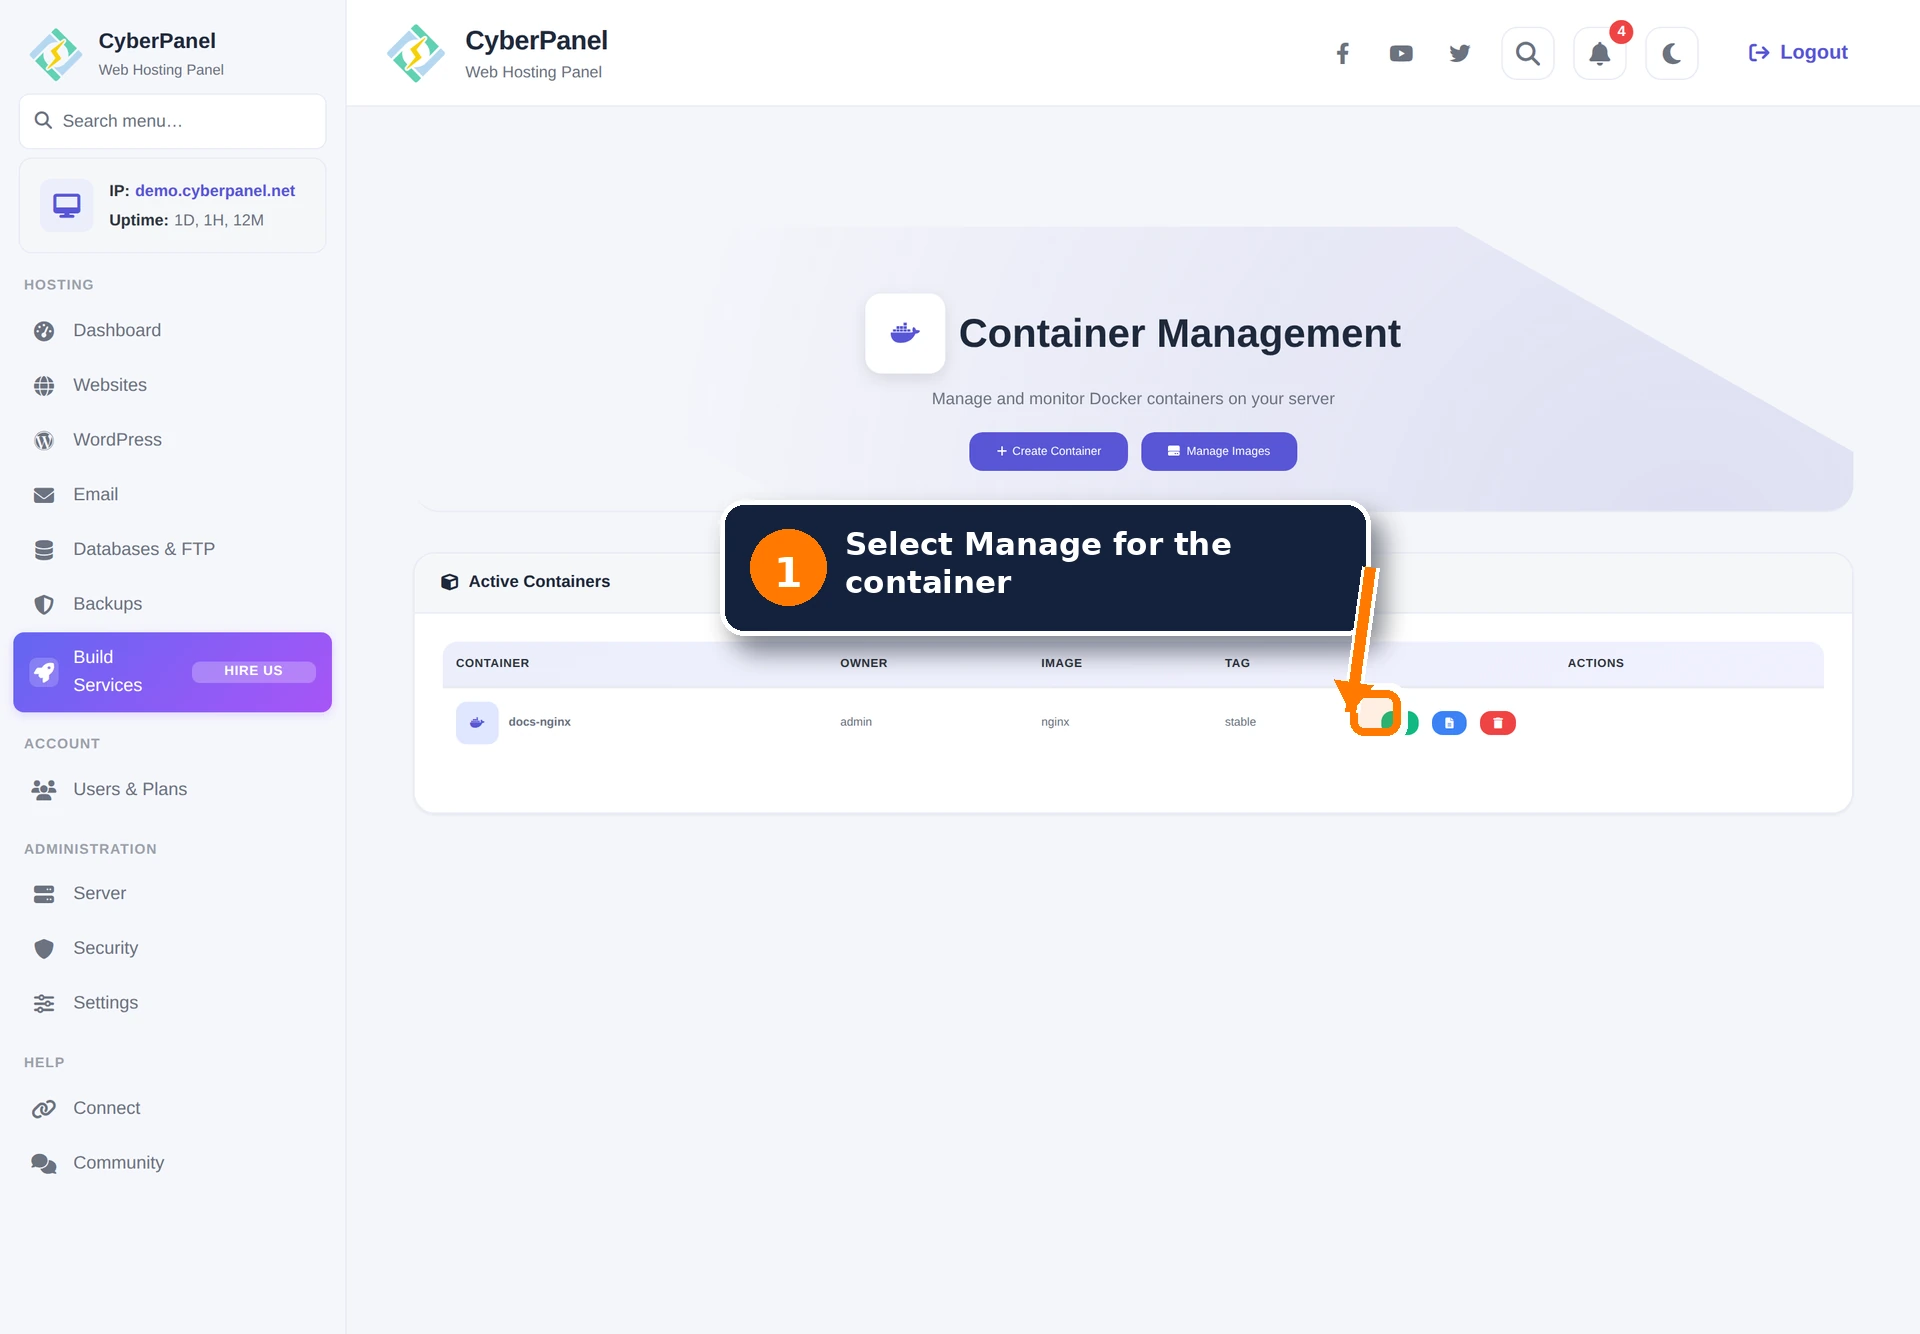
Step 1: Open the container
Open Server → Containers. Find the container and select the green Manage action. The other row actions display logs or delete the container.
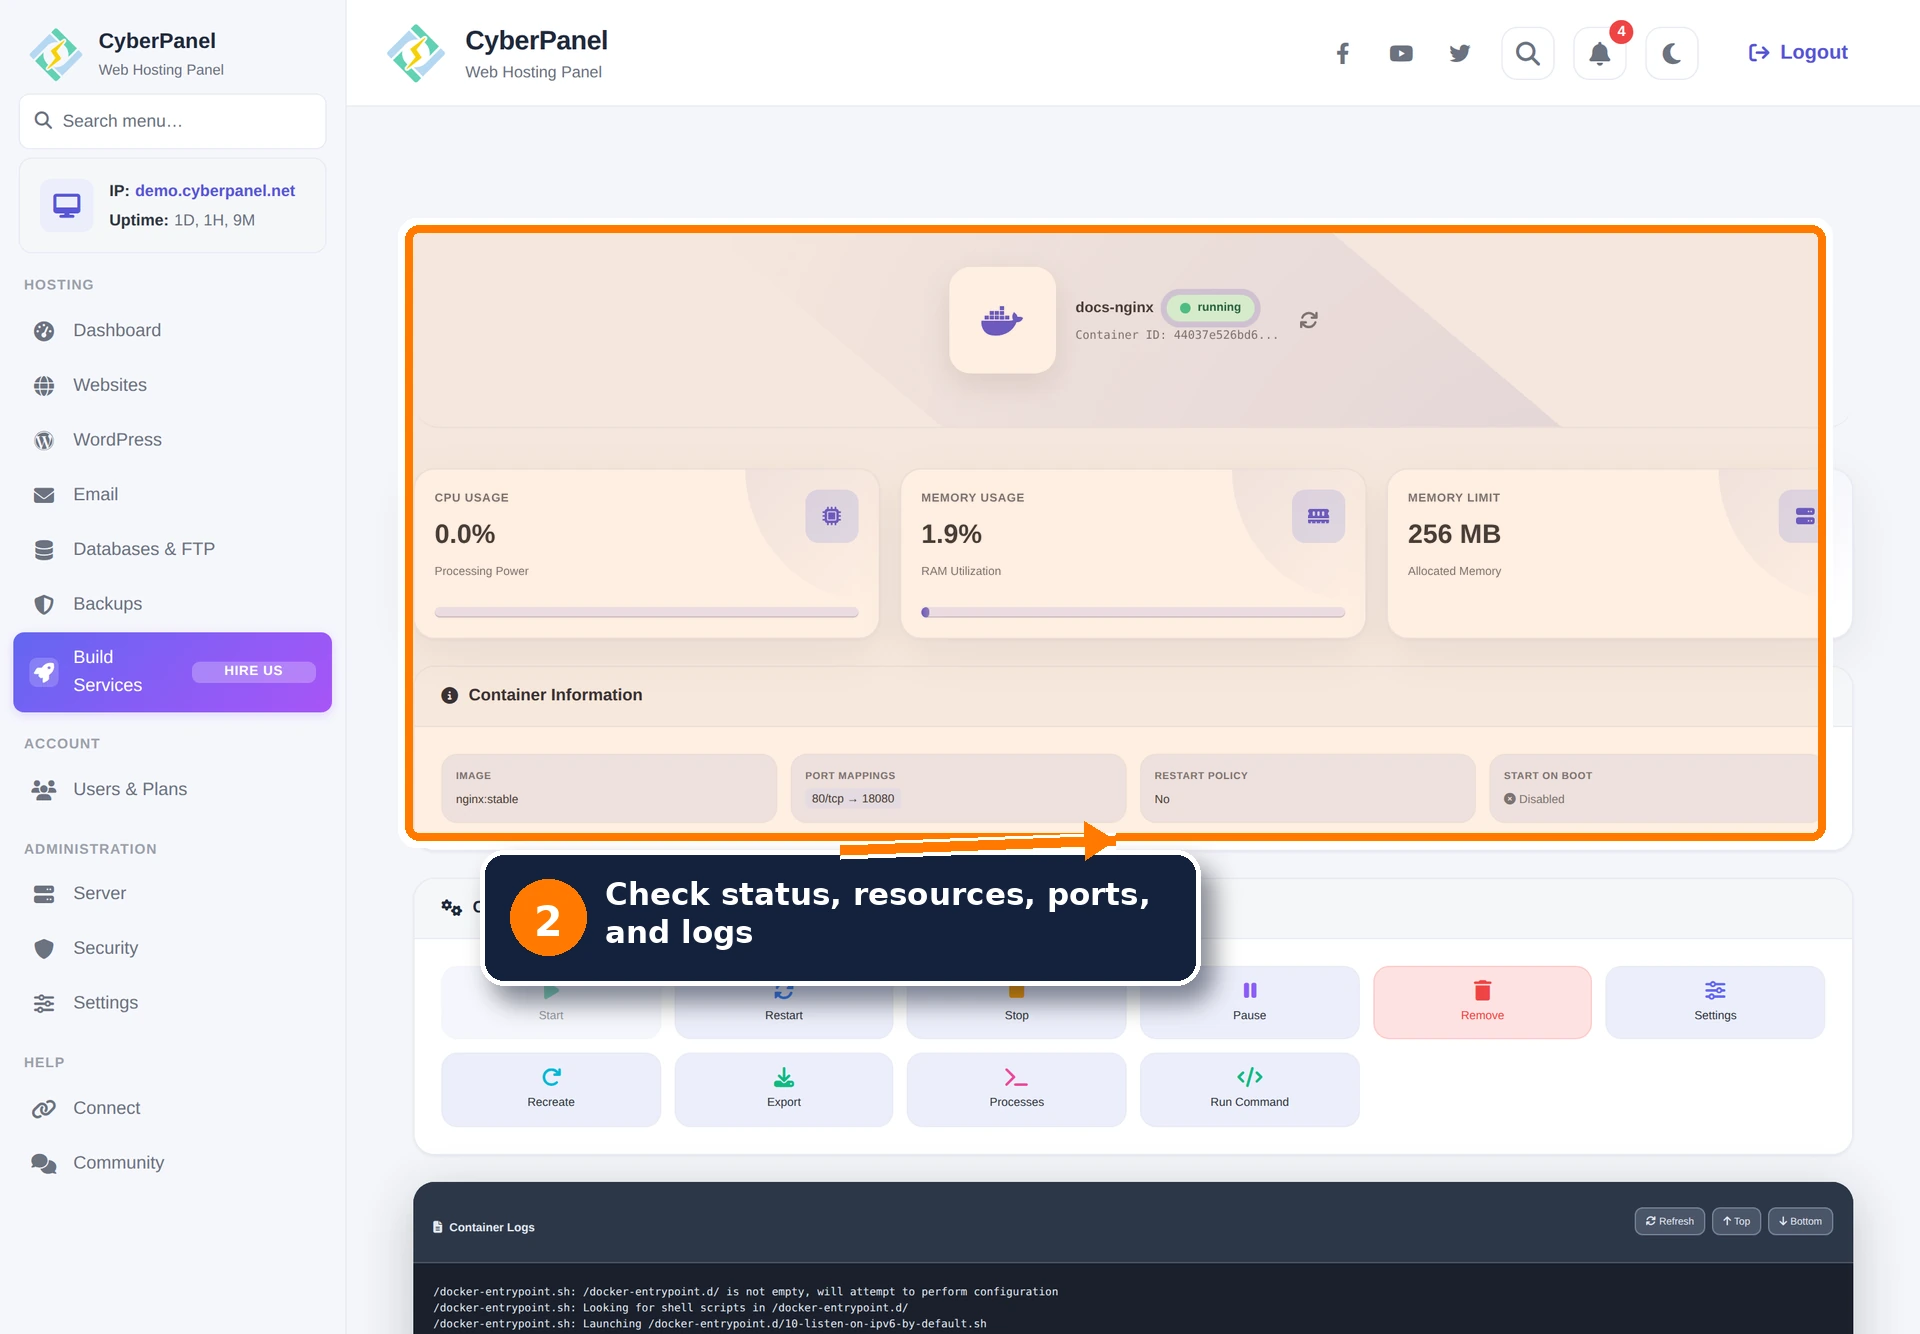
Step 2: Check status and runtime information
The header shows the container name, ID, and current state. The cards show CPU use, memory use, and the configured memory limit. Container Information lists the image, port mappings, restart policy, and start-on-boot state. Review the recent logs at the bottom of the page before changing a failed workload.
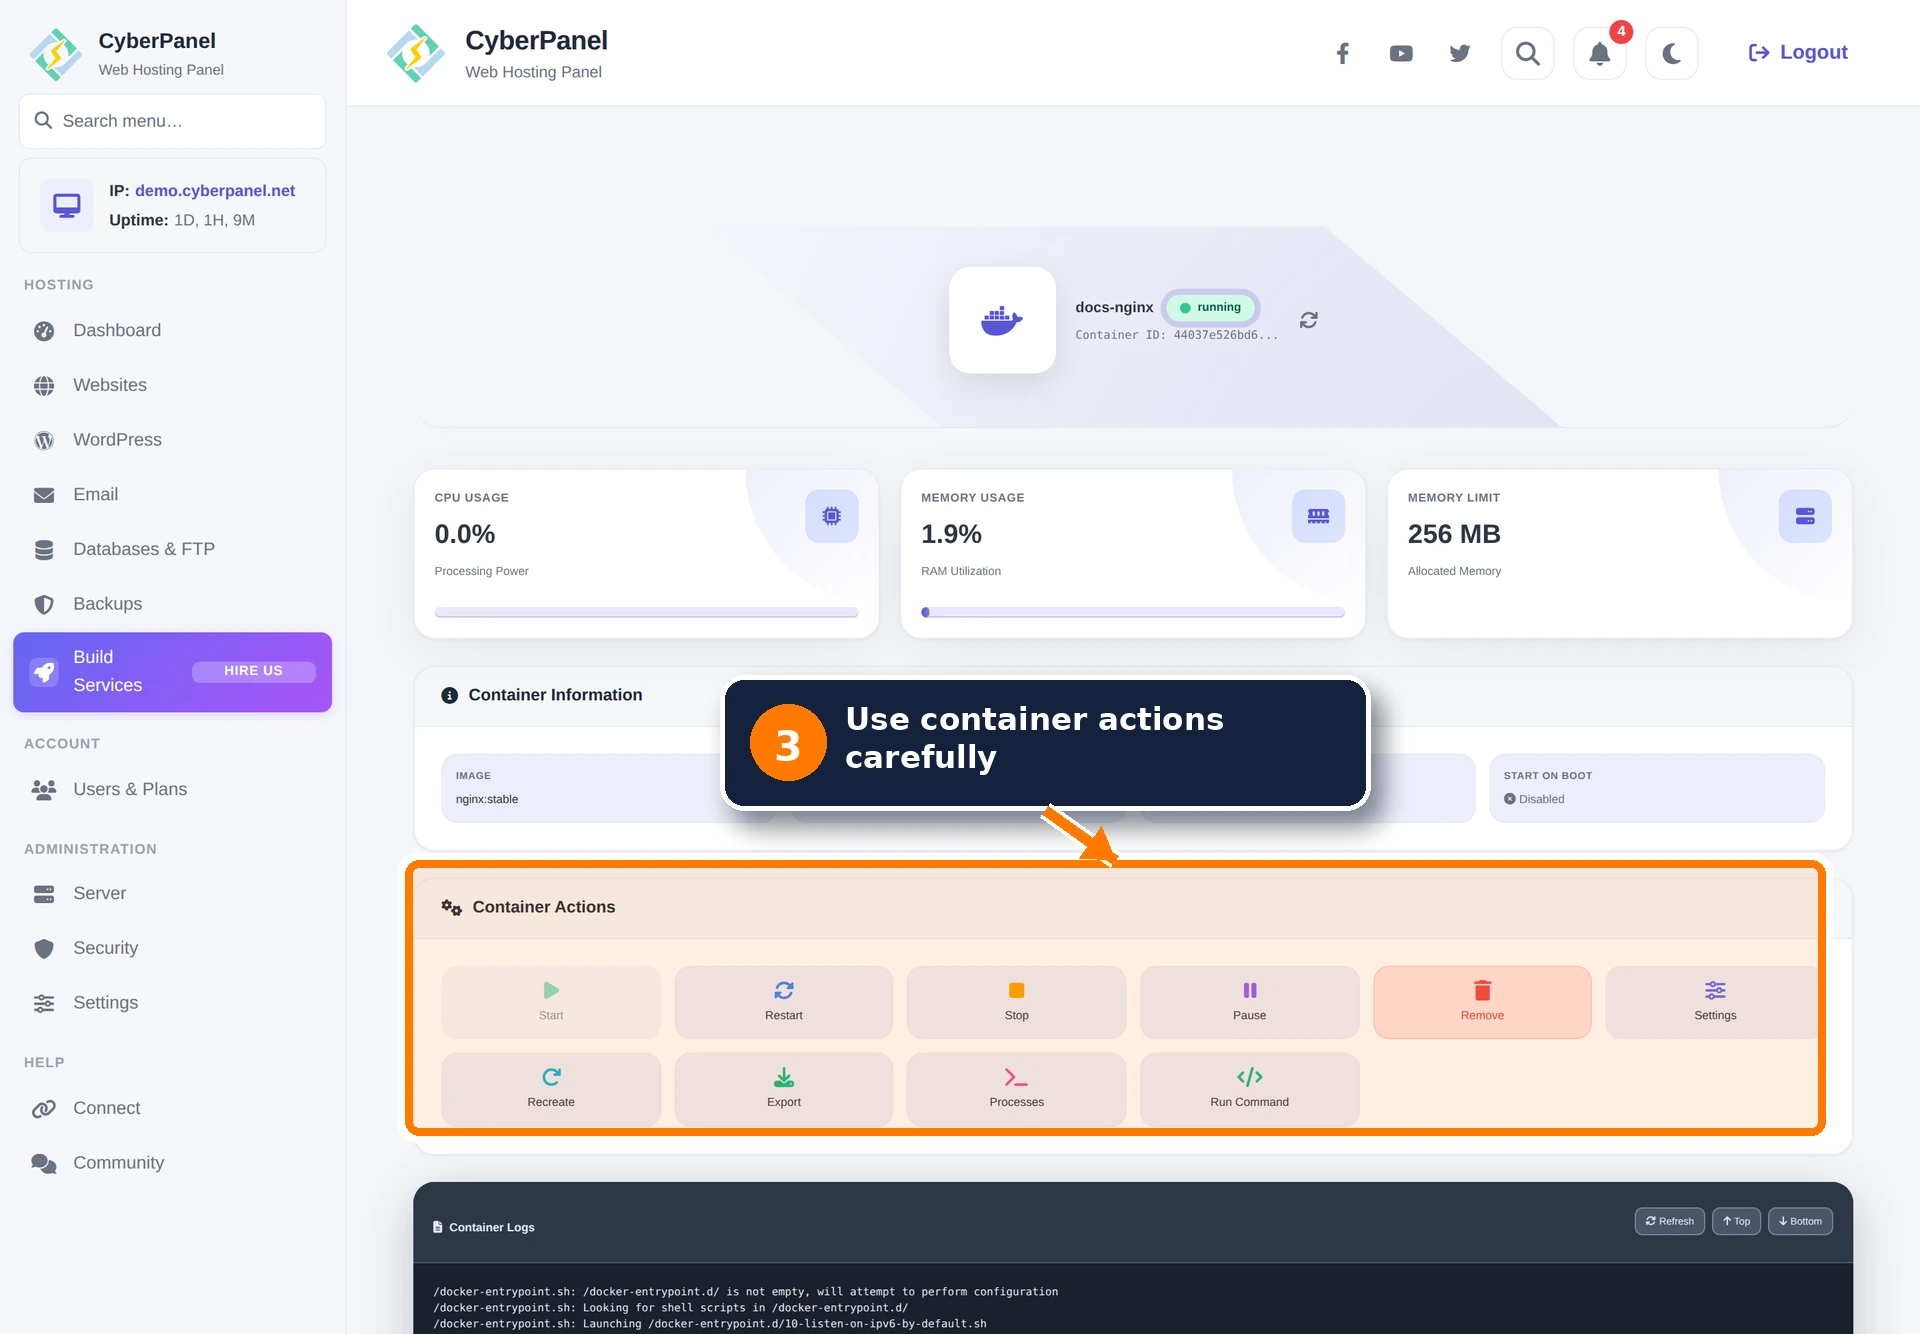
Step 3: Use container actions
- Start: starts a created or stopped container.
- Restart: stops and starts a running container. Expect a brief interruption.
- Stop: requests a graceful stop.
- Pause: temporarily suspends processes without stopping the container.
- Remove: deletes the container. Back up persistent data first.
- Settings: changes memory, boot behavior, environment variables, and volumes.
- Recreate: replaces the container using its saved configuration.
- Export: downloads a container export. It does not replace a separate backup of mounted data.
- Processes: displays the processes running inside the container.
- Run Command: executes a command inside a running container.
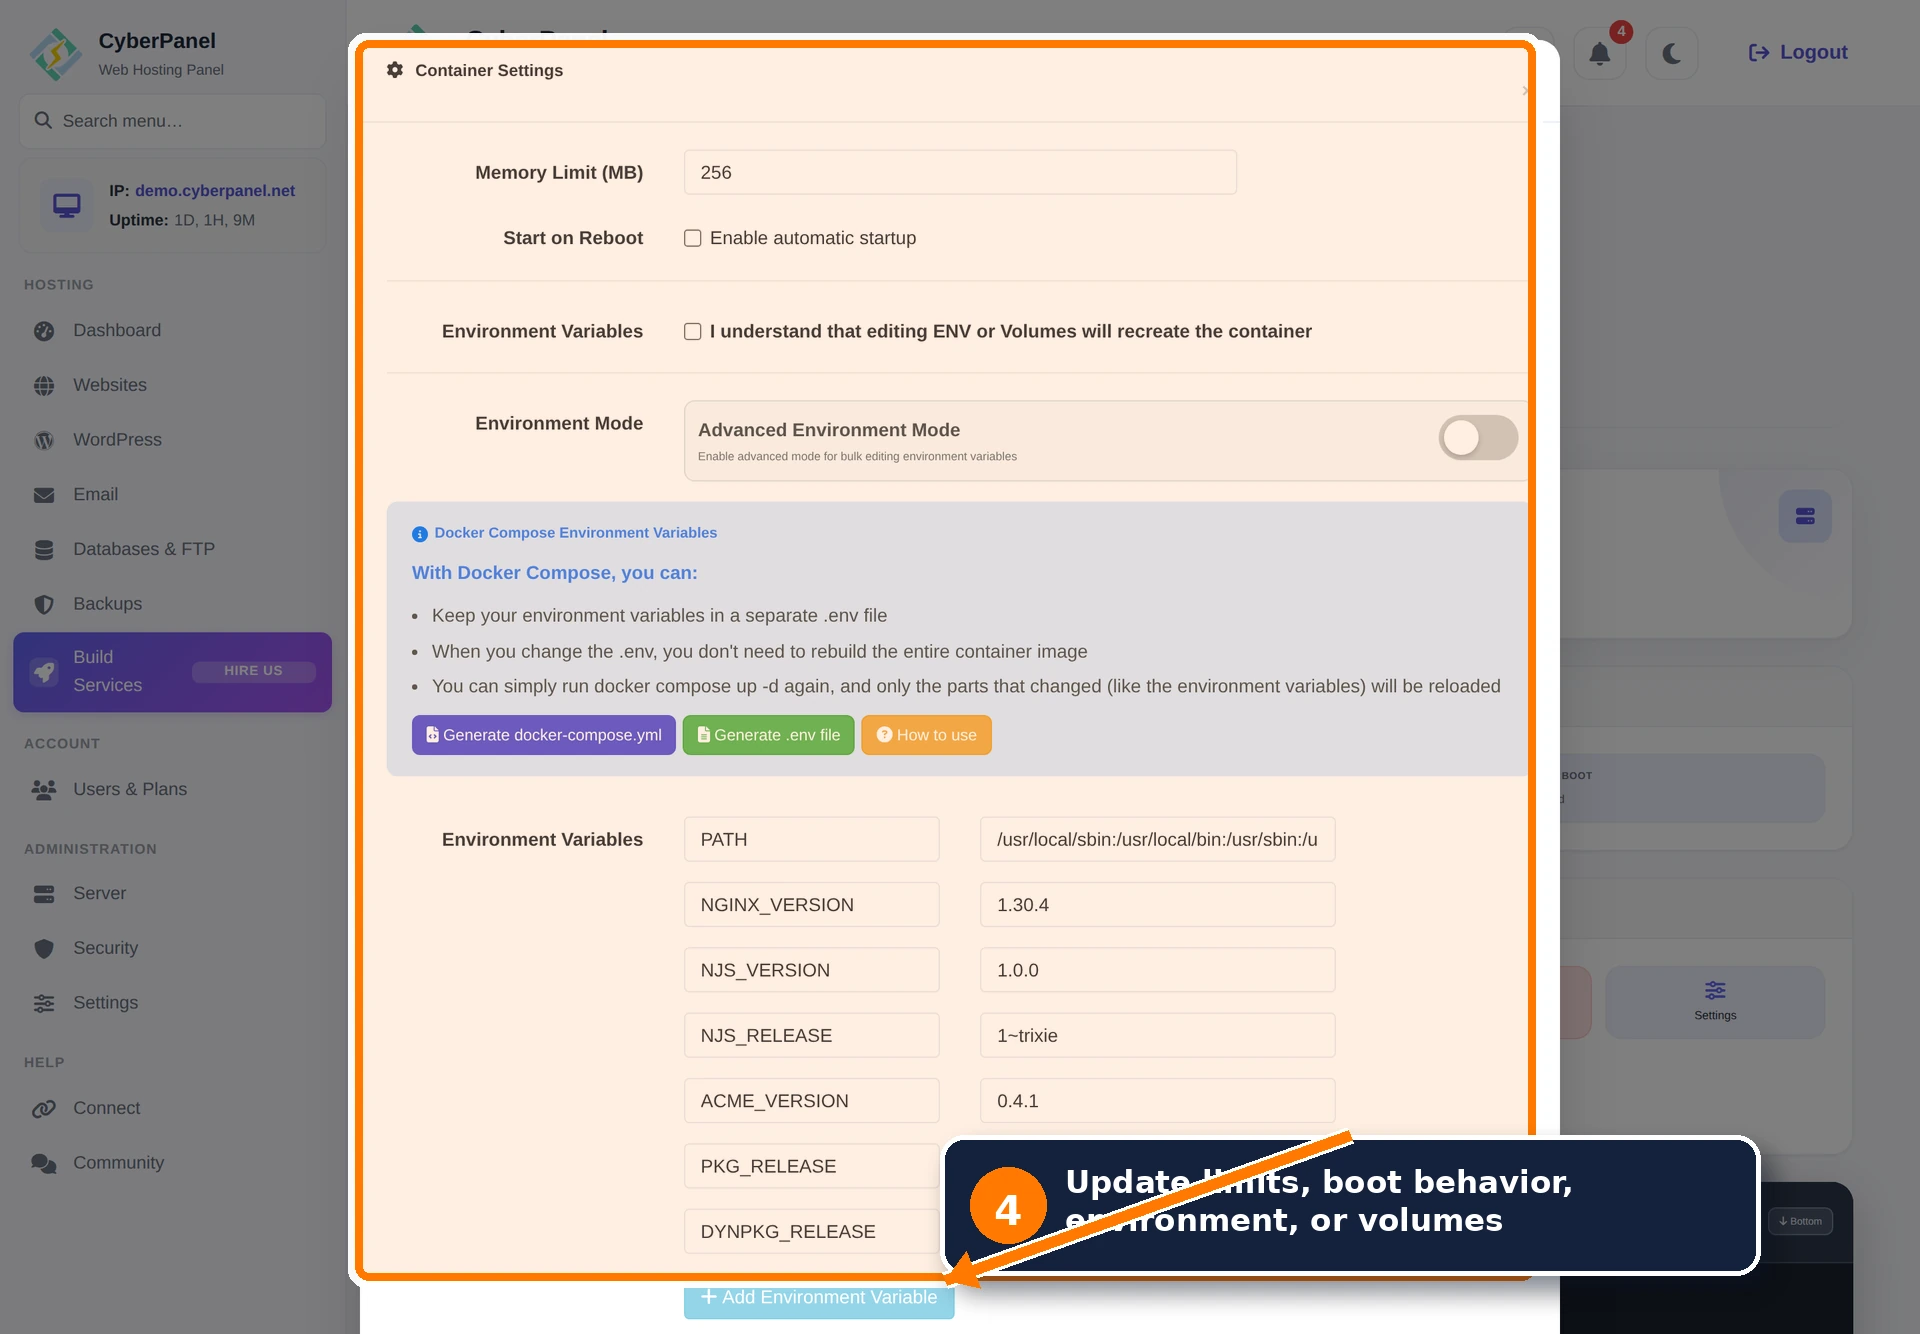
Step 4: Change container settings
Select Settings to change the memory limit or automatic startup. Enable the confirmation only when you intend to edit environment variables or volumes: saving those changes recreates the container and causes downtime.
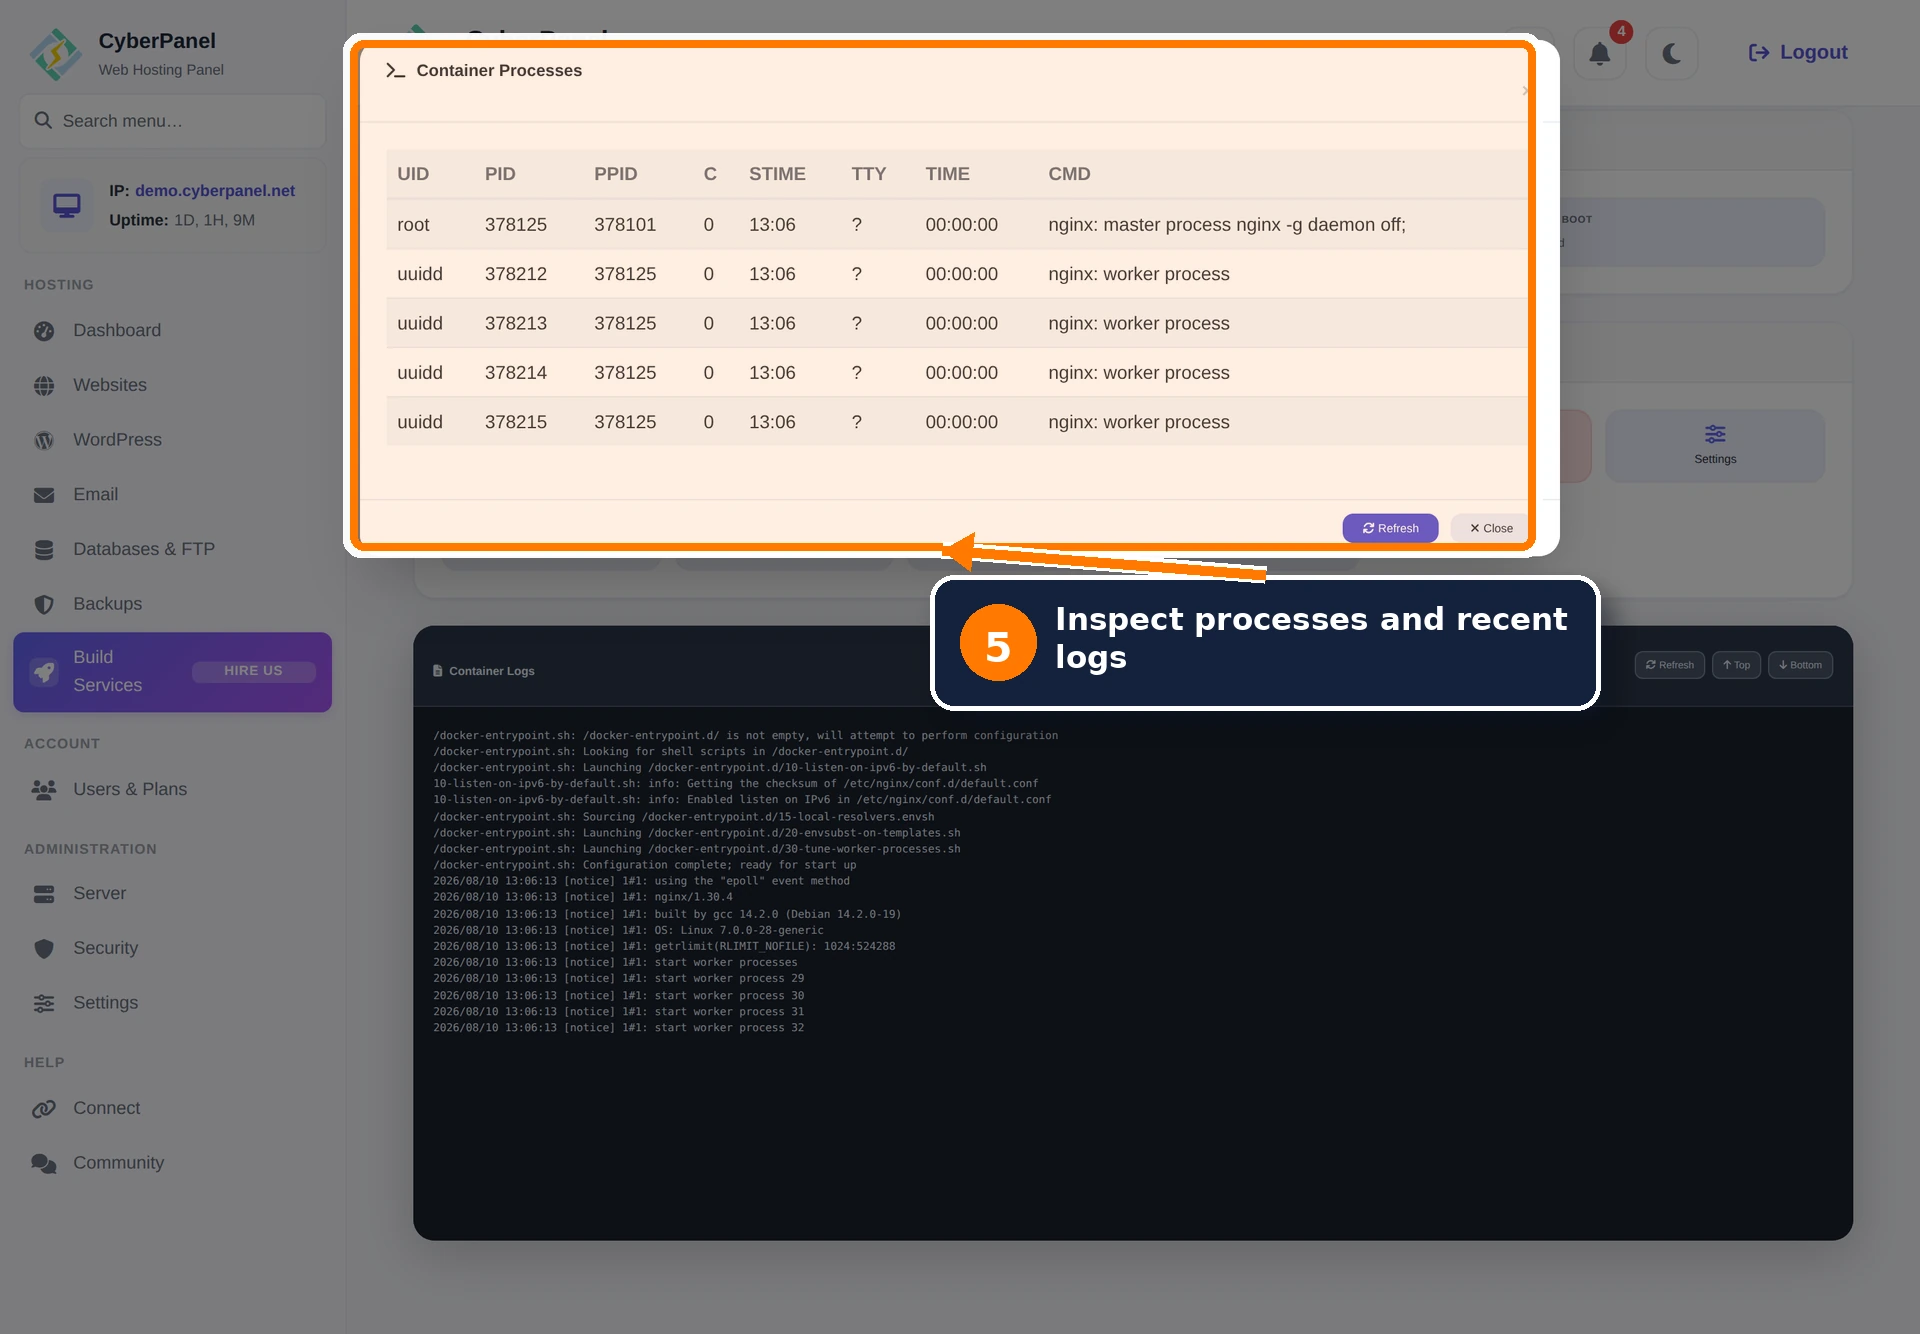
Step 5: Inspect processes and logs
Select Processes to confirm which processes are active. Compare the process list with the log panel to distinguish an application startup failure from a networking or proxy problem.
Run Command has the same effect as executing a command inside the container. Use read-only commands first, do not paste commands from an untrusted source, and do not include secrets in command output copied to a ticket.
Useful read-only checks
docker ps -a
docker inspect CONTAINER_NAME
docker logs --tail 200 CONTAINER_NAME
docker stats --no-stream CONTAINER_NAME
ss -lntp
Validated lifecycle
The current interface was tested on Ubuntu 26.04 with an official nginx image. Creation, start, local HTTP access through a mapped port, restart, stop, start again, process inspection, settings, commands, and logs all completed successfully.