How to Use Website Home in CyberPanel
The Website Home workspace brings the controls for one website into a single screen. Use it after creating a website to work with files, domains, DNS, email, databases, backups, deployment tools, and site settings.
If the website does not exist yet, start with How to Create a Website in CyberPanel.
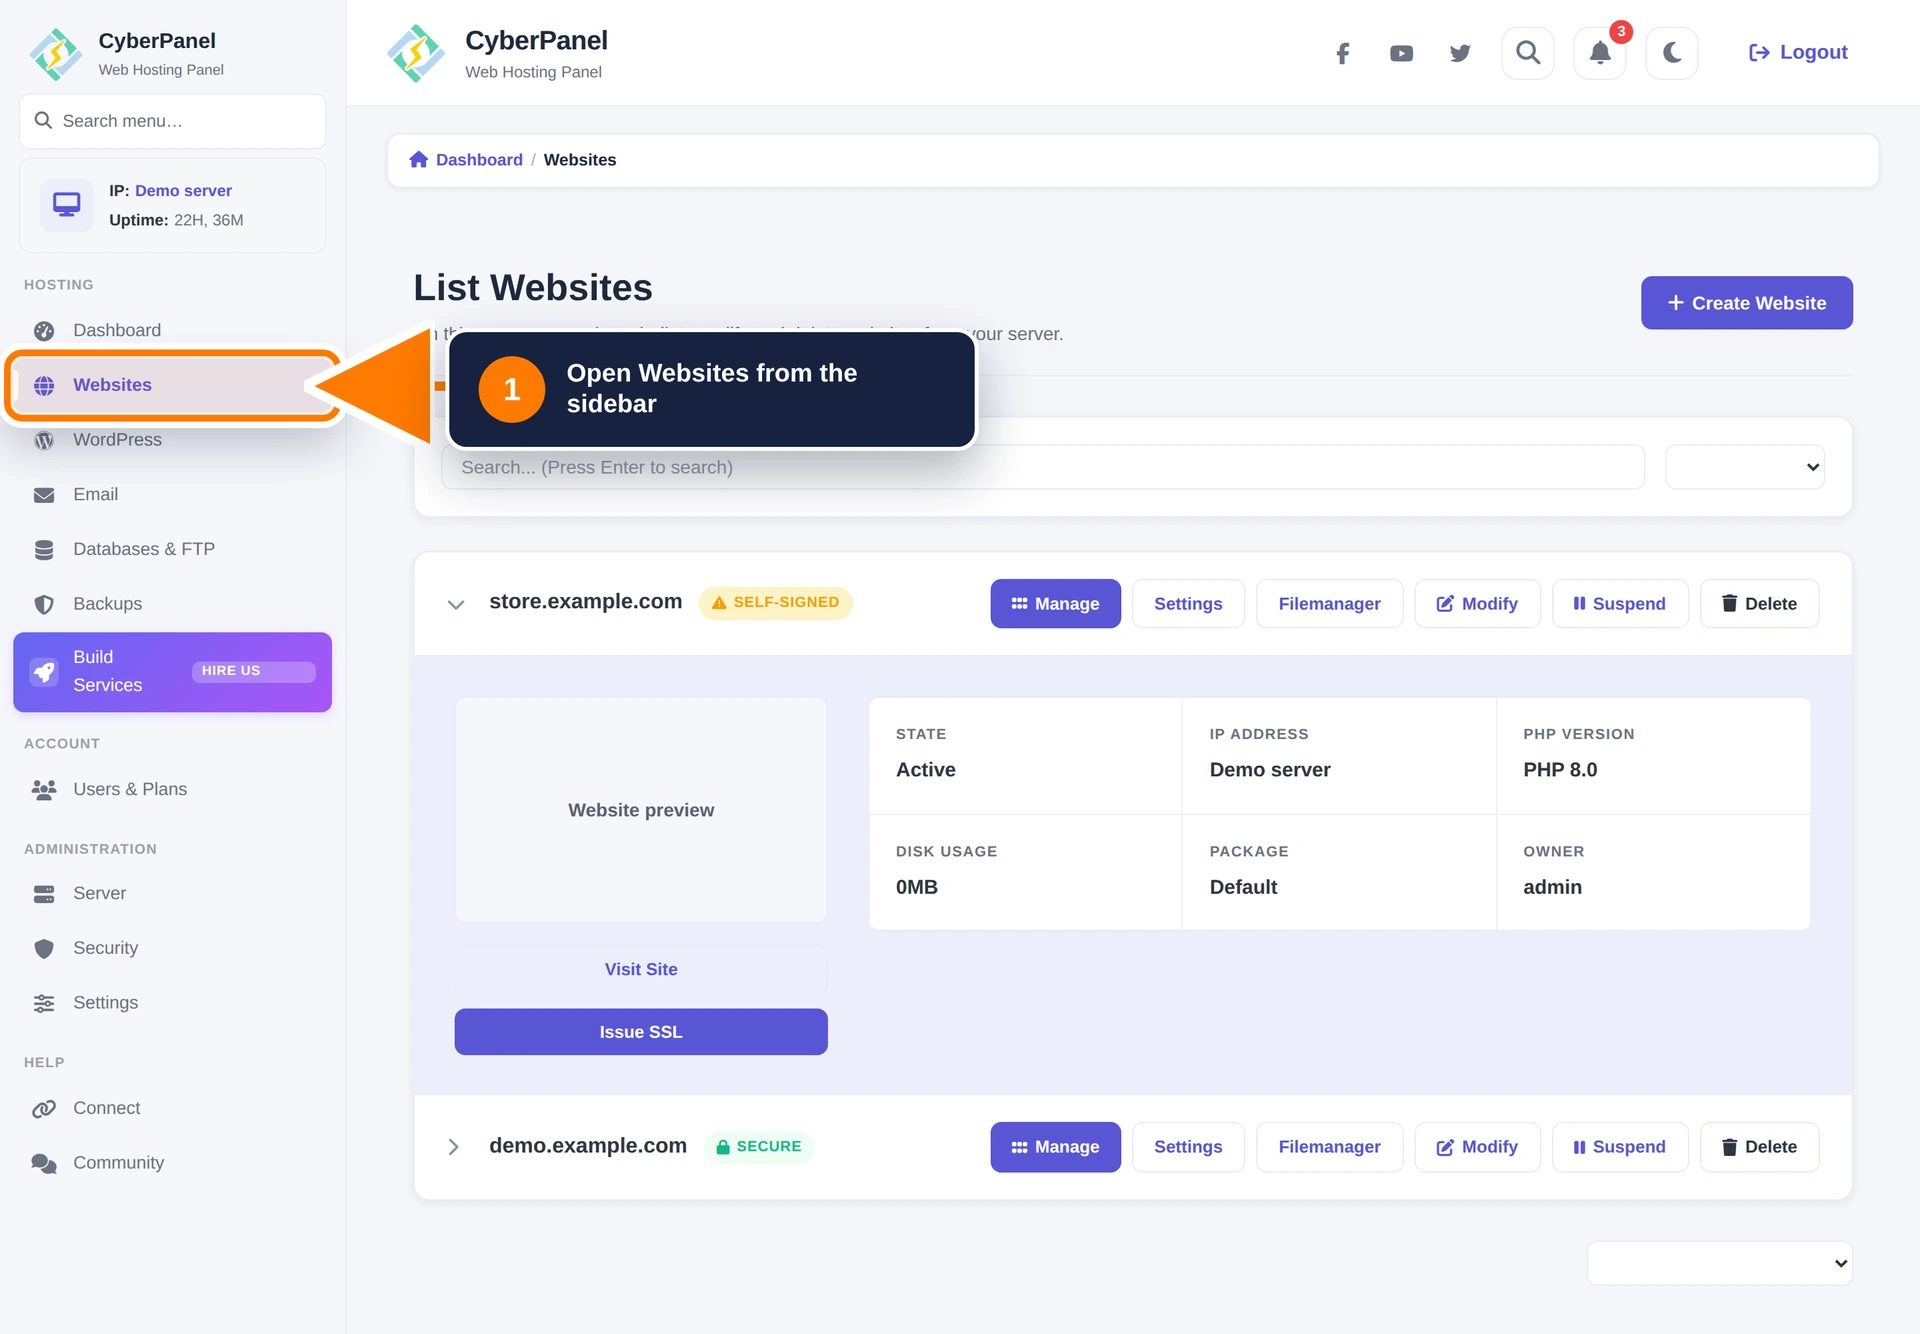
Step 1: Open Websites
Sign in to CyberPanel and select Websites in the left sidebar.
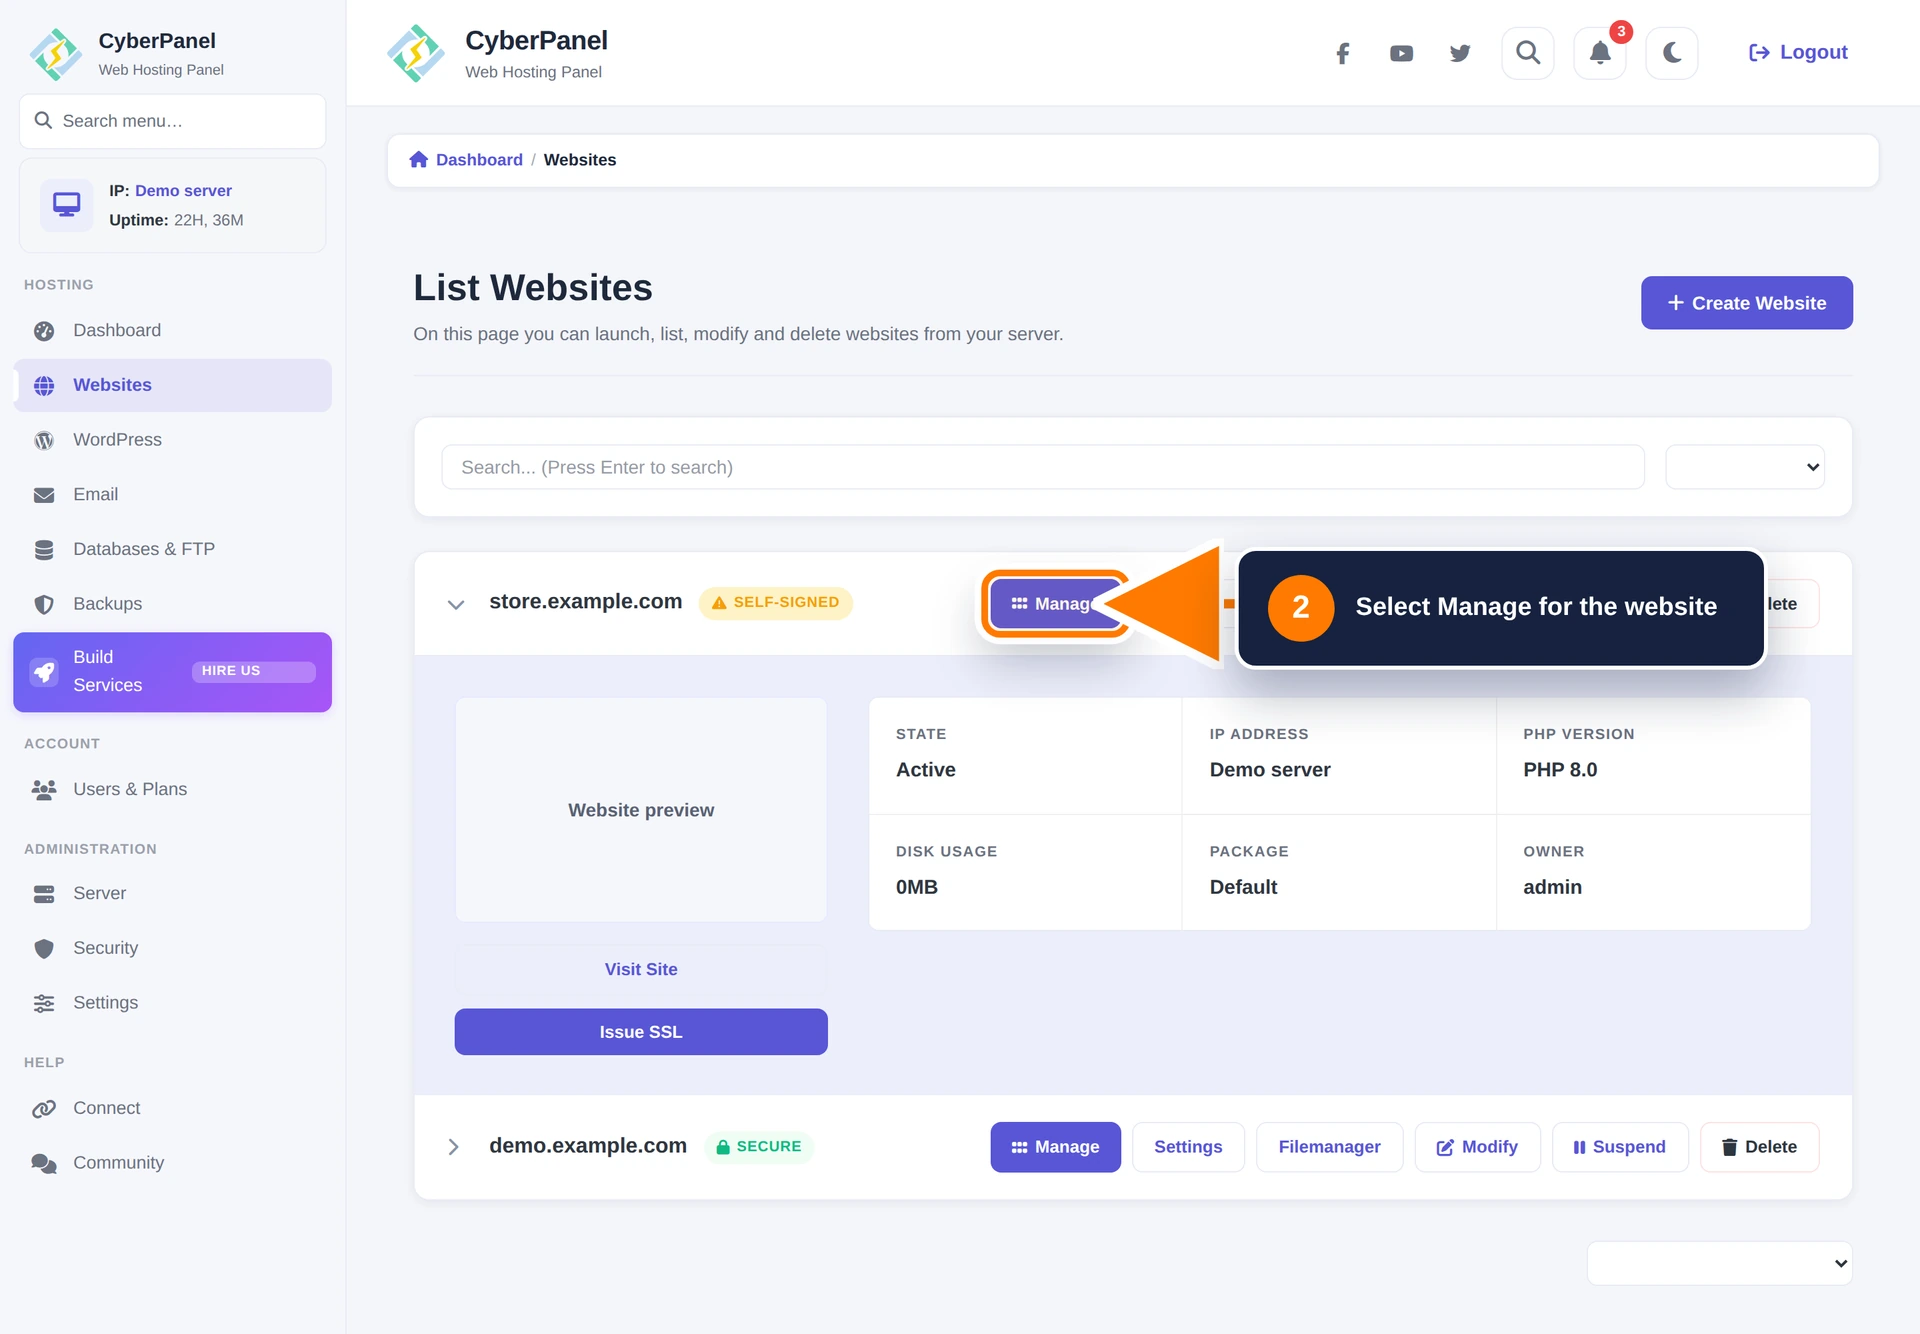
Step 2: Open the website workspace
Find the required domain and select Manage. The row also provides direct links to full settings, File Manager, modify, suspend, and delete actions. Expand the row to review status, IP address, PHP version, disk use, package, owner, and SSL state.
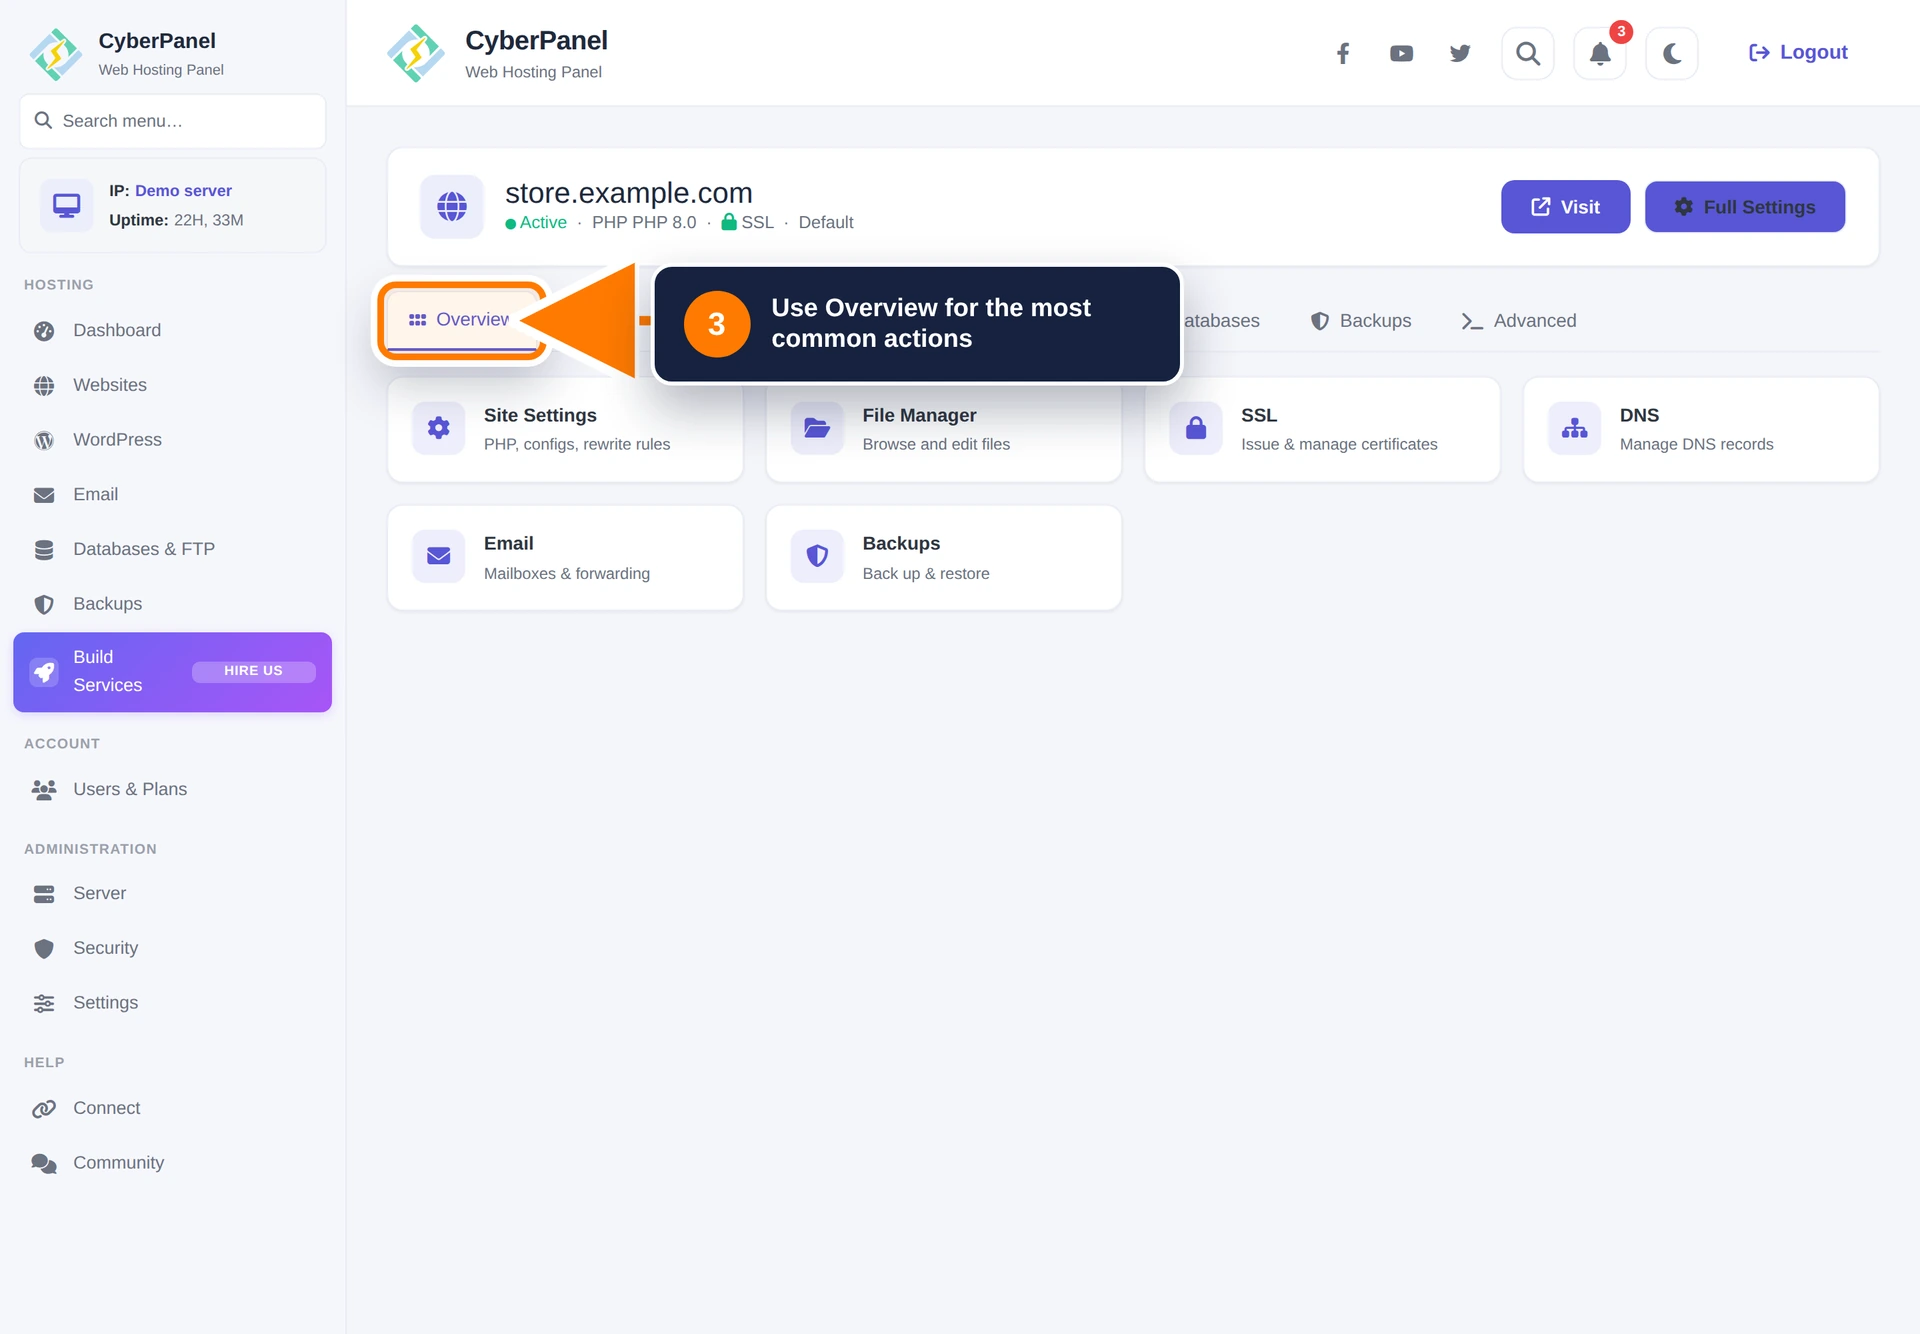
Step 3: Use the Overview
The header shows the domain, active or suspended state, PHP version, SSL state, and package. Select Visit to open the public website or Full Settings for PHP, configuration files, logs, rewrite rules, cron jobs, and other detailed settings.
The Overview tab contains shortcuts for Site Settings, File Manager, SSL, DNS, Email, and Backups.
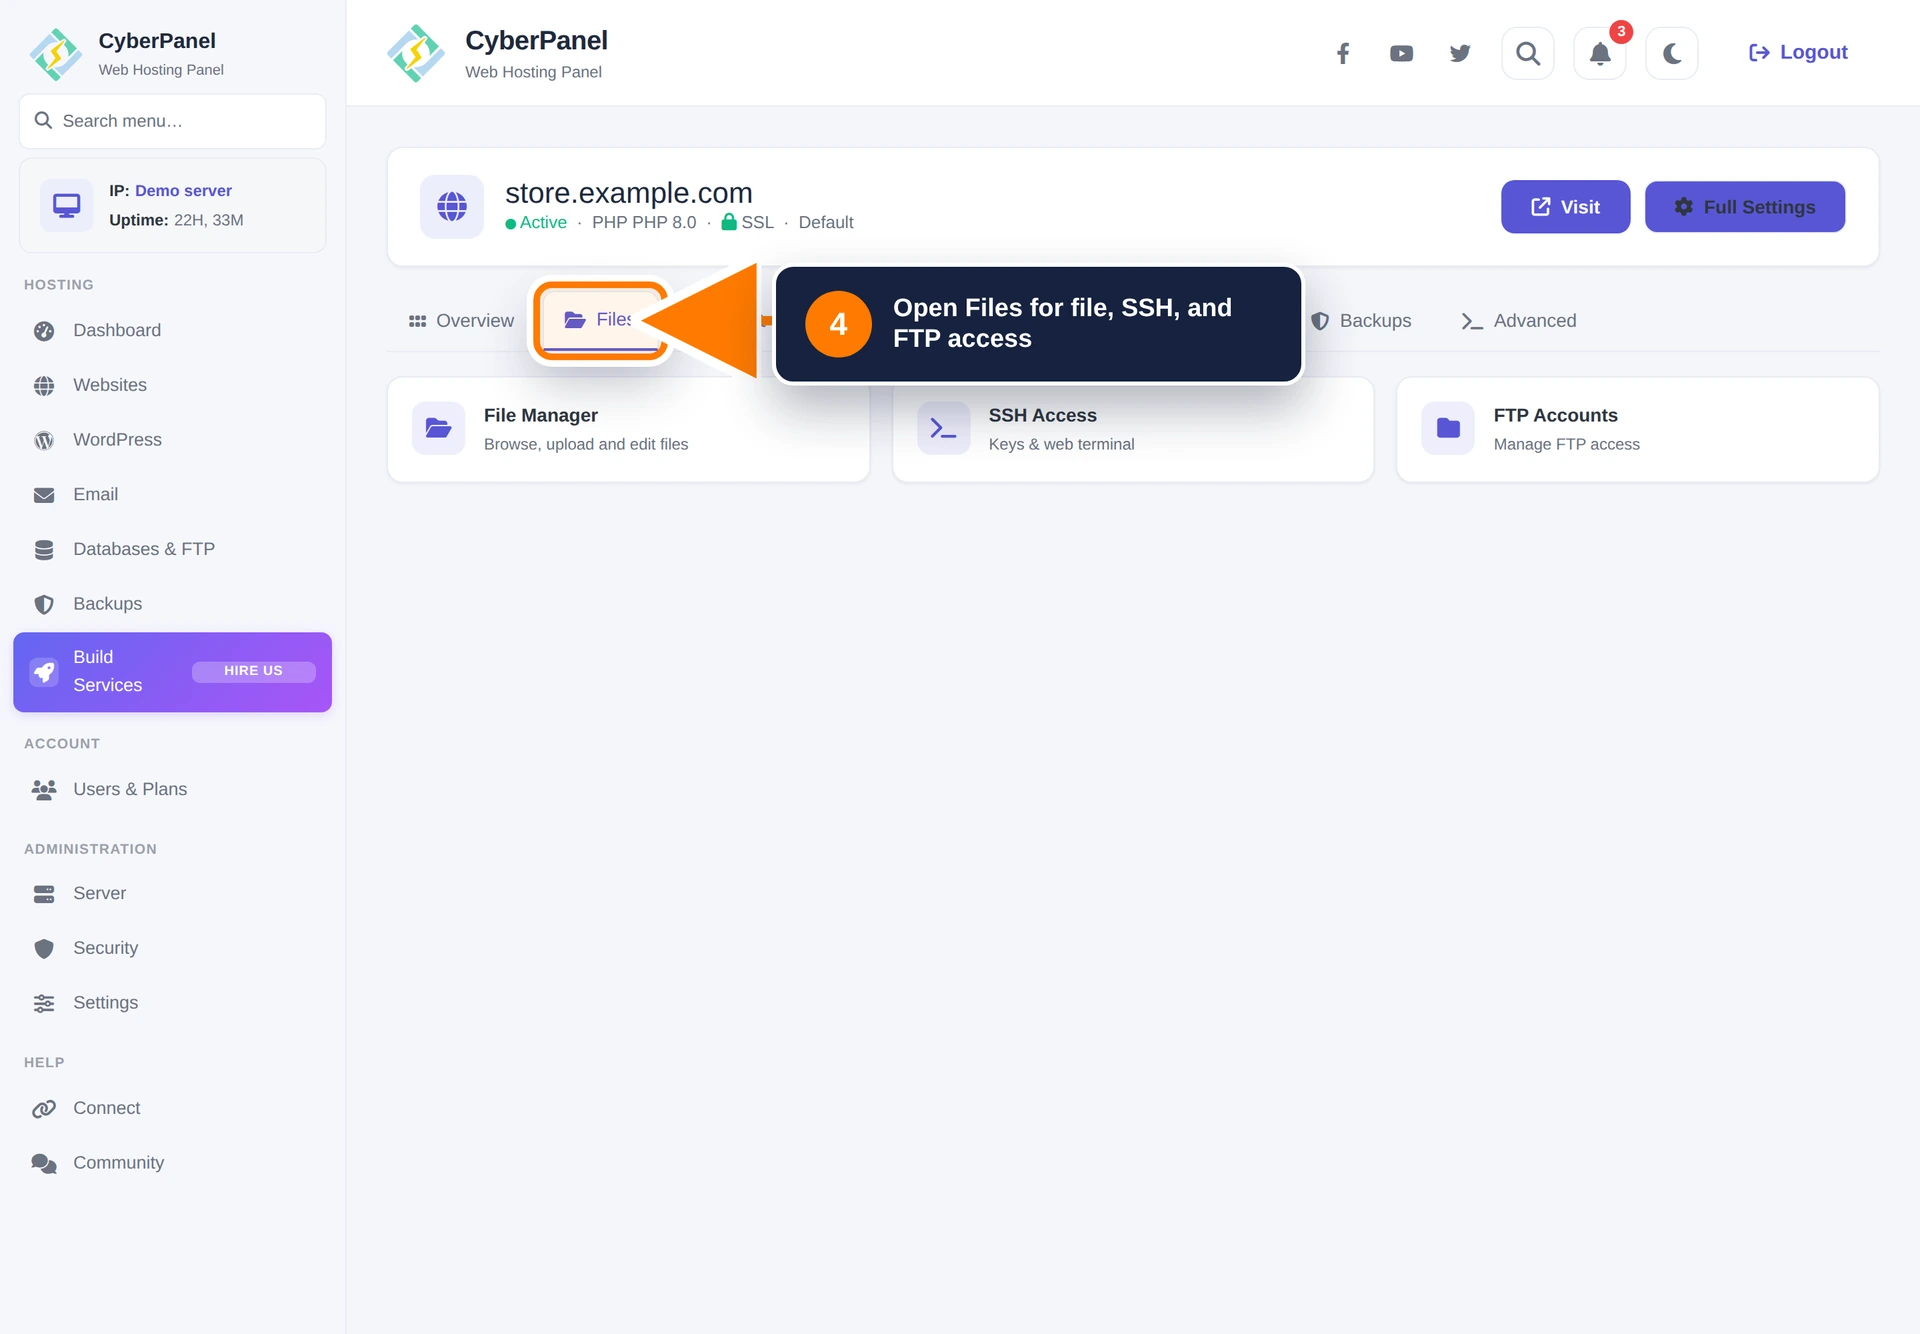
Step 4: Manage files and access
Open Files for these tools:
- File Manager: browse, upload, edit, move, and remove website files.
- SSH Access: manage SSH keys and open the web terminal where permitted.
- FTP Accounts: create and maintain restricted FTP access. See How to Create an FTP Account in CyberPanel.
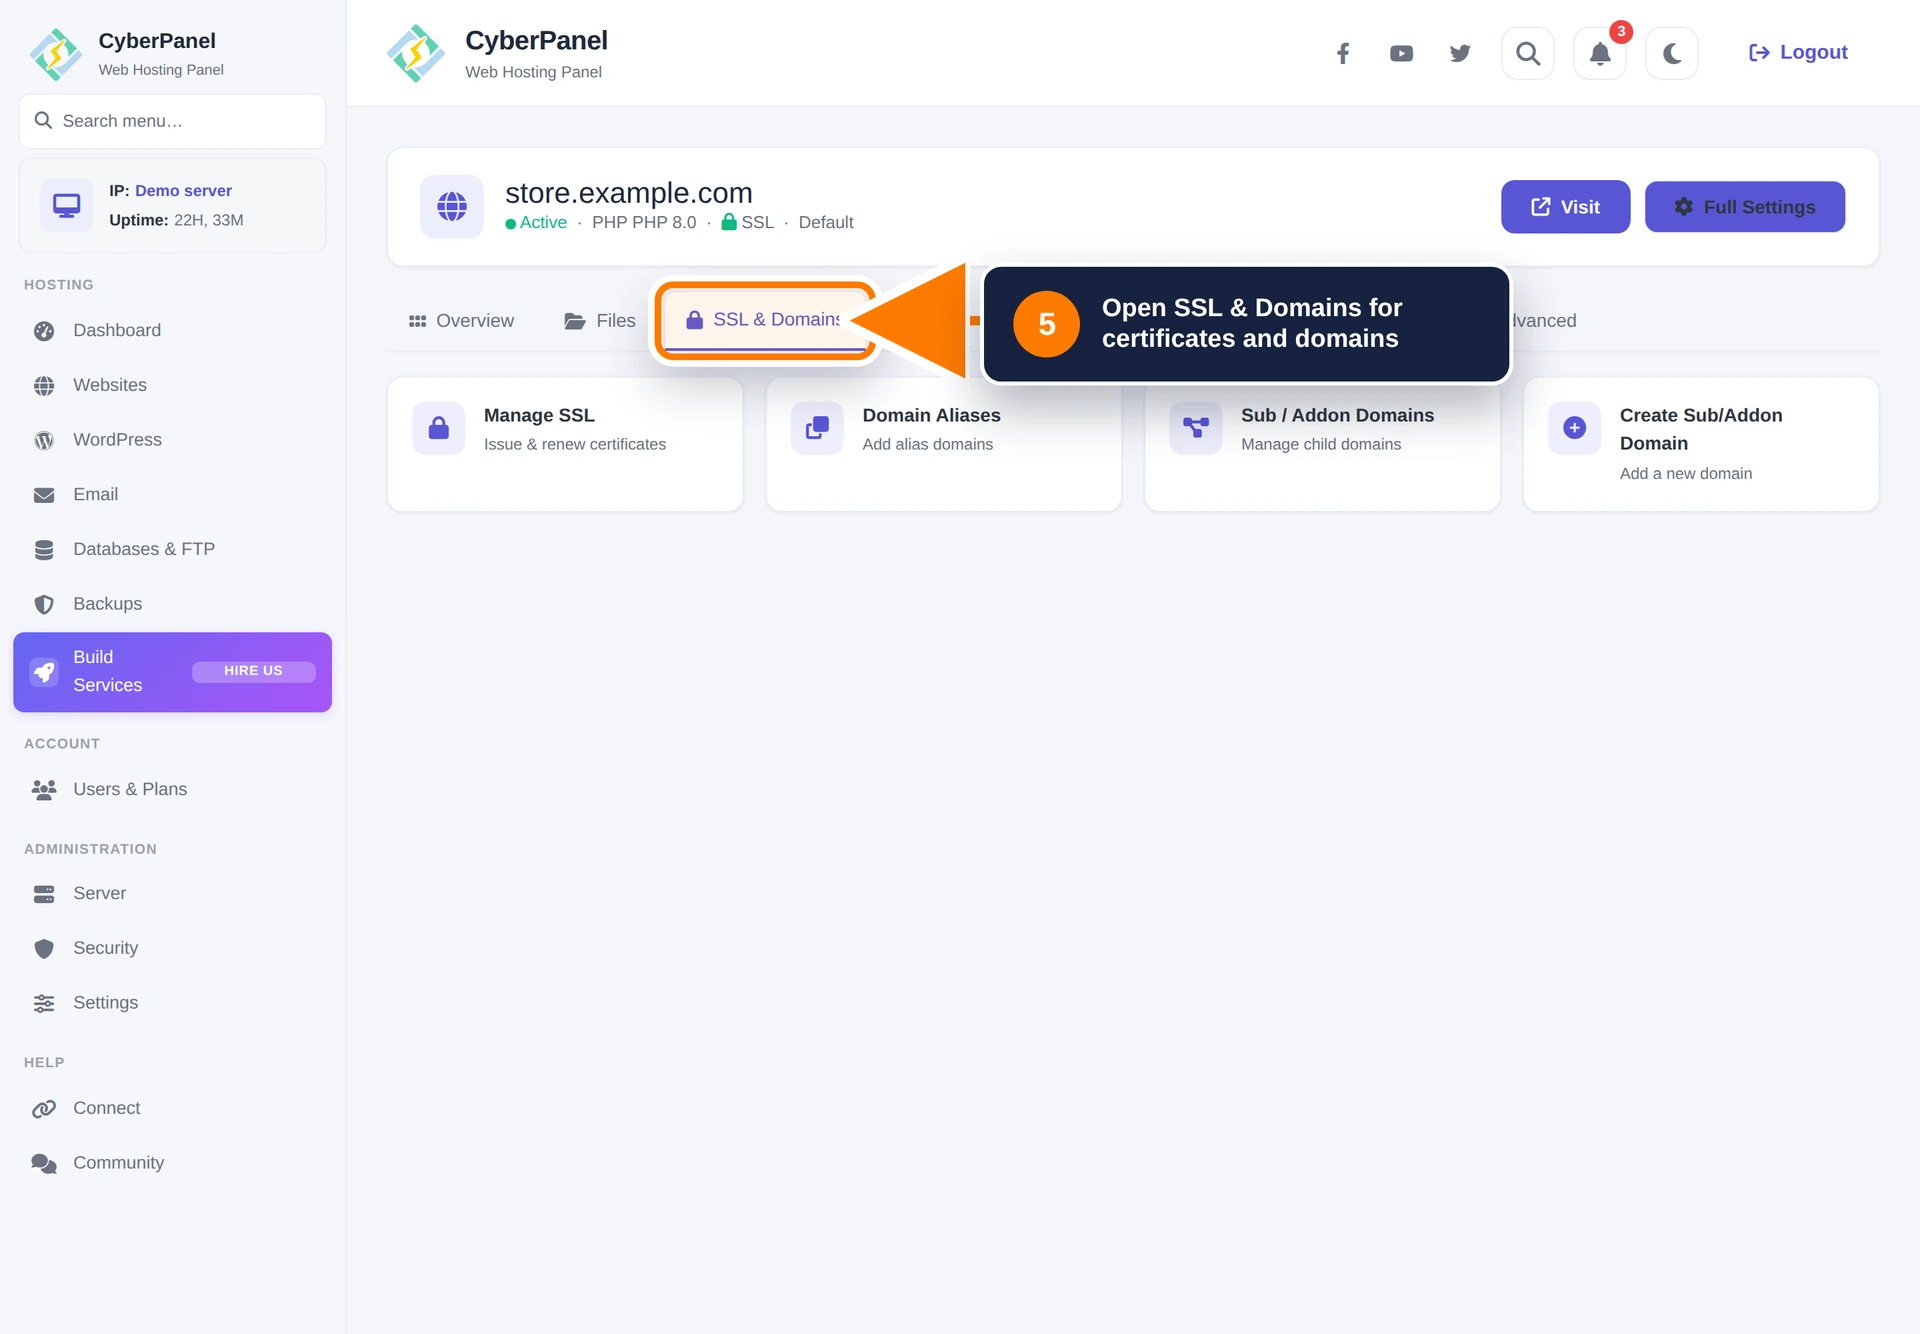
Step 5: Manage SSL and domains
Open SSL & Domains to issue or renew a certificate, add domain aliases, list child domains, or create a subdomain/addon domain. DNS for every added domain must point to the server before a trusted certificate can be issued.
For certificate requirements and troubleshooting, see How to Issue SSL in CyberPanel.
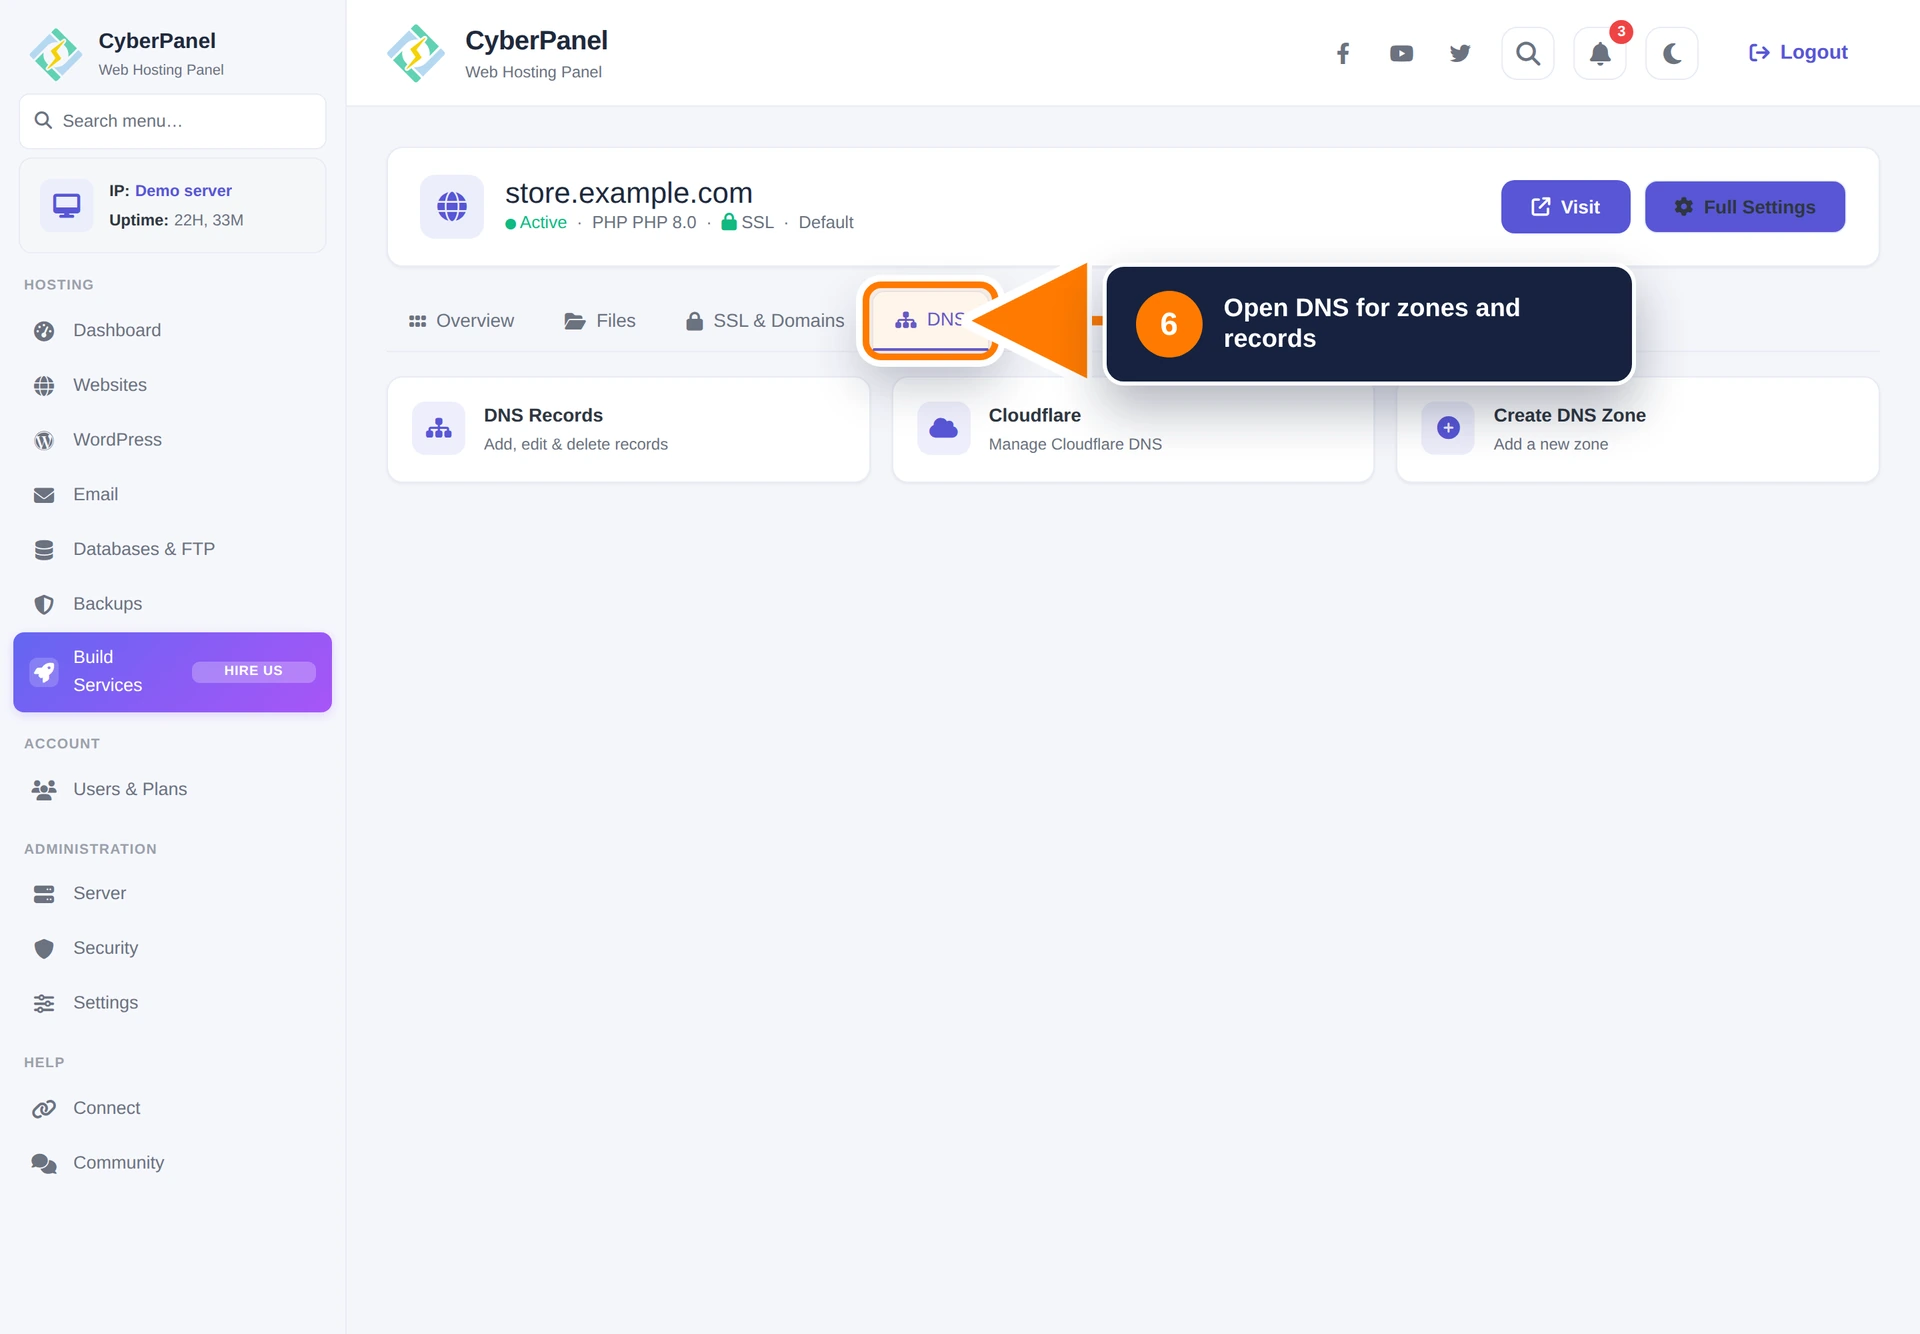
Step 6: Manage DNS
Open DNS to add, edit, or delete records in a CyberPanel DNS zone. The Cloudflare tool manages connected Cloudflare DNS, while Create DNS Zone adds a zone when one does not exist.
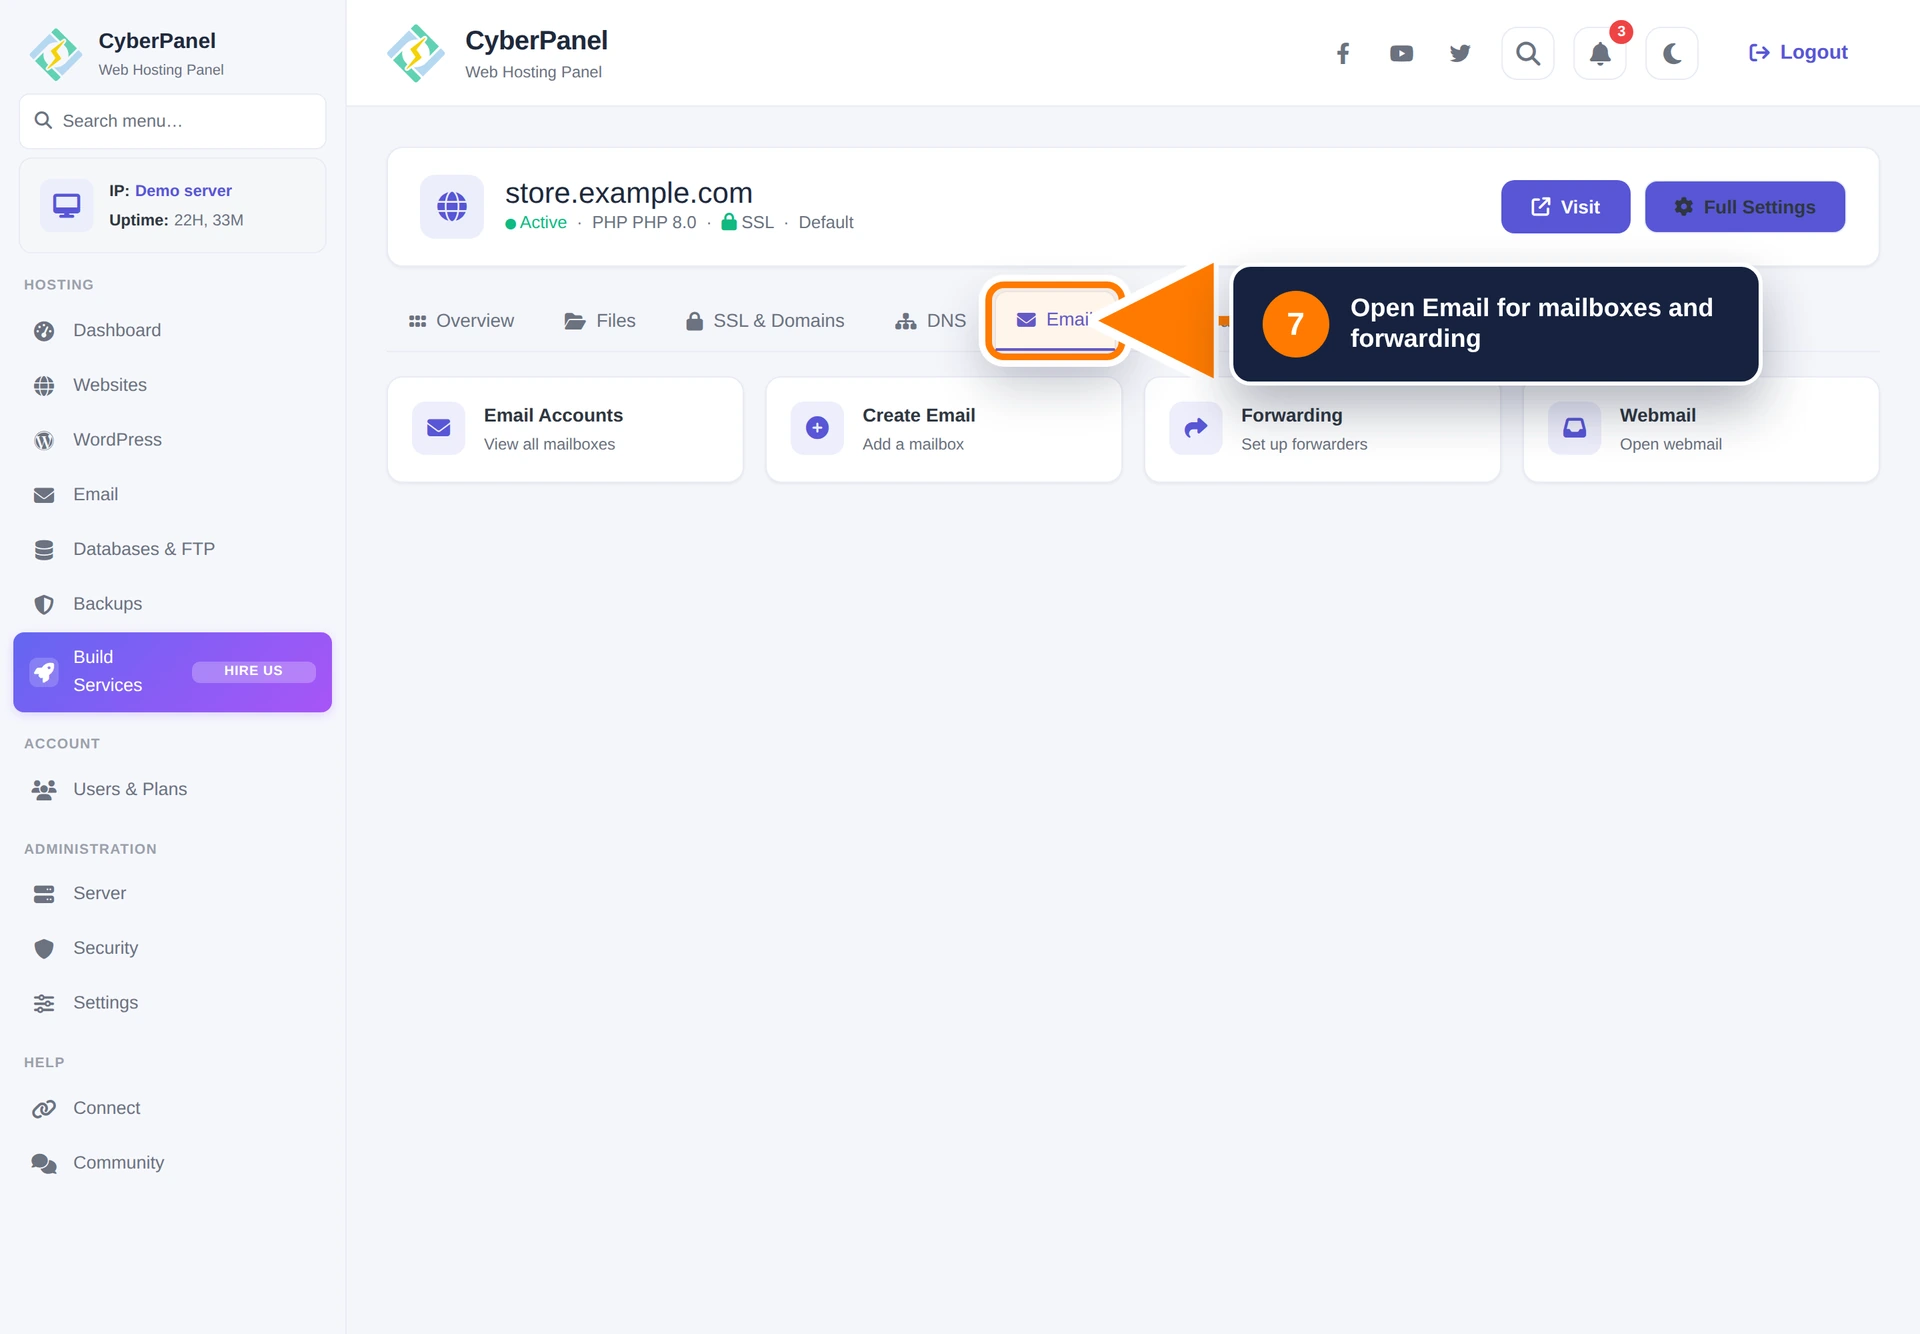
Step 7: Manage email
Open Email to view mailboxes, create an account, configure forwarding, or open Webmail. The mail domain and correct MX, SPF, DKIM, and DMARC records are required for reliable delivery.
Follow Email Management in CyberPanel for the mailbox workflow and mail troubleshooting entry points.
Step 8: Manage databases
Open Databases to list website databases, create a database and user, or launch phpMyAdmin. Export the database before a destructive schema or content change.
See Database Management in CyberPanel for the complete creation workflow.
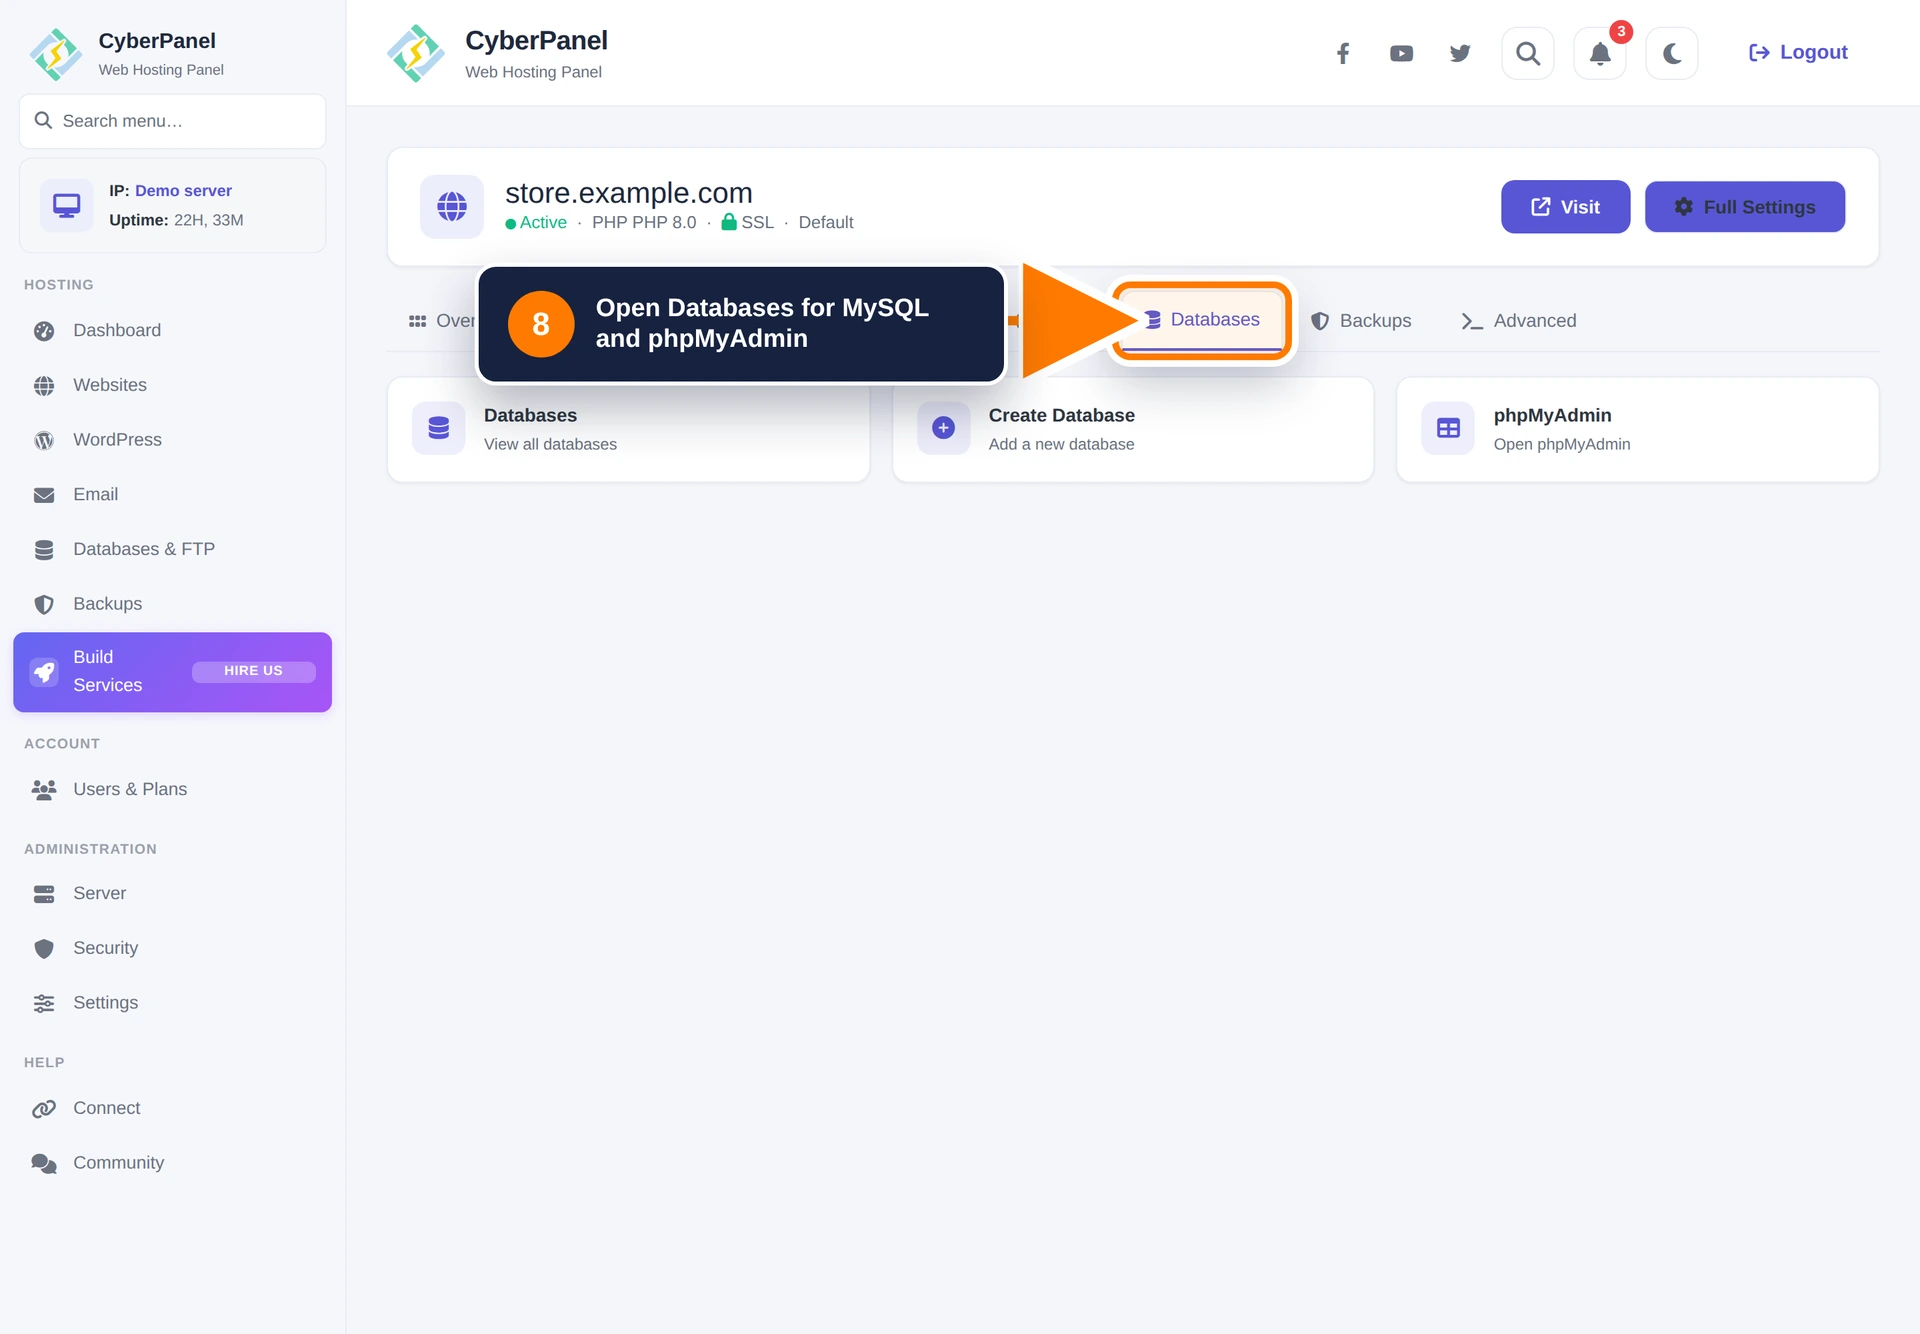
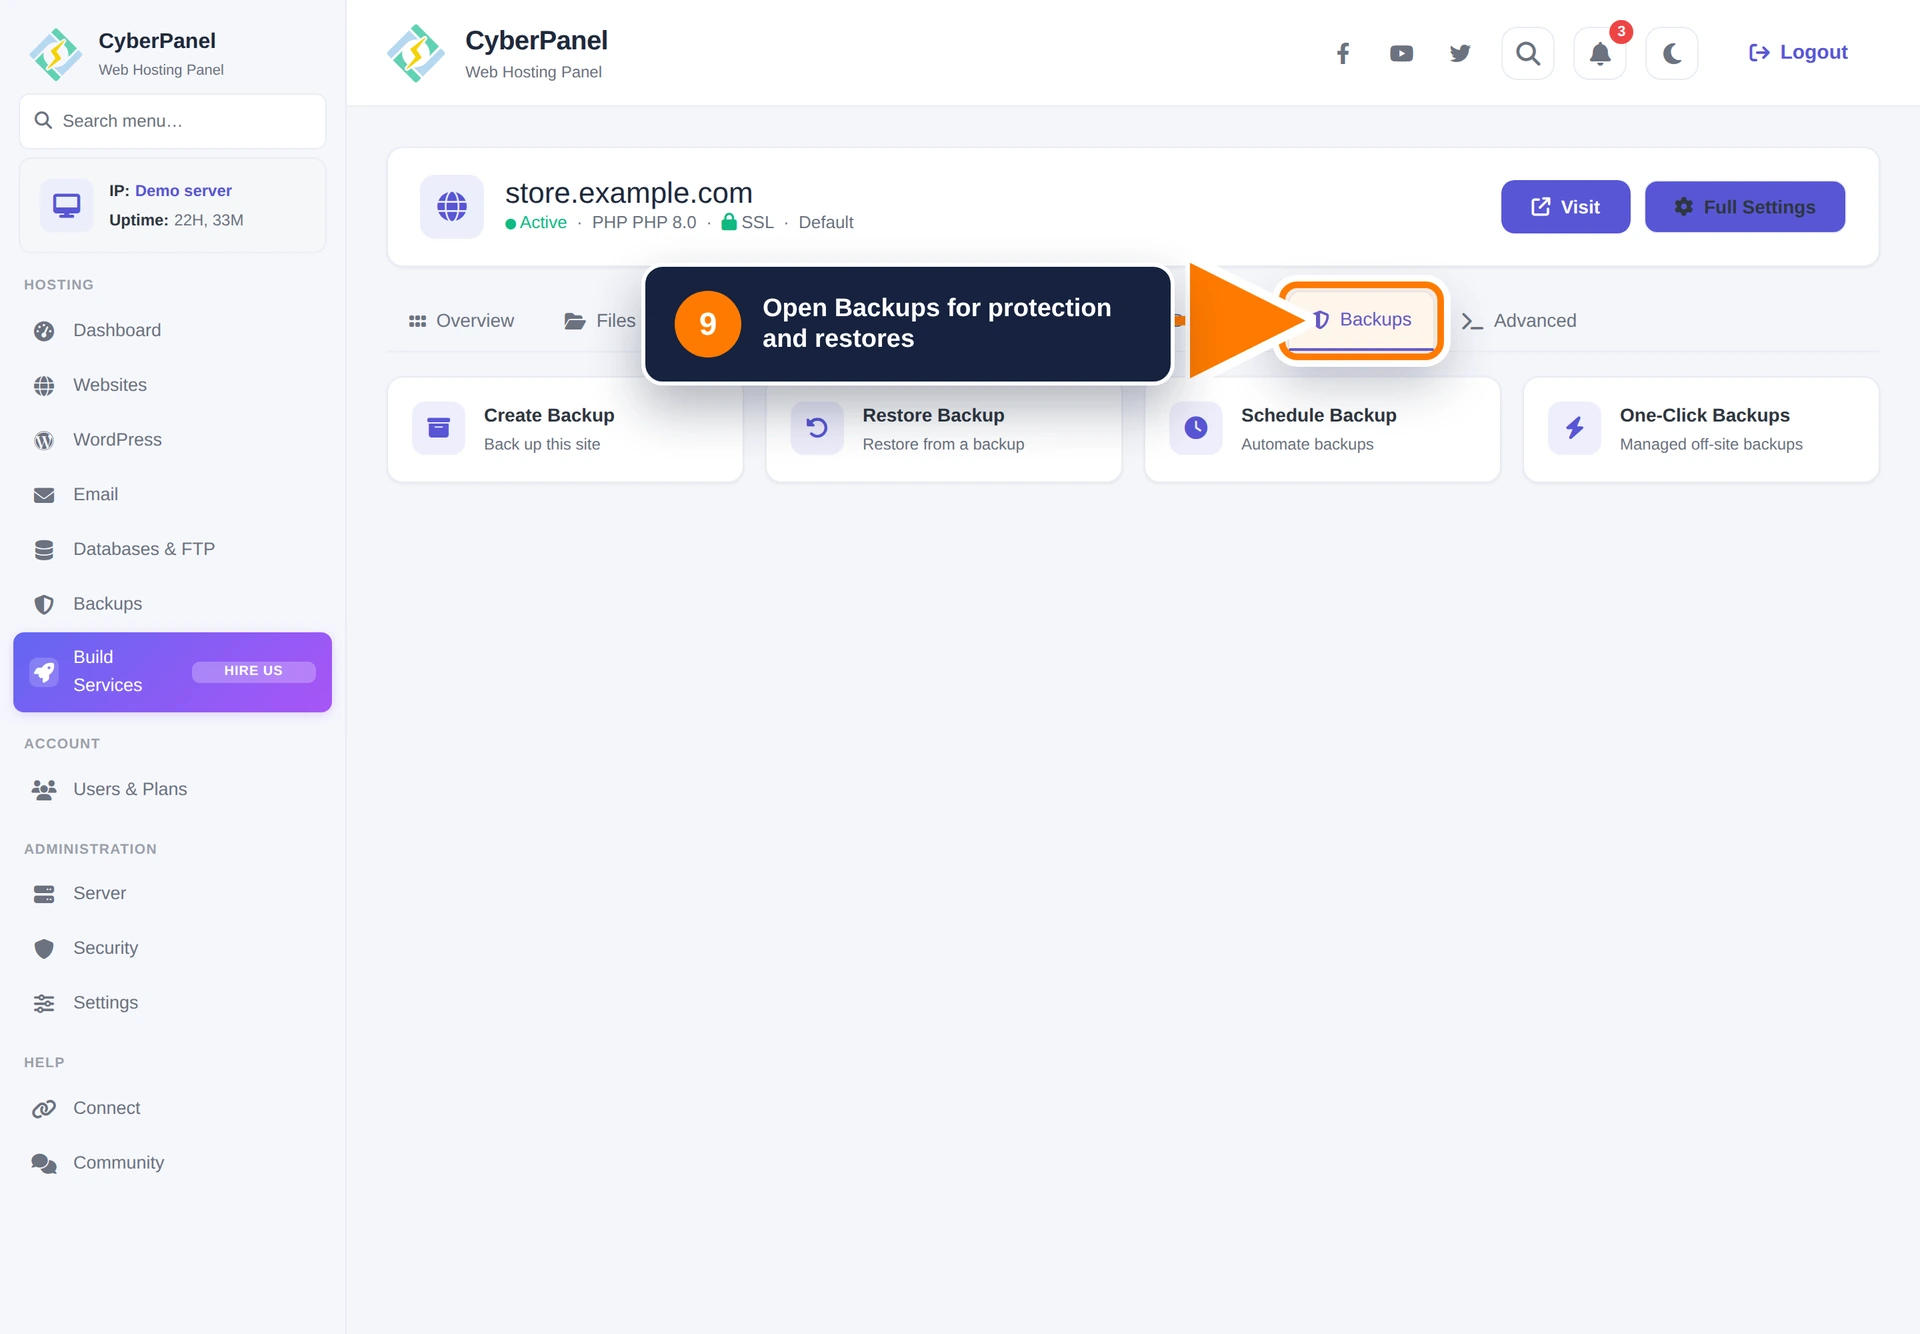
Step 9: Protect and restore the website
Open Backups to create or restore a backup, configure a schedule, or open One-Click Backups. Keep at least one current backup outside the server.
See Backup and Restore in CyberPanel before starting a restore.
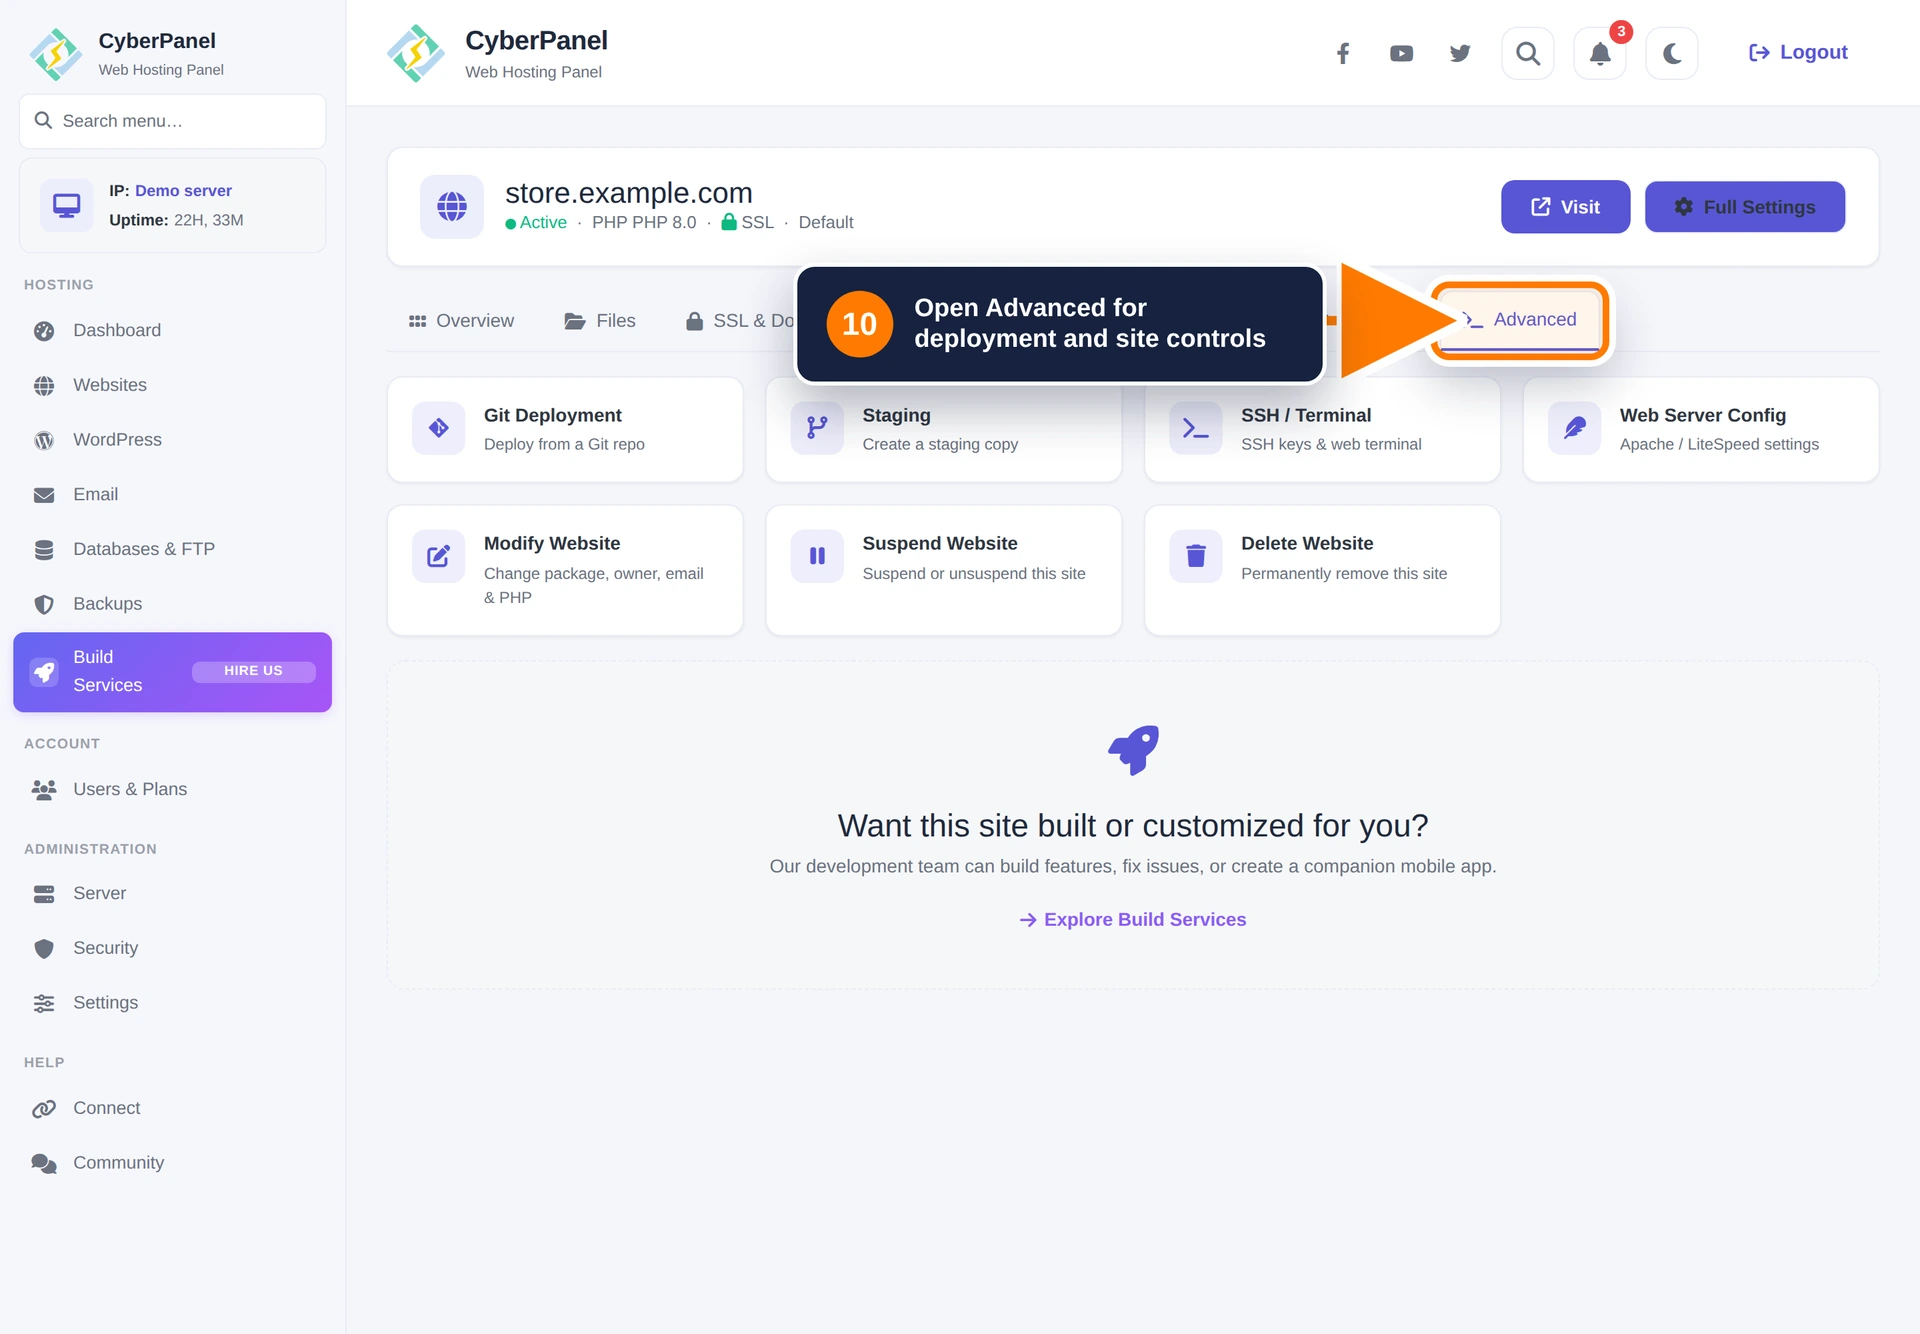
Step 10: Use advanced site controls
Open Advanced for:
- Git Deployment: connect and deploy from a Git repository.
- Staging: create a testing copy before changing the live site.
- SSH / Terminal: manage keys and terminal access.
- Web Server Config: open the Apache/LiteSpeed manager available for the website.
- Modify Website: change package, owner, administrative email, or PHP version.
- Suspend Website: stop or resume public service without deleting its data.
- Delete Website: permanently remove the website.