Working with a local WordPress setup can also be more efficient compared to making alterations directly on a live website. Additionally, if you’re on the move or in an area with limited internet connectivity, having WordPress running locally allows you to keep working on your projects even without an online connection.
In this article, you will walk through the steps of how to install WordPress locally on Windows and Mac. Furthermore, I’ll delve into the system prerequisites and software installation procedures necessary to configure WordPress and gain access to the dashboard.
What is Local WordPress?
Local WordPress refers to a self-contained, offline development environment for WordPress websites that are hosted and run on your personal computer, typically using software like XAMPP, WAMP, MAMP, or other local server environments. It allows you to create, test, and modify WordPress websites without the need for an internet connection or hosting service.
Local WordPress installations are a valuable tool for WordPress developers, designers, and anyone who wants to experiment with or work on WordPress websites in a controlled and efficient environment before making changes to their live websites.
Benefits of Using a Local WordPress Setup
Here are some key characteristics and benefits of using a local WordPress setup:
Offline Development
Get exclusive access to all things tech-savvy, and be the first to receive
the latest updates directly in your inbox.
You can work on your WordPress website without needing an internet connection. This is particularly useful for developers and designers who want to experiment with changes or new features in a controlled environment.
Safe Testing
Since your changes are made locally, there is no risk of affecting your live website. You can experiment with themes, plugins, and code without worrying about breaking your site or causing downtime.
Speed and Efficiency
Local installations are typically faster than working on a live website because they don’t depend on internet speeds. This makes development and testing more efficient.
Privacy
Your local WordPress installation is not accessible to the public, providing privacy and security for your development work.
Backup and Restore
It’s easier to create backups and restore points for your local WordPress site, helping you revert to a previous state if something goes wrong during development.
Version Control

You can use version control systems like Git to track changes in your WordPress project more effectively.
Offline Work
As mentioned in your original question, local WordPress enables you to work on your projects even when you’re offline or in locations with limited internet access.
Training and Learning
It’s an excellent environment for beginners to learn and practice WordPress development or for experienced developers to test new ideas.
Prerequisites
Here are the prerequisites your computer needs to meet in order to run WordPress on a local server, whether you’re using Windows or Mac:
Hardware Specifications
- A minimum of 4GB of RAM and at least 1.5GB of available disk space.
Software Specifications
- PHP version 7.4 or higher.
- MySQL version 5.6 or newer OR MariaDB version 10.1 or newer.
- Support for HTTPS (SSL/TLS).
- A local server environment like Apache or Nginx.
Please note that these requirements represent the bare minimum. For larger websites or customized setups, it is advisable to have more disk space available.
Setting up WordPress on Windows
To install WordPress on a Windows operating system, you should proceed by setting up and configuring a virtual host on Windows 10 through the use of XAMPP. It’s important to note that you have the option to choose either XAMPP or WAMP based on your personal preference. However, in this guide, the installation process using XAMPP will be demonstrated.
Step 1: Installing XAMPP
Prior to WordPress installation, it’s essential to establish the correct environment on your Windows machine. This entails setting up a server-database combination, featuring Apache as the web server and MySQL as the database system. After successful installation and configuration of XAMPP, you’ll be prepared to proceed with the WordPress installation.
Begin by visiting the XAMPP download page and selecting the option compatible with the most recent PHP version.

After the download is complete, execute the installer to install XAMPP on your local system.

The installation will take a little while to complete.

Following the installation, initiate the XAMPP control panel to inspect and configure the status of Apache and MySQL. In the XAMPP control panel, be sure to enable the checkboxes for Apache and MySQL, as these components are vital for the local installation of WordPress.
Step 2: Local Installation and Configuration of WordPress
Install WordPress setup from the official website. Here is the link.
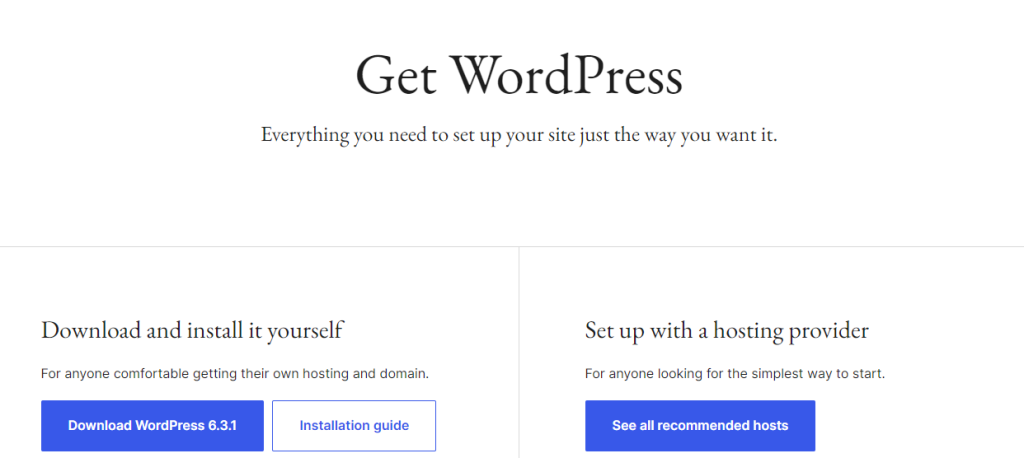
To begin the process, extract WordPress from the downloaded zip file by simply right clicking and clicking Extract All. After extraction, move the extracted WordPress folder to the /htdocs folder located within your XAMPP directory. After this navigate to the resulting project directory. It’s essential to ensure that the Apache and MySQL services in the XAMPP control panel are running smoothly.
Once these services are up and running, proceed to visit the phpMyAdmin portal by clicking on admin from the XAMPP control panel, where you can create the necessary database for your brand-new WordPress website.
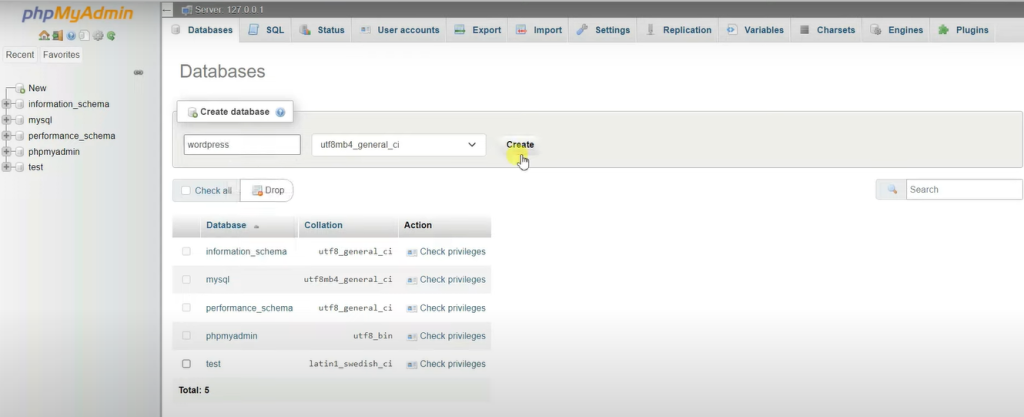
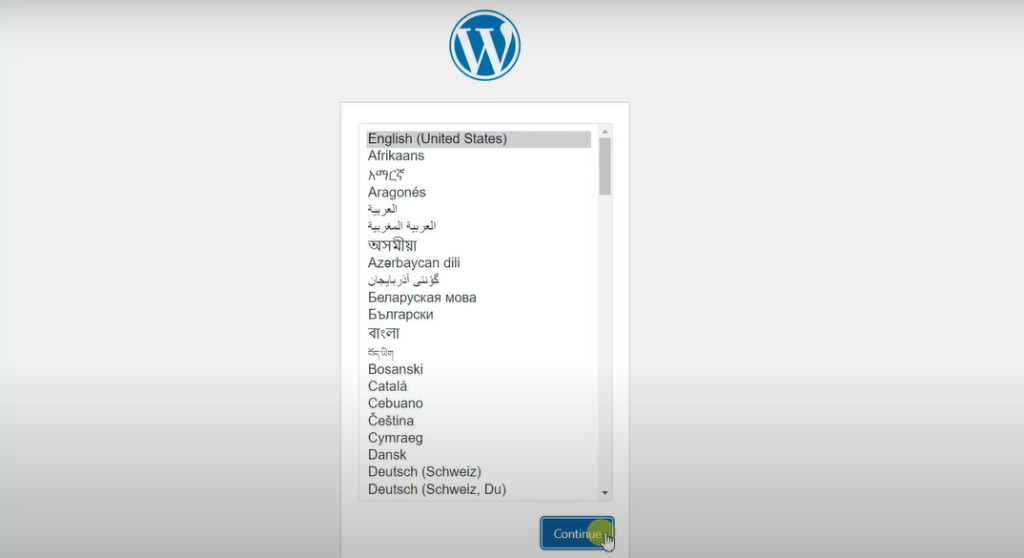
Upon visiting phpMyAdmin select new from the left side menu enter the database name and click create. Now open a new tab on the browser and type localhost/wordpress. Replace WordPress with the name of your database. The below page will appear. Click continue.
Launch your chosen code editor and access the wp-config.php file. In this file, input the database credentials (database name, username, and password) that match the ones you’ve configured in the XAMPP control panel.
Now enter the database name that you created in XAMPP control panel, username, password (it can be kept empty), database host, and table prefix, and click submit.

Click on run the installation and the installation will start for WordPress. Now enter the site title, username, password, and email, and click Install WordPress.

Now you can simply enter your username and password and log in to your WordPress account. These are the necessary steps to successfully install WordPress on your Windows computer for local development.
Setting up WordPress on macOS
For Mac users, the option to utilize WordPress locally on your Mac system is also available. Similar to the Windows setup, you’ll need to configure a stack for local WordPress operation. While the steps may vary slightly, the fundamental process of working with WordPress on a Mac follows the same overarching principles.
Step 1: Installing MAMP
Rather than XAMP, MAMP will be installed from the official website to establish a web server and database for your WordPress setup. Proceed to install MAMP by executing the installation wizard. While you might encounter an option to install the Pro version, it’s important to note that this step is optional; you can begin with the free version.

After the installation process is complete, navigate to the MAMP controller and initiate the server. Click Start.

Once the server is operational, click on the Tools menu to access phpMyAdmin.

Step 2: Local Installation of WordPress on Mac OS
Install WordPress setup from the official website on Mac OS.

Similar to the Windows procedure, starting the process on Mac involves extracting WordPress from the downloaded zip file by right-clicking and selecting “Extract All.” Once the extraction is complete, transfer the extracted WordPress folder to the roots folder found within your MAMP directory.
With these services running, you can then access the phpMyAdmin portal by clicking on Tools menu at the top within the MAMP control panel. Here, you can create the necessary database for your freshly set up WordPress website. Include the database name, and proceed to the wp-config.php file to input the database credentials.
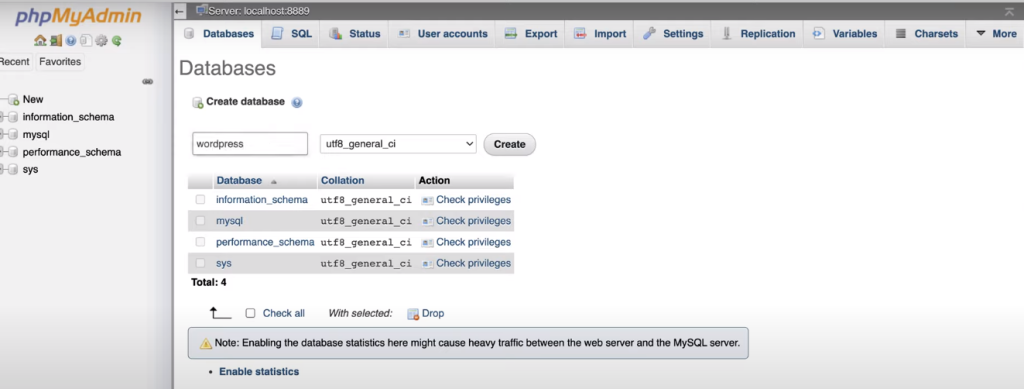
Select new from the left side and enter database name and click create.
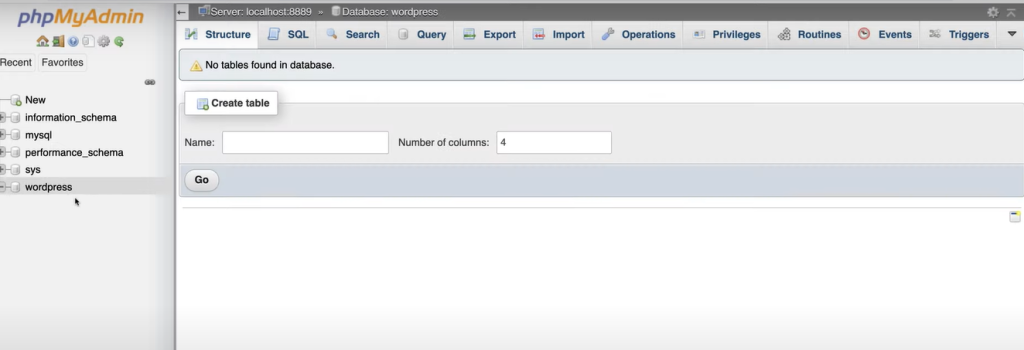
This is going to give a blank database, where we are actually going to install WordPress.
Next, open a new browser tab and enter localhost/WordPress, replacing WordPress with the name of your database. You’ll be directed to the following page; simply click on continue.
Now enter the database name created in MAMP control panel , username and click submit. Now run the installation.

Now enter the required details. This includes site title, username and password. Click install WordPress.

You can now proceed to enter your username and password to log in to your WordPress account. These steps are essential for a successful WordPress installation on your Windows computer, enabling local development.
How to Fix Common Errors in Local WordPress Installation?
Installing WordPress locally provides an excellent environment for development and testing without affecting your live website. However, like any software installation, it’s not uncommon to encounter some hiccups along the way. In this guide, we’ll explore common errors that users might encounter when setting up WordPress locally and provide solutions to address them.
Port Conflicts
Sometimes, other software on your computer may be using the same ports as your local server (e.g., Apache or MySQL), leading to conflicts. To resolve this, you can change the port numbers in your server configuration files (httpd.conf for Apache) to ones that are not in use.
Database Connection Issues
Problems with connecting WordPress to the local database can occur. Ensure your database credentials in the wp-config.php file match the settings in your local database management tool (e.g., phpMyAdmin). Also, make sure your MySQL server is running.
Missing or Corrupted Files
If you’re experiencing missing file errors, double-check that you’ve correctly placed WordPress files in the designated directory. Re-downloading and reinstalling WordPress can also resolve corrupted file issues.
Incorrect URL Settings
After moving WordPress from a live server to a local environment, you may experience issues with links and images. Use the “Search and Replace” tool in your database management tool to update URLs from the live site to the local site.
Memory Limit Exhaustion
WordPress may run into memory limit issues, especially when working with themes and plugins. You can increase the memory limit in the wp-config.php file or by modifying your PHP configuration.
FAQs- How to Install WordPress Locally on Windows
Is Local WordPress Suitable for E-commerce Development?
Yes, local WordPress installations are suitable for e-commerce development and testing. You can set up and customize e-commerce plugins and themes locally to ensure they work correctly before deploying them on a live website. However, keep in mind that e-commerce websites may have specific requirements and integrations, so thorough testing and consideration of payment gateways, security, and scalability are essential.
Can I Work on Multiple Local WordPress Sites Simultaneously?
Yes, you can work on multiple local WordPress sites simultaneously. Most local server environments, such as XAMPP, MAMP, and WAMP, allow you to create and manage multiple virtual hosts or directories, each hosting a separate WordPress installation. This enables you to work on various projects or websites independently on your local machine.
Is Local WordPress Secure?
Local WordPress installations are generally secure since they are not accessible from the internet by default. However, it’s still essential to follow security best practices, such as keeping software and plugins up to date, using strong passwords, and implementing security plugins, especially if you plan to migrate your local site to a live server.
Can I Access My Local WordPress Site from Another Device?
By default, local WordPress installations are only accessible on the computer where they are installed. If you need to access your local site from another device, you can configure your local server environment to allow remote access. However, this can introduce security risks, so it should be done cautiously in a controlled environment.
Can I Transfer My Local WordPress Site to a Live Server?
Yes, you can transfer your local WordPress site to a live server. The process involves moving your website files and the database to the live server. You’ll need to update the database settings and WordPress URLs to match your live server’s configuration. Many hosting providers offer tools and guides to simplify this process. It’s essential to back up your local site and test it on a staging server before migrating it to the live environment to avoid any disruptions.
Conclusion
In conclusion, harnessing the power of a local WordPress setup presents a world of opportunities for developers, designers, and WordPress enthusiasts alike. The advantages are clear – offline development, risk-free experimentation, enhanced efficiency, and the ability to maintain privacy and security.
Whether you’re a Windows or macOS user, this guide has provided you with a comprehensive roadmap for creating your local WordPress environment, complete with troubleshooting tips for common hiccups along the way. By leveraging this tool, you can confidently refine your WordPress skills, test new ideas, and create innovative websites—all while safeguarding your live projects from unintended disruptions.
Get to know our related content about How To Install WordPress Without Softaculous In Just 5 Minutes?
