Developers love Visual Studio Code; for them, it’s the best code editor, whether for Windows or macOS! The reason web developers, Programmers, or people working with Docker want to install Visual Studio Code on Ubuntu is because it’s lightweight, fast & feature-rich.
If you use a laptop or desktop with Ubuntu Linux, you can also run VS Code on your machine. It can be installed in several ways: as a snap package, via apt, through the Ubuntu Software Center, or by downloading it manually.
This guide will walk you through three simple methods to install Visual Studio Code on Ubuntu, using snap, APT, and the deb. package. Launching the Visual Studio Code on Ubuntu and troubleshooting issues explained! We cover everything today! So let’s begin!
Understanding Visual Studio Code on Ubuntu?
A Visual Studio Code, or VS Code for short, is a widely-used open-source code editor. Released in 2015 by Microsoft, Visual Studio Code has become a top choice among code editors for developers. It is cross-platform, built on Electron, and offers a marketplace with over 3000 extensions, providing linters, debuggers, and test runners for various programming languages.
With the VS Code Server extension, you can use the editor right from your web browser, which is perfect for working remotely.
Key features of Visual Studio Code include:
Like the desktop version, VS Code Server is packed with features such as syntax highlighting, built-in debugging, Git integration, and support for multiple programming languages.
- Intelligent Code Editing, which offers context-aware code completion and recommendations for quicker, more effective development.
- Great Support for Multiple Languages: A vast array of extensions for multiple programming languages.
- Integrated Version Control: Git repository and version control duties are simple to administer.
- Customizable Interface: An advanced user interface that can be customized with settings, themes, and extensions.
Prerequisites for Installing Visual Studio on Ubuntu
Before Installing Visual Studio Code Server on Ubuntu, just make sure you have:
- Ubuntu long-term support (LTS) should be installed on the server.
- A VPS should have 200 MB of storage space and 1 GB of RAM.
- To download installation files and dependencies, use a reliable internet connection.
- Software installation requires sudo or administrative access.
3 Installation Methods for how to Install Visual Studio Code on Ubuntu!
Method 1: Install Visual Studio Code on Ubuntu via Snap (Recommended)
Snap packages are applications that are packaged in a container. To install the VS Code snap package with all necessary dependencies, use this command:
sudo snap install --classic code- Type in your password.
- Let the app download.
To confirm the installation, check the version of the program:
code --versionMethod 2: Install Visual Studio Code on Ubuntu Using APT Repository
Another way to install Visual Studio Code on ubuntu is by using the APT package manager. Here are the steps to do it:
1. First, update your system repository to get the latest version of VS Code:
sudo apt update2. Visual Studio Code on ubuntu needs some package dependencies to work correctly. Use this command to install them, which also includes downloading necessary files:
sudo apt install software-properties-common apt-transport-https wget -yThis command will automatically handle any dependencies for VS Code.
3. To check the integrity of the VS Code package, import Microsoft’s GPG key and save it in the right place:
wget -qO- https://packages.microsoft.com/keys/microsoft.asc | gpg --dearmor > packages.microsoft.gpg<br>sudo install -D -o root -g root -m 644 packages.microsoft.gpg /etc/apt/keyrings/packages.microsoft.gpgThis command does not produce any output.

4. Next, add the Visual Studio Code repository to your system with this command:
sudo sh -c 'echo "deb [arch=amd64 signed-by=/etc/apt/keyrings/packages.microsoft.gpg] https://packages.microsoft.com/repos/code stable main" > /etc/apt/sources.list.d/vscode.list'This command also has no output.
5. To make sure you have the latest version of VS Code, update the package repositories again:
sudo apt update6. Now, install Visual Studio Code on Ubuntu using:
sudo apt install code7. Finally, check if VS Code is installed correctly by running:
code --versionIf everything went well, you will see the version of the program.
Method 3: Install Visual Studio Code on Ubuntu via .deb Package (Manual Method)
For users who have tried Snap and APT but didn’t work, prefer to install Visual Studio on Ubuntu manually.
Set up VS Code Server using a .deb package, you can uninstall it with APT by running:
sudo apt remove code-serverTo also remove any leftover configuration files, use:
sudo apt autoremoveFor those who installed it via a standalone release, you will need to manually delete the installation folder:
rm -rf ~/.local/lib/code-server-*If you made a symbolic link for easier access to the code-server command, remove it with:
rm ~/.local/bin/code-serverFinally, delete any remaining user data, settings, or configuration files:
rm -rf ~/.local/share/code-server ~/.config/code-serverHow to uninstall Visual Studio Code on Ubuntu
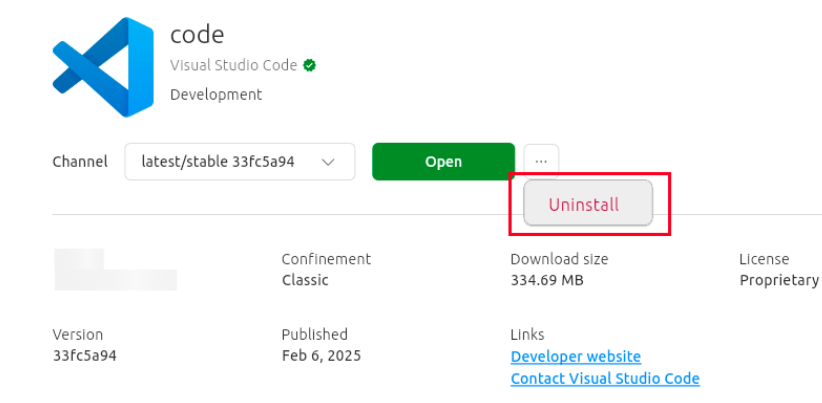
There are various reasons you might want to uninstall VS Code Server from Ubuntu, such as opting for a different code editor, reclaiming disk space, or reconfiguring your server setup.
The uninstallation method depends on the installation method used.
Hostinger VPS template
If you installed VS Code Server through Hostinger’s VPS template, you can remove it by selecting a different template.
Choose an alternative template or Linux distribution on the same Operating System page. Follow the on-screen instructions to finalize the change, which will automatically eliminate the current VS Code Server configuration.
Remember to back up your server data before changing templates, as this action will erase all existing data on the server.
install.sh script
For those who installed VS Code Server using the install.sh script, start by deleting its installation files:
rm -rf ~/.local/lib/code-server-*Then, remove any leftover configuration files:
rm -rf ~/.config/code-server.deb package
If you set up VS Code Server via a .deb package, you can uninstall it using APT:
sudo apt remove code-server
To clean up any leftover configuration files, run:
sudo apt autoremoveStandalone release
For installations made with a standalone release, you will need to manually delete the installation directory:
rm -rf ~/.local/lib/code-server-*If you created a symbolic link for easier access to the code-server command, remove it:
rm ~/.local/bin/code-serverFinally, delete any remaining user data, settings, or configuration files:
rm -rf ~/.local/share/code-server ~/.config/code-serverTroubleshooting Common Issues While Installing Visual Studio Code on Ubuntu
The VS Code team has worked with hundreds of developers to identify and fix shell or terminal configuration problems, and they offer suggestions and troubleshooting suggestions for users.
- Review your user settings, such as defaultProfile, profiles, cwd, environment variables, inheritance, automationProfile, splitCwd, and windowsEnableConpty. Use the @modified filter in the Settings editor to see if any settings have been changed.
- Change most Integrated Terminal settings directly in your user settings.json file.
- Test your shell in an external terminal or command prompt. Some launch issues may be related to your shell installation rather than VS Code itself.
- Make sure you are using the latest version of VS Code, especially if your shell is installed separately from your operating system. If your shell is on an older OS build, consider updating to the latest version.
- Turn on trace logging to capture a log when starting the terminal. This log can help identify issues since it records all arguments used to create the terminal process/pty.
1. Snap Installation Error:
To install Snap, use the following command:
sudo apt install snapd -y
2. APT Repository Key Issues:
In case of key errors, re-add Microsoft’s GPG key with this command:
wget -qO- https://packages.microsoft.com/keys/microsoft.asc | gpg --dearmor | sudo tee /usr/share/keyrings/packages.microsoft.gpg > /dev/null3. Dependency Issues with .deb Package:
Execute the following command:
sudo apt --fix-broken installTo fix issues with launching the Integrated Terminal in Visual Studio Code, follow these steps:
Some Additional Troubleshooting Tips!
- If you have launch problems related to your environment, ask for help on Stack Overflow.
- Use the issue reporter (Help > Report Issue) to inform the extension about the problem.
- If you think there is a bug, report it through the issue reporter (Help > Report Issue).
- For Windows 10 version 1809 (build 17763) or earlier, upgrade to Windows 1903 (build 18362) to access the new “conpty” backend.
- If the terminal is set to run only as an administrator, change the default terminal or adjust the terminal exe properties to allow it to run without administrator rights.
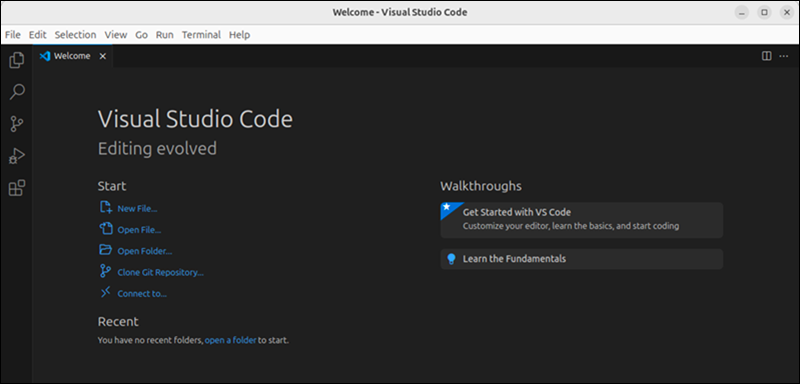
Launching Visual Studio Code on Ubuntu
Launching the Visual Studio on Ubuntu is pretty simple! To begin the program, follow these steps:
Click the Show Apps button and find Visual Studio Code in the list of apps.
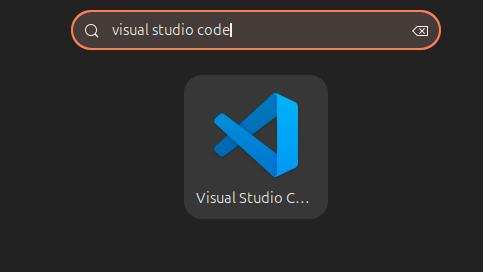
Click on the app to launch it.
Customize the look and add extensions for the programming languages you require.
Conclusion
This article explained the three best ways you can install Visual Studio Code on Ubuntu using Snap, APT, and .deb methods. We discussed detailed troubleshooting tips, each method provides additional control and flexibility, so select the one that suits your needs best.
Keep Visual Studio Code Server updated to enjoy the newest features, better performance, and improved security. We also suggest exploring extensions to further enhance your coding experience.
FAQ’s
1. How can I install Visual Studio Code on Ubuntu without using Snap?
You can use the APT repository or a .deb package (refer to Methods 2 and 3 above).
2. What are the differences between Snap, APT, and .deb installations?
- Snap: Easiest to use, updates automatically, runs in a sandbox.
- APT: Quicker, works well with the system.
- .deb: Requires manual setup, gives you full control.
3. Is it possible to use Visual Studio Code on Ubuntu without root access?
Yes! You can install it using Snap or a .deb package in your user directory.
4. How can I update Visual Studio on Linux Ubuntu?
For Snap:
sudo snap refresh codeFor APT:
sudo apt update && sudo apt upgrade code5. How can I completely uninstall Visual Code on Ubuntu and its configuration files?
Run:
rm -rf ~/.config/CodeThis will delete all settings and extensions.