By using Oxygen Builder, you can design your entire website visually, from the header to the footer, without needing to know any coding. You can make the WordPress site look exactly the way you want it to.
As soon as Oxygen is activated, the WordPress theme is disabled. Therefore, Oxygen won’t apply theme styles or layouts to your site while it is activated.
Drag-and-drop technology makes Oxygen appear relatively easy to use. The plugin is not without its learning curve, so it may be difficult to use for newbies. To get the hang of its operation, they will need some time.
Also read: Easily Remove WordPress Malware
Features of Oxygen Builder
- Importing and exporting: Move Oxygen-created designs from one site to another with ease.
- Updates that are safe: Because your design is saved in the database, upgrading Oxygen will have no effect on it.
- Search Engine Optimized: SEO plugins work in the same way that they do with standard WordPress themes.
- Code that is free of errors: Oxygen creates pages with clear, high-quality HTML and CSS.
- Compatibility with Page Builder: Oxygen can be used in conjunction with Elementor, Visual Composer, Beaver Builder, and other similar tools.
- There is no bloating: Only anything you put on your page is output by Oxygen. There’s nothing else. So there is no extra burden.
Advantages of Oxygen Builder
- Features that are extremely powerful
- Modules and templates are fantastic.
- For those who know how to use it, it is adaptable.
- Pricing that is reasonable
- Create popups as an option
- Content will be shown based on the conditions.
- Integrates with ACF and gives you complete control over your site.
- Templates should be kept in one place.
Disadvantages of Oxygen Builder
- Some third-party plugins are incompatible.
- Other builders are more client-friendly.
- There is a real challenge of learning to be aware of.
How does Oxygen Builder works?
Lets go through some basics first.
Drag and Drop
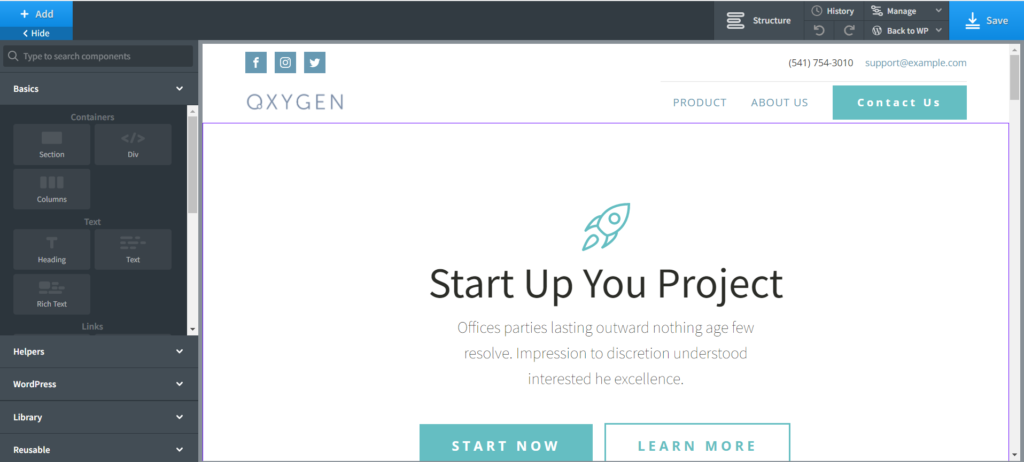
The drag-and-drop visual editor in Oxygen allows you to create and update page designs precisely as you see them. Click the +Add button on the toolbar to access the element browser. Simply click on an element to add it to your page.
Get exclusive access to all things tech-savvy, and be the first to receive
the latest updates directly in your inbox.
Primary and Advanced tabs
The Primary and Advanced tabs on the left sidebar display properties for the currently active element. The Primary tab shows general characteristics as well as properties specific to the element you’re editing. The Advanced tab gives a lot of options for modifying the element even more.
Select element from Structure Panel
Simply select an element from the page previewing or the Structure panel to activate it. When it comes to rearranging elements, you have two alternatives. Using the Structure panel or by dragging and dropping items. Using the Structure pane to place elements is sometimes more efficient. This can happen when dragging isn’t the greatest option due to a lengthy distance, when dragging huge elements, or when nesting is difficult.
Identify the Structure switch in the top hand corner of the window and click it to open the Structure panels. Then, to rearrange an element, select it and drag it around. The undo history feature of Oxygen works on a session-by-session basis. To put it another way, reloading and re-entering the builder will delete all undo history.
Div Element, Columns and Sections
The majority of the time, your pages will be made up of a number of Section elements. The rest of the elements will be contained inside these divisions. Column-based information is handled via the Columns element. You can choose from pre-defined column layouts or manually adjust the widths of individual columns.
The Div element is used to represents a set within a Section or Column so that the layout of those elements can be managed without affecting the arrangement of other elements within the Section or Column. The alignment and arrangement of the items placed inside Columns, Sections, and Divs can be controlled using settings.
SEO in Oxygen Builder
As you are already familiar with Oxygen Builder and RankMath, you can keep using them.
Additionally, Oxygen’s minimalist code provides good indexation and, most importantly, fast website loading times. Don’t take that for granted.
A site’s code is far less important than Keyword relevance and backlinks. If you are searching for every advantage available to conquer the SERP, having a clean code and a logical structure is vital. Moreover, because different post types can be pre-configured and saved as templates, uploading content is faster.
Pricing
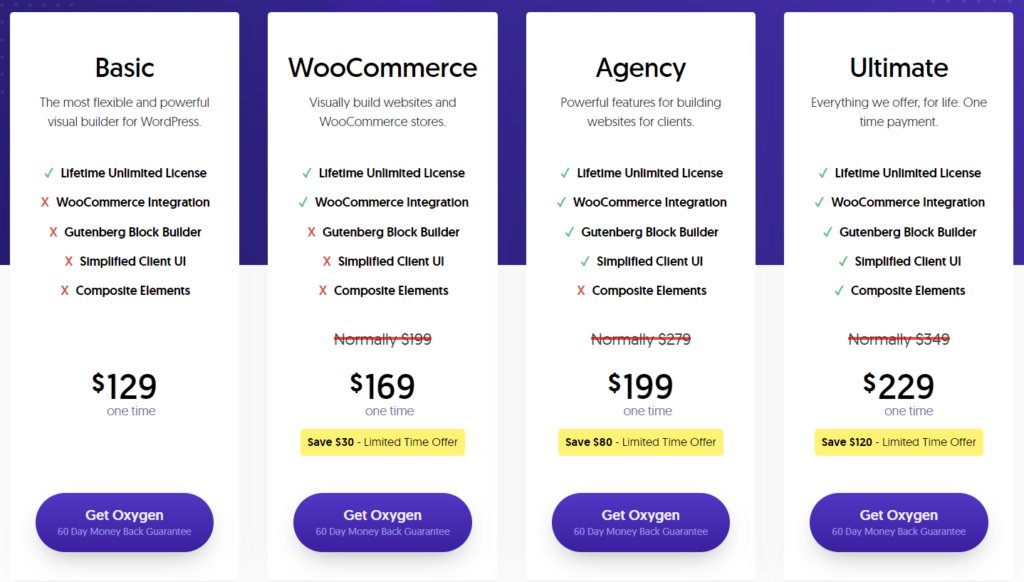
Oxygen’s affordability is another strong suit. Every other page builder charges an annual or monthly subscription. For the time being, Oxygen is available for a one-time fee of $99 for unlimited access. That’s fantastic math for a developer who can recoup his investment by selling websites created for it. However, even for a business, this is advantageous because there is no license charge, which means you save money annually.
Create a full-fledged site using Oxygen Builder in 20 minutes
Let see how we can use Oxygen Builder to create a complete website in WordPress.
Install Oxygen Builder
Open your WordPress Dashboard


Click on Plugin -> Add New from the left hand side menu

Click on Upload plugin

Add your Oxygen zip file and Install and Activate it

You will see Oxygen tab in the left hand side menu

Set your Design sets
Open your WordPress Dashboard

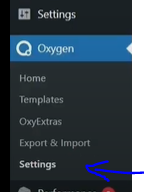
Click on Oxygen -> Settings from the left hand side menu
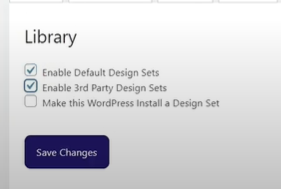
Click on Library tab from top

Enable Default Design Sets and Enable 3rd Party Design Sets and click Save
Check out our video to see how you can create your website from scratch using Oxygen Builder.
Conclusion
With CSS, JavaScript, and HTML knowledge, Oxygen is a great tool. If used to its maximum capability, it’s possible to create stunning websites. Especially if you’ve had bad experiences with other builders, you should give it a try.
