

In this comprehensive guide, we take you through a systematic journey of optimizing your VPS performance. From initial performance assessment to fine-tuning, we provide step-by-step instructions, expert tips, and best practices to ensure your VPS runs at peak efficiency. Whether you’re a seasoned administrator or new to VPS management, this guide equips you with the knowledge and tools to enhance your server’s speed, reliability, and overall performance. Elevate your VPS experience with this invaluable resource.
How to Assess VPS Network Speed?
When you’re managing a Virtual Private Server (VPS), one of the critical aspects to monitor and optimize is its network speed. The network speed of your VPS directly impacts the performance of your websites, applications, and overall user experience. In this comprehensive guide, we will walk you through the process of assessing VPS network speed, providing you with the tools and knowledge needed to ensure your VPS operates at peak performance.
Why Assess VPS Network Speed?
Network speed is a crucial factor for any online operation. Whether you’re running a website, an e-commerce store, or an application, your users expect fast and reliable network connectivity. A slow network can result in delayed page loads, decreased user satisfaction, and potentially lost revenue.
Assessing VPS network speed serves several essential purposes:
- Identifying Bottlenecks: By evaluating network speed, you can pinpoint any bottlenecks or performance issues that may be hindering your VPS’s connectivity.
- Optimizing User Experience: Faster network speeds lead to quicker loading times, ensuring a smoother and more enjoyable experience for your website or application users.
- Troubleshooting Issues: If you encounter network-related problems, assessing network speed can help you diagnose and resolve these issues promptly.
Steps to Assess VPS Network Speed
Let’s dive into the steps to assess VPS network speed effectively:
Selecting the appropriate tool for measuring network speed is essential. There are various online tools and command-line utilities available for this purpose. Some popular options include:
- Speedtest.net: A widely used online tool for testing network speed. Simply visit the website and click “Go” to initiate the test.
- iperf: A command-line utility that provides detailed network performance statistics. You will need to install iperf on both your VPS and a remote server to conduct the test.
- Fast.com: Another user-friendly online tool developed by Netflix for measuring download speed.
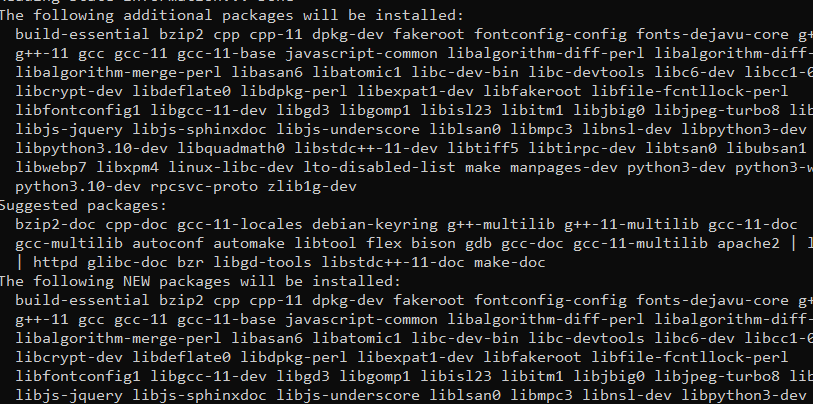
Installing Speedtest CLI on Ubuntu
Run the below command:
curl -s https://install.speedtest.net/app/cli/install.deb.sh | sudo bash sudo apt install speedtest
Installing Speedtest CLI on AlmaLinux / Rocky Linux / CentOS
Run this command:
curl -s https://install.speedtest.net/app/cli/install.rpm.sh | sudo bash sudo dnf install speedtestThe speedtest.net Feature
Following the installation, the speedtest.net functionality becomes accessible via the command line. It’s worth highlighting that Speedtest will automatically seek out the nearest server based on geographical proximity for conducting both download and upload assessments.
The command to perform the test is simple, speedtest:
Once the speedtest is finished, you’ll receive results resembling the following, which include details about the server you’ve connected to, as well as your download and, notably, upload speeds.
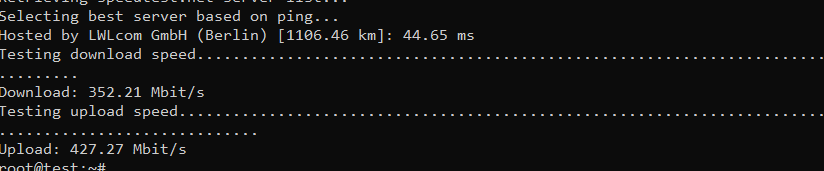
- Hosted by LWLcom GmbH (Berlin): This indicates the name of the company or organization hosting the server used for the speed test. In this case, the server is hosted by LWLcom GmbH in Berlin.
[1106.46 km]: This value signifies the approximate geographical distance between the testing location (your device) and the server in kilometers. In this instance, the server is located 1106.46 kilometers away from the testing location.
44.778 ms: This represents the latency or ping time, measured in milliseconds (ms), which is the time it takes for a small piece of data to travel from your device to the server and back. Lower ping times are generally better, indicating a more responsive and faster connection.
So, in summary, the line indicates that the speed test was conducted on a server hosted by LWLcom GmbH in Berlin, which is approximately 1106.46 kilometers away from the testing location, and the measured ping time was 44.778 milliseconds
- Download 315.14 Mbit/s: This figure represents the download speed, typically measured in megabits per second (Mbit/s) or Mbps. It indicates the rate at which data can be transferred from the internet to your device. In this case, your download speed is 315.14 megabits per second, which is a measure of how quickly you can receive data from the internet. Higher download speeds generally mean faster internet connections, allowing you to stream videos, download files, and browse websites more quickly.
- Upload 400.95 Mbit/s: This value represents the upload speed, also measured in megabits per second (Mbit/s) or Mbps. It indicates the rate at which data can be sent from your device to the internet. In this case, your upload speed is 400.95 megabits per second, indicating how quickly you can transmit data to the internet. A higher upload speed is important for activities like uploading files, video conferencing, and online gaming, where you need to send data to remote servers or other users.
Leveraging the dd Command for Evaluating Disk Write Speed
Write speed refers to the speed at which data can be saved or recorded onto a storage drive. You typically encounter write speed when you’re attempting to duplicate a file from one location to another.
The primary function of the dd command is to duplicate files while potentially transforming the data format during the process. Moreover, the dd command can also serve as a tool to assess the performance of a disk device within a Linux system.
In this illustration, we’ll generate a 1GB file using a relatively large block size of 1M. Please ensure you have sufficient free storage space available. Subsequently, employ the following command to assess your disk’s write speed:
dd if=/dev/zero of=tmpfile bs=1M count=1024 conv=fdatasync
- 1024+0 records in: This part indicates the number of input records processed by the “dd” command. In this case, 1024 records were processed. Each record is typically of a specific size, which can be specified when using the “dd” command.
- 1024+0 records out: This part signifies the number of output records produced by the “dd” command. Similar to the “records in” value, 1024 records were produced as output.
- 1073741824 bytes (1.1 GB, 1.0 GiB) copied: This section provides information about the total amount of data that was copied during the benchmark test. In this case, 1073741824 bytes were copied, which is equivalent to 1.1 gigabytes (GB) or 1.0 gibibytes (GiB). Note that there is a difference between “GB” and “GiB,” where “GB” is often used in a decimal context, and “GiB” is used in a binary context.
- 1.5734 s: This part represents the time it took to complete the data copy operation. In this case, it took approximately 1.5734 seconds to copy the specified amount of data.
- 682 MB/s: The final part denotes the average data transfer rate during the copy operation. It indicates that the average write speed was approximately 682 megabytes per second (MB/s). This value represents how quickly data was written to the disk during the benchmark test and is a measure of the disk’s write performance.
Utilizing the dd Command for Evaluating Disk Reading Speed
Prior to assessing disk read performance through benchmarking, it’s advisable to clear the server’s buffer cache. This step ensures that read speeds are measured directly from the hard drive:
sudo /sbin/sysctl -w vm.drop_caches=3


- 1073741824 bytes (1.1 GB, 1.0 GiB) copied: This part informs us that a total of 1,073,741,824 bytes were copied during the operation. It also provides two equivalent size representations for better comprehension: “1.1 GB” (gigabytes) and “1.0 GiB” (gibibytes).
- 0.591077 s: This indicates the time it took to complete the data copying operation, which was approximately 0.591077 seconds.
- 1.8 GB/s: This is the calculated data transfer rate or speed. It tells us that data was copied at a rate of 1.8 gigabytes per second.
Lastly, run this command:
rm tmpfile
Leveraging the dd Command for Assessing CPU Performance
The dd command can also serve as a basic CPU benchmark tool. However, it’s essential to keep in mind that this method provides a quick assessment and is not suitable for precise CPU performance comparisons.
To commence the test, execute the command provided below:
dd if=/dev/zero bs=1M count=1024 | md5sum

- 1073741824 bytes (1.1 GB, 1.0 GiB) copied: This part informs us that a total of 1,073,741,824 bytes were copied during the operation. It also provides two equivalent size representations for better comprehension: “1.1 GB” (gigabytes) and “1.0 GiB” (gibibytes).
- 1.59992 s: This indicates the time it took to complete the data copying operation, which was approximately 1.59992 seconds.
- 671 MB/s: This is the calculated data transfer rate or speed. It tells us that data was copied at a rate of 671 megabytes per second.
FAQs
Why should I clear the server’s buffer cache before assessing disk read performance?
Clearing the server’s buffer cache ensures that disk read speeds are measured directly from the hard drive, without any influence from cached data. This provides a more accurate assessment of disk read performance.
How can I optimize my VPS performance based on the assessment results?
Based on the assessment results, you can optimize your VPS performance by adjusting server configurations, upgrading hardware, optimizing software, and implementing caching mechanisms. Specific actions will depend on the performance bottlenecks identified during the assessment.
What other factors can impact VPS performance apart from network and disk speed?
Several factors can impact VPS performance, including CPU utilization, RAM availability, software efficiency, and server location. Addressing these factors collectively can lead to improved overall VPS performance.
Is the “dd” command suitable for precise CPU benchmarking?
No, the “dd” command is not suitable for precise CPU benchmarking. It provides a quick assessment of CPU performance but is not designed for detailed and accurate comparisons of CPU performance.
Conclusion
In conclusion, this comprehensive guide equips you with the knowledge and tools needed to optimize your VPS’s performance systematically. From initial performance assessment to fine-tuning, we’ve provided step-by-step instructions, expert tips, and best practices to ensure your VPS operates at its peak efficiency. By following these insights, you can elevate your VPS experience and provide your users with a faster, more responsive online environment.
Related Content : Discover Top 25 RunCloud Alternative
Optimize Website Performance and Compliance with Google Fonts Checker
