You might imagine that controlling every aspect of your Magento store’s functionality without writing a single line of code would be a lot easier, that you wouldn’t have to code every time you need a new setting. And that is actually what you can do if you create a admin config in Magento 2.
Whether you are creating a module of a certain custom setting, the knowledge to create an admin config in Magento 2 offers you the ultimate flexibility to customize your Magento store based on your needs. In this guide, we will take you through simple steps to achieve this and empower you to streamline your store management like never before.
Why Create a Admin Config in Magento 2?
Admin configurations in Magento 2 make it easy to customize and manage for merchants and developers as well. Since you can implement custom admin configurations, you’re able to offer a simple admin interface for such custom modules and their features, have better management control over the shop, provide administrators with an organized set of options according to their necessities, and include settings that adapt to your requirements.
Creating admin configurations helps to add special functionality like own shipping methods or payment options for example, along with display parameters without modifying each time the code for each.
Step-by-Step Guide to Create a Admin Config in Magento 2
There are several steps to create a admin config in Magento 2, including creating a custom module, defining configuration fields, and accessing those settings from your Magento admin panel.
Step 1: Create a Custom Module
To create a admin config in Magento 2, you first need to create a custom module. This is where you will define your configuration options.
Get exclusive access to all things tech-savvy, and be the first to receive
the latest updates directly in your inbox.
- Set up the directory structure:
Move into app/code/ and create a new directory for your module. For instance:
app/code/Vendor/CustomConfig/- Declare your module
Create a module.xml inside app/code/Vendor/CustomConfig/etc/ to declare the module:
<?xml version="1.0"?>

<config xmlns:xsi="http://www.w3.org/2001/XMLSchema-instance" xsi:noNamespaceSchemaLocation="urn:magento:framework:Module/etc/module.xsd">

    <module name="Vendor_CustomConfig" setup_version="1.0.0"/>

</config>- Refresh
Now, enable the module and refresh Magento’s configuration.

Step 2: Define Admin Config Settings in system.xml
In this step, you will define which configuration fields appear in the Magento admin panel. You will utilize the system.xml file for structuring your admin settings.
Create the system.xml file:
In the app/code/Vendor/CustomConfig/etc/adminhtml/ directory, create the system.xml file. This is where you specify the configuration settings that will appear in the admin panel.
<?xml version="1.0" encoding="UTF-8"?>

<config xmlns:xsi="http://www.w3.org/2001/XMLSchema-instance" xsi:noNamespaceSchemaLocation="urn:magento:framework:Config/etc/system_file.xsd">

    <system>

        <section id="custom_config_section" translate="label">

            <label>Custom Configuration</label>

            <tab>general</tab>

            <resource>Magento_Backend::admin</resource>

            <group id="general_settings" translate="label" showInDefault="1" showInWebsite="1" showInStore="1">

                <label>General Settings</label>

                <field id="custom_field" translate="label" type="text" sortOrder="10" showInDefault="1" showInWebsite="1" showInStore="1">

                    <label>Custom Field</label>

                    <comment>Enter your custom value here</comment>

                    <validate>validate-length minimum-length-2 maximum-length-255</validate>

                </field>

            </group>

        </section>

    </system>

</config>
Explanation:
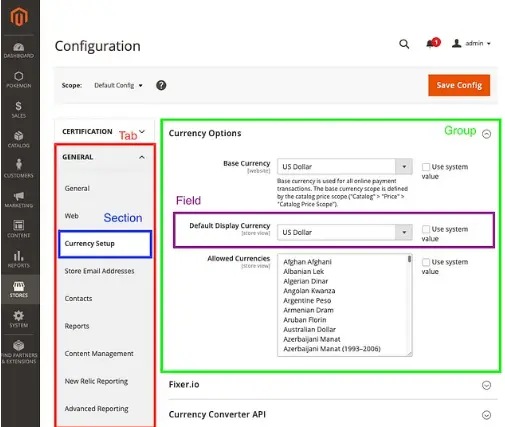
- A new section in the Admin Panel is defined by <section>.
- The <group> groups related settings into a category.
- The <field> defines the actual configuration field that will be displayed in the admin panel.
Step 3: Create the Model to Fetch Configuration Data
Once you have defined the admin config, you would then need to create a model that will fetch the configuration value.
Create a model to retrieve the config value:
In app/code/Vendor/CustomConfig/Model/Config.php, insert the following code:

<?php

namespace Vendor\CustomConfig\Model;

use Magento\Framework\App\Config\ScopeConfigInterface;

class Config

{

    protected $scopeConfig;

    public function __construct(ScopeConfigInterface $scopeConfig)

    {

        $this->scopeConfig = $scopeConfig;

    }

    public function getCustomField()

    {

        return $this->scopeConfig->getValue('custom_config_section/general_settings/custom_field');

    }

}
Explanation:
The getCustomField() method returns the value of the custom field you created earlier.
Step 4: Clear the cache and test
The last step to create a admin config in Magento 2 is clearing up your cache afterward for the changes to take effect.
php bin/magento cache:flushNow go to Store > Config in your Magento Admin Panel. Under Custom Configuration, you will see the General Settings section that has the custom field you have added.

Role of CyberPanel in Managing Magento 2 Admin Configurations

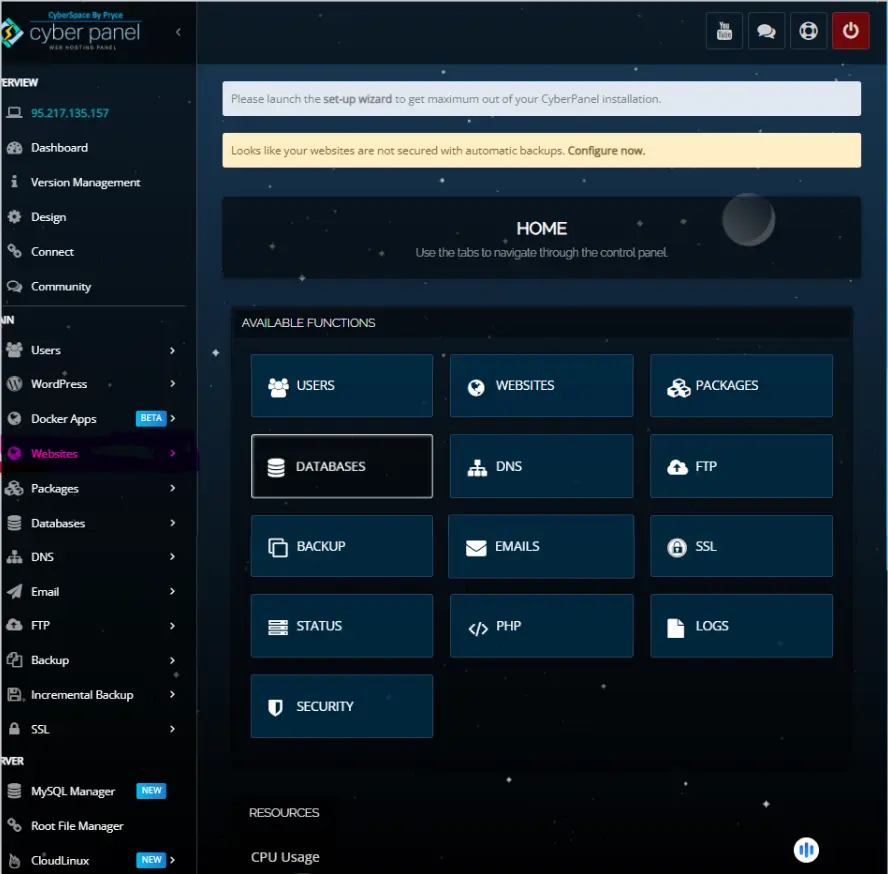
CyberPanel i.e. web hosting control panel makes managing Magento 2 admin configs easier by providing user-friendly tools for servers and files. This helps the user, in the following ways:
- Easy File Management: Edit Magento configuration files directly from the file manager of CyberPanel.
- Database Management: The Magento database can easily be managed to save and retrieve admin config settings properly.
- PHP Optimization: CyberPanel optimizes server settings for better performance by Magento configurations.
- Security and Backups: Automatically backup configurations with security features.
- Performance Monitoring: Monitor how the admin configuration impacts store performance to make sure everything is running smoothly.
CyberPanel helps to ease the server work for you so that you can be more focused on creating and managing the admin configs in Magento 2.
FAQs: Create A Admin Config in Magento 2
1. What is an admin config in Magento 2?
Admin config in Magento 2 enables developers to make custom settings in Magento, which can be accessed and managed directly from the Admin Panel without requiring code changes each time.
2. Why should I create an admin config in Magento 2?
Admin configs help to make the management of the store easy by enabling custom settings for things like payment methods, shipping options, and display settings from the backend.
3. How to create an admin config in Magento 2?
To create an admin config in Magento 2, you need to create a custom module, define settings in the system.xml file, and create a model to retrieve configuration values. These settings will then appear in the Admin Panel.
4. Where can I find the custom admin config settings in Magento 2?
You can locate customized admin settings via Stores > Configuration in the Admin Panel. Under the section and group you configured in system.xml, they are listed.
5. Can admin configs be scoped to the store view, website, or default store?
Yes, under Magento 2, you have the option of scoping an admin configuration towards a specific store view, website, or by default on a store. Choose the correct scope in the Admin Panel.
6. Can I validate custom config fields?
Yes, Magento 2 provides built-in rules like length limits or data-type validation (such as being numeric or an e-mail) in the system.xml file.
Unlocking the Power of Custom Admin Configurations in Magento 2
In summary, when you create a admin config in Magento 2, it enables you to customize and streamline your store management, making it easier for developers and store owners to handle complex settings. With this guide, you can easily create and manage your admin configurations to enhance functionality and user experience.
Ready to take your Magento 2 store to the next level? Start building your custom admin configurations today and enjoy a more powerful, user-friendly admin panel!


