Stop believing horror stories shared by inexperienced people about- driver conflicts, missing dependencies, and cryptic error messages. And start learning how to install CUDA on Ubuntu today! This is the only guide you need!
Installing CUDA on Ubuntu isn’t hard at all!
All you need are the right steps to help you set up CUDA smoothly, making sure your GPU is ready for deep learning,AI, or high-performance computing. This guide covers all instructions required to install and check CUDA version on Ubuntu through the simplest methods.
What is CUDA?

The NVIDIA Compute Unified Device Architecture (CUDA) Toolkit is a software platform that lets developers harness the power of NVIDIA’s processing capabilities and create GPU-accelerated applications.
CUDA serves as both a programming model and an API, enabling programmers to write code that operates on both the CPU and GPU, while also managing data transfers between the two.
It’s widely used for Machine learning & AI, MATLAB, OpenCV, Rendering and stimulations, Blockchain & cryptocurrency
Get exclusive access to all things tech-savvy, and be the first to receive
the latest updates directly in your inbox.
Here are the main goals of CUDA:
- It extends standard programming languages to facilitate the implementation of parallel algorithms.
- It supports mixed computing, allowing applications to utilize both CPU and GPU.
- It enables gradual integration into existing applications.
- It treats the CPU and GPU as distinct devices, each with its own memory.
- It allows for simultaneous computations on the CPU and GPU without competing for memory resources.
- CUDA-capable GPUs feature hundreds of cores that can execute thousands of computing threads.
- These cores share resources, including a register file and shared memory.
When it comes to compatibility, the CUDA Toolkit works with various Linux distributions like Ubuntu, Debian, Fedora, CentOS, and OpenSUSE.
How to Install CUDA on Ubuntu? STEP-BY-STEP GUIDE!

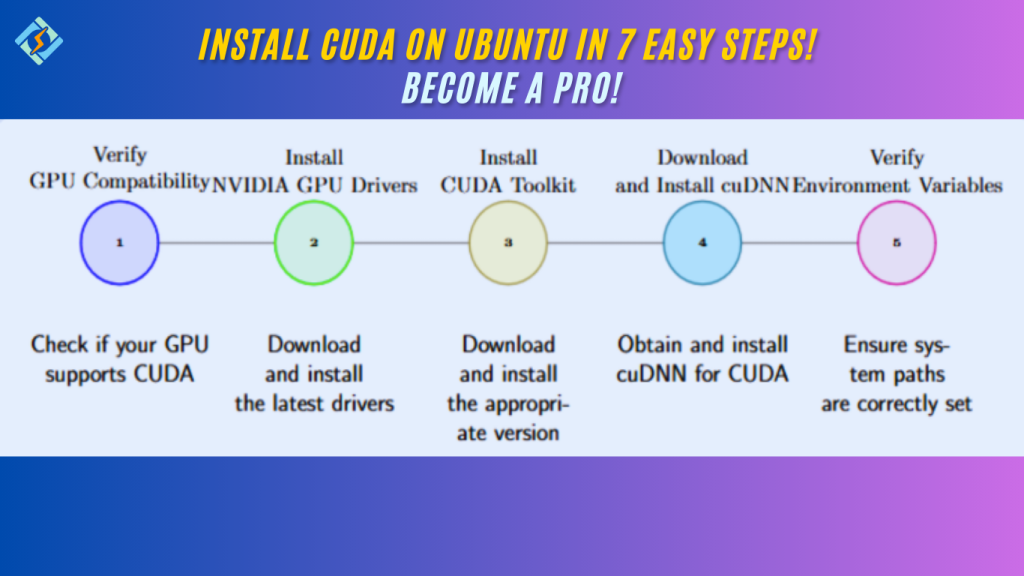
Before installing CUDA on Ubuntu, ensure the following system prerequisites:
Pre-requisites
To get NVIDIA CUDA up and running on your system, you’ll need to have a few things in place:
- Install the latest NVIDIA GPU drivers from their website, even if they may be included in the CUDA installation.
- A compatible version of Linux that includes a GCC compiler and toolchain
- The CUDA Toolkit, which you can download from https://developer.nvidia.com/cuda-downloads
Remember that the CUDA development environment works best when it’s closely integrated with your host development setup, including the host compiler and C runtime libraries. Because of this, it’s only supported on specific distribution versions that have been approved for the CUDA Toolkit release you’re using.
Once you finish these steps, you’ll be able to compile and run CUDA applications, utilizing the parallel processing capabilities of your NVIDIA GPU. We will start by installing the NVIDIA driver, followed by the CUDA toolkit.
To install Ubuntu drivers, use the command:
sudo ubuntu-drivers autoinstallFor the NVIDIA drivers, I suggest version 525, but feel free to adjust it to your needs:
sudo apt install nvidia-driver-525Installing CUDA Toolkit via APT
You can install CUDA either by downloading the release file or using Conda. This guide will focus on installing CUDA via the release file from the official Toolkit Archive.
The CUDA Toolkit includes all the necessary tools to create, build, and run a CUDA application, along with libraries, header files, and additional resources.

Step 1: Download the CUDA release file.
$ wgetStep 2: Run the release file.
$ sudo sh cuda_12.0.1_525.85.12_linux.runYou will need to accept the End User License Agreement, then press Enter to proceed with the installation.
After the installation finishes, you should see an output like this:
carbon--6-Download Verification
You can verify the download by checking the MD5 checksum listed at https://developer.download.nvidia.com/compute/cuda/12.6.2/docs/sidebar/md5sum.txt against the checksum of your downloaded file. If the checksums do not match, the file is corrupted and should be downloaded again.
To compute the MD5 checksum of the downloaded file, use the following command:
md5sumhttps://developer.download.nvidia.com/compute/cuda/12.0.1/local_installers/cuda_12.0.1_525.85.12_linux.run
Configuration and Verification (Post Installation Steps)
Step 1: Set up the server
Adjust the server settings to work with the CUDA toolkit. Add the CUDA path to the system’s PATH and include the CUDA Toolkit library path in the LD_LIBRARY_PATH to ensure the CUDA toolkit link loader can find the shared libraries.
Compiler Accessibility for CUDA
To enable the nvcc compiler, put /usr/local/cuda/bin at PATH.
• To find the location of the CUDA library, append /usr/local/cuda/lib64 to LD_LIBRARY_PATH.
• The version of CUDA installed determines the paths.
$ echo "export PATH=/usr/local/cuda-12.0/bin${PATH:+:${PATH}}" >> /home/seconduser/.bashrc<br>$ echo "export LD_LIBRARY_PATH=/usr/local/cuda-12.0/lib64${LD_LIBRARY_PATH:+:${LD_LIBRARY_PATH}}" >> /home/seconduser/.bashrcStep 2: Activate the Environment
Once the server is configured for the CUDA toolkit, activate the changes to the environment variables so the system can locate and use CUDA.
$ source /home/seconduser/.bashrcStep 3: Verify Installation
$ nvidia-smiOutput:
carbon--7-Step 4: Check Package Installation.
Confirm that the CUDA Toolkit package is properly installed on your server.
$ nvcc --versionOutput:
carbon--8-How to Verify CUDA Installation
To check CUDA version on Ubuntu, you use pre-existing test scripts provided by CUDA. These scripts will help you thoroughly confirm the compatibility and performance of your CUDA-enabled setup.
Step 1: Clone the repository of test scripts
$ git clone https://github.com/NVIDIA/cuda-samples.gitStep 2: Navigate to the directory with the deviceQuery sample script.
$ cd cuda-samples/Samples/1_Utilities/deviceQueryStep 3: Compile the script.
$ makeStep 4: Execute the script.
$ ./deviceQueryIf your CUDA program executed the script correctly, your output should resemble the example below:
carbon--9-To uninstall CUDA on Ubuntu-DO THIS!
To remove CUDA and clean up your system:
sudo apt remove --purge '^cuda.*' -y<br>sudo apt autoremove -yFinal Thoughts
Installing CUDA on Ubuntu might seem complex but by following these steps you can set it up without errors. Now that you’ve successfully learned how to install CUDA on Ubuntu, your system is ready to leverage GPU acceleration for AI, machine learning, or other high-performing computing tasks.
Further, you can go ahead and train your deep-learning models, run simulations, and accelerate computations.
Here are some of Ubuntu’s CUDA Best Practices to keep in mind:
- For stability and compatibility, update the NVIDIA and system drivers.
- For simple installation and updating, use CUDA APT PPA.
- Use the nvcc compiler’s options and flags to optimize and debug CUDA code.
- To make development easier, use CUDA libraries and tools.
- For practical, maintainable code, adhere to CUDA coding guidelines.
FAQs
1. How To install CUDA on Ubuntu?
To install CUDA on Ubuntu 22.04, start by following the detailed guide provided above. Make sure to install the NVIDIA drivers first and correctly configure the environment variables.
2. What is the latest version of CUDA for Ubuntu?
To find the latest version of CUDA for Ubuntu, go to the NVIDIA CUDA Toolkit webpage.
If you encounter errors during the CUDA installation on Ubuntu, make sure your system is completely updated, install the appropriate NVIDIA drivers, and confirm compatibility before continuing.
3. How can I verify if CUDA is installed correctly
To check CUDA version on Ubuntu you installed, run nvidia-smi and nvcc –version to see if CUDA is installed and recognized.
4. Is it possible to install CUDA without NVIDIA drivers?
No, CUDA needs NVIDIA drivers to work properly.
5. What is the difference between CUDA and cuDNN?
CUDA is a general framework for GPU computing, while cuDNN is specifically designed for deep learning tasks.
6. How can I upgrade CUDA to the latest version?
To upgrade, first remove the current version using sudo apt remove –purge ‘^cuda.*’, then install the latest version from NVIDIA’s website.
7. What should I do if I get driver conflicts?
You can try reinstalling the NVIDIA drivers with the command sudo apt install –reinstall nvidia-driver-535 -y.
8. Can I install CUDA on Ubuntu WSL (Windows Subsystem for Linux)?
Yes! CUDA is now compatible with WSL2. Just follow the same installation steps, ensuring you have the latest WSL2 kernel and NVIDIA drivers.
9. Will installing CUDA on Ubuntu affect my system performance?
No, it shouldn’t affect performance, but ensure your GPU has sufficient VRAM and that your drivers are up to date to prevent any slowdowns.
10. Why doesn’t the cuda-repo package install the CUDA Toolkit?
When you use RPM or Deb, the package you download is a repository package. This type of package simply tells the package manager where to locate the real installation packages, but it does not install them.
11. How To Uninstall CUDA from Ubuntu completely?
To fully uninstall CUDA from Ubuntu, run the command:
sudo apt remove --purge '^cuda.*' -y, and then execute
sudo apt autoremove -y.Here’s the Official CUDA FAQ’s Site for further answers!


