You must be thinking about how to add a unique touch to your WooCommerce store’s cart page. We are going to learn how to add custom button to cart page in WooCommerce. When you add a custom button to the cart page in WooCommerce, it will enhance your customer experience. By doing so, you can introduce new functionality and get more sales.
The default “Add to Cart” button WooCommerce is very useful for users as it provides a smooth shopping experience. But for your offers, you need a custom add to cart button.
Let’s learn together how to add custom button to cart page in WooCommerce!
Custom Buttons in WooCommerce
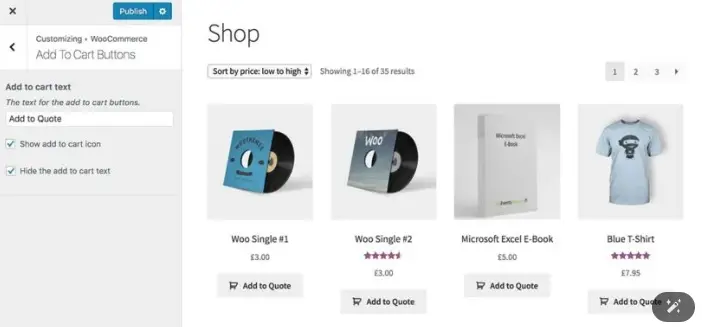
WooCommerce is the most popular eCommerce platform. It possesses customization options. One of these options is ability to add custom button to cart page. It can server many purpose, such as:
- Directing users to special offers
- Enabling promotional discounts
- Simply enhancing navigation
If you use a default add to card button WooCommerce, it cannot offer customization. So, you need to add a custom button. We are going to get you know how to add custom button to cart page in WooCommerce.
How to Add Custom Button To Cart Page in WooCommerce
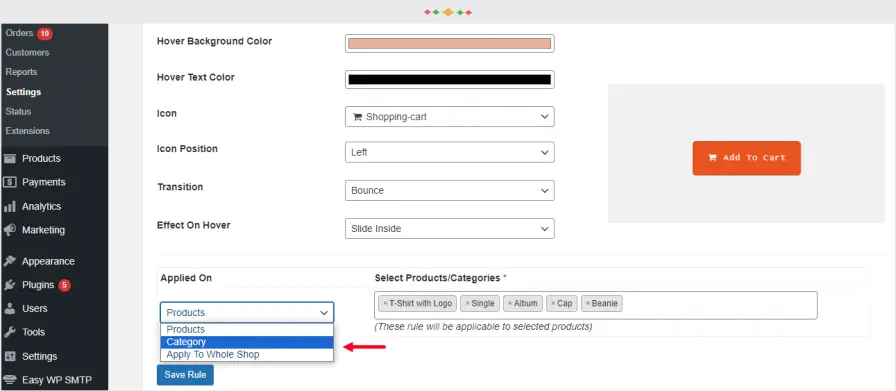
Step 1: Add a Hook To the WooCommerce Cart Page
In this instance, you must hook into the WooCommerce cart action, which leads you to the first step of adding a custom button to the cart page. WooCommerce has several hooks that let you insert custom content in certain locations on the cart page. To achieve this, we will be hooking into woocommerce_cart_actions, which is the action that is meant to add content to the cart.
Get exclusive access to all things tech-savvy, and be the first to receive
the latest updates directly in your inbox.
Below is a simple code that adds a custom button on your cart page:
add_action( 'woocommerce_cart_actions', 'add_custom_button_to_cart', 10 );

function add_custom_button_to_cart() {

    echo '<a href="https://yourlink.com" class="button custom-button">Custom Button</a>';

}
Explanation of the Code:
- add_action: This function hooks our custom button to WooCommerce’s woocommerce_cart_actions hook, ensuring the button is displayed in the correct location.
- echo ‘<a href=”https://yourlink.com” class=”button custom-button”>Custom Button</a>’;: This line generates a link styled as a button, which you can replace with any URL (such as a checkout or promotional page). You can also change the text inside the <a> tag to something more specific, such as “Go to Checkout” or Apply Discount.
Step 2: Styling Custom Button
Here is the code to style your button:
.custom-button {

    background-color: #0073e6;

    color: white;

    padding: 10px 20px;

    text-align: center;

    border-radius: 5px;

    text-decoration: none;

    display: inline-block;

    margin-top: 20px;

}

.custom-button:hover {

    background-color: #005bb5;

}
Output:
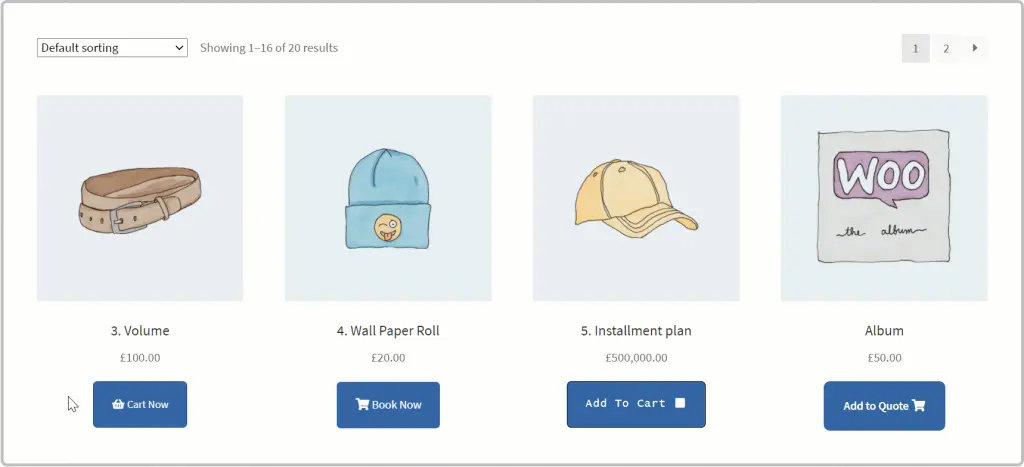
This code will add a style to your custom button having a blue background with white text, rounded corners, and a hover effect that darkens the blue background when the mouse hovers over the button.
Step 3: Adding Custom Redirect Functionality
If you actually want the custom button to do something specific on the click event (e.g., redirecting customers to another page: a checkout page for some promotion or a discount form), then all you need to do is update the href attribute in the tag.
For instance, to link customers to a special checkout page:
echo '<a href="https://yourcheckoutpage.com" class="button custom-button">Go to Checkout</a>';This will cause the button to direct to your custom checkout page for customers to get to buy faster.
Step 4: Testing the Custom Button
Once we finish adding our code and styling, it is very important to test the button to ensure it works as it should. Adding a product to your cart, going to the cart page, and confirming that the custom button has been added is available. The functionality of the test is to make sure that the page or action will be redirected when the button is clicked. You can also verify that the intended goal is set.
How to Remove Add to Cart Button WooCommerce
After knowing, how to add custom button to cart page in WooCommerce,there might be some occasions when you wish to remove the add to cart button WooCommerce from certain products or pages. Using the remove_action function, it is easy to disable the default add to cart button.
Here’s how to remove the add to cart button WooCommerce:

remove_action( 'woocommerce_after_shop_loop_item', 'woocommerce_template_loop_add_to_cart', 10 );This will remove the “Add to Cart” button on product listings within the shop page. You may replace it with your custom button or leave the space blank.
Best Practices for Adding Custom Buttons
After knowing how to add custom button to cart page in WooCommerce, here are some best practices:
- User-friendly design: Make sure your custom button is clear, actionable, and aesthetically pleasing. It should be easy for the customer to know what action the button would take.
- Mobile-friendliness: Your custom button must be optimized for mobiles. Most customers shop on their phones, so the button should look good and function well on all devices.
- Test Thoroughly: As soon as the custom buttons have been added to your site, test them properly to make sure they work, especially after modifying CSS or applying functionality changes.
- Minimal Disruption: Avoid flooding your cart page with too many buttons. Let the page look clean and concise so that users can have an easy time buying from you.
The Role of CyberPanel in WooCommerce Customization
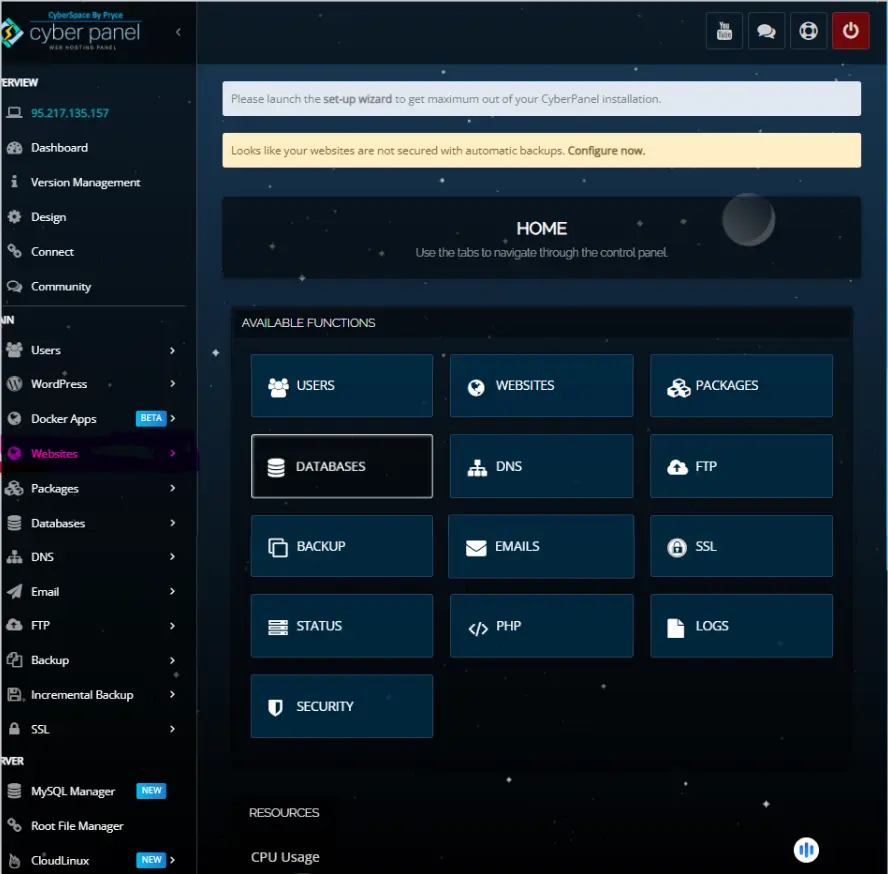
CyberPanel is a popular web hosting control panel. It plays an important role in optimizing your WooCommerce store. It secures your site and offers a smoother user experience.
- Optimized Performance: CyberPanel incorporates OpenLiteSpeed to optimize WooCommerce performance. This ensures page loading time is faster and increases the conversion rate while offering a better shopping experience.
- Security: It has SSL management, firewall settings, and malware scanning to keep your store free from threats while keeping the interactions of your custom button safe.
- Traffic and Resource Monitoring: CyberPanel tracks real-time resource utilization.
- Easy logging: Manage logs easily, track server activities, and analyze traffic patterns to optimize the functionality of custom buttons and identify performance issues.
- Easy WooCommerce Integration: CyberPanel’s interface provides easy integration with WooCommerce, offering uncomplicated ways to add custom features, like buttons, without affecting site performance.
FAQs: WooCommerce Add to Cart Button
1. How to add custom button to cart page in WooCommerce?
You may add a custom button using the woocommerce_cart_actions hook along with a PHP function that produces a link, styled as a button.
2. Is it possible to remove the default “Add to Cart” button in WooCommerce?
You can always remove the standard “Add to Cart” by using the function remove_action by deactivating the standard default button on individual product pages.
3. I want to give my customized button a woo-commerce style to it.
You can make it really work using custom CSS, added to your theme’s stylesheet, or via the WordPress Customizer.
4. Can I connect my custom button to another page?
Yes, you would be able to set the href attribute inside the <a> tag to redirect customers anywhere you would like-from a checkout page, perhaps, or to a special offer.
5. How do you test your custom button?
Test it by adding any product to the cart, then go to the cart page to check whether the button appears and works.
Wrapping Up!
To sum up, we have done by query how to add custom button to cart page in WooCommerce. By creating an advanced button and placing it in your WooCommerce cart page, you are actually increasing functionality relative to your store while improving user experience.
Now you can build individual actions with the help of several steps to lead the customer to special offers, apply discounts to the orders, or send the user to checkout. So in such a manner as described in the steps above you easily execute custom buttons and apply needed styles according to your personal taste.
Ready to supercharge your WooCommerce store? Begin adding custom buttons today and offer more tailored shopping experiences that drive conversions!
