Tracking website visitors on your WordPress site is essential for understanding user behavior, improving user experience, and optimizing your content strategy. Here’s a step-by-step guide on how to check site visits on WordPress using various methods, including Google Analytics and WordPress plugins:
Configuring Google Analytics for Monitoring Website Visitors
Establishing Google Analytics to monitor website visitors is a crucial process for website owners seeking valuable insights into user behavior, audience demographics, and overall site performance. Google Analytics offers a comprehensive set of tools, enabling data-driven decision-making based on real-time information. In this guide, we will walk you through the process of configuring Google Analytics to efficiently track visitors on your website.
Step 1
Begin by visiting the Google Analytics website for the sign-up process. Once on the site, click the ‘Get started today’ button.

Step 2
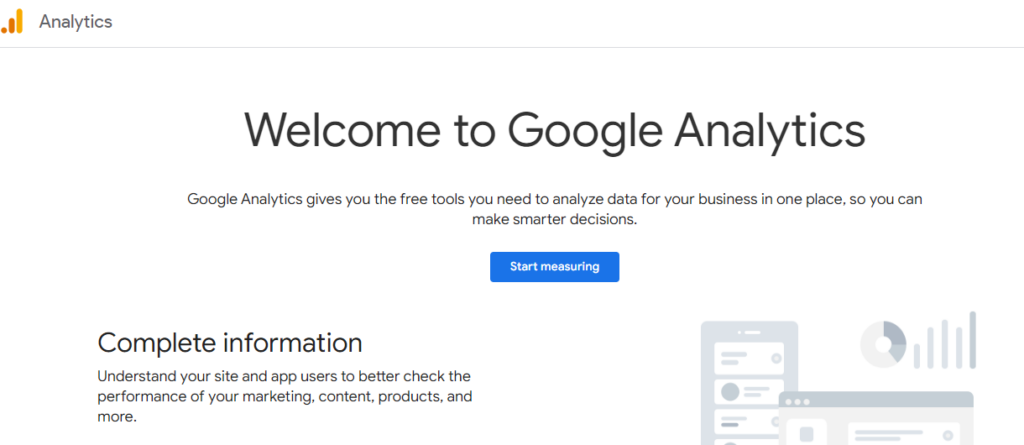
After logging in with your Gmail account, you’ll encounter a welcome screen similar to the one depicted below. This is where you’ll enroll in Google Analytics using your Gmail credentials. Proceed by clicking the ‘Start measuring’ button.

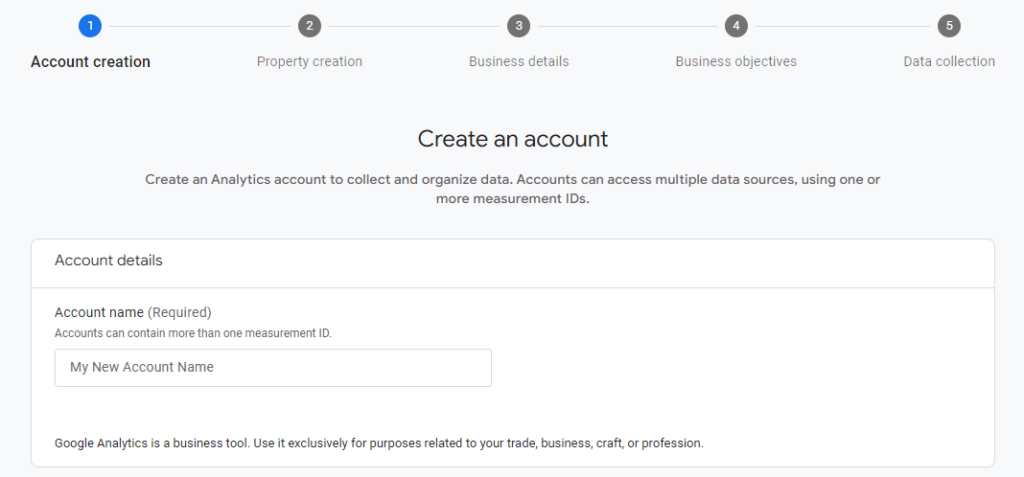
Subsequently, you’ll be prompted to supply an account name. This internal designation can be anything of your choosing, such as your business name.

Google Analytics will present various options for sharing account data.
Get exclusive access to all things tech-savvy, and be the first to receive
the latest updates directly in your inbox.
These settings empower you to regulate the sharing of your Google Analytics data. You have the option to maintain the default settings and proceed to the next step.

Step 3
Moving to the subsequent screen, you are required to establish a Google Analytics property.
Google has rolled out the latest version of Analytics known as Google Analytics 4 (GA4), which now monitors both your website and mobile apps within a single account. This updated version offers novel features, metrics, and a distinct interface for your reports.
Proceed by entering a property name, selecting your reporting time zone and currency, and then clicking the ‘Next’ button.

In the succeeding screen, you must pick an ‘Industry category’ from the dropdown menu for your website and opt for a ‘Business size’ from the available choices. Once completed, simply click the ‘Next’ button.

Following that, you should opt for business objectives and specify how you plan to utilize Google Analytics in conjunction with your business. This selection aids in generating personalized reports tailored to your business requirements.
For example, you’ll find options such as generating leads, driving online sales, raising brand awareness, examining user behavior, and more. You can choose multiple options or select all those that align with your objectives. We recommend opting for the ‘Get baseline reports’ option to ensure that all Google Analytics reports are populated in your account.
Once you have completed the process, click the ‘Create’ button.

Step 4
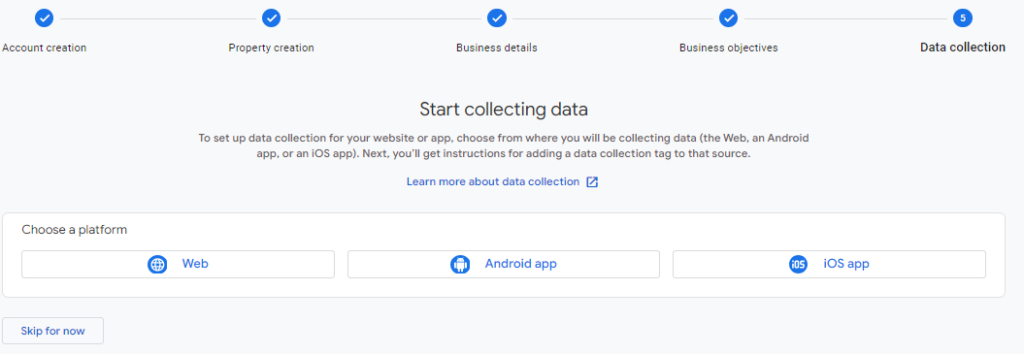
You will now encounter the options for your Google Analytics Web stream. As we are configuring Google Analytics for a WordPress site, proceed to choose ‘Web‘ as the platform.

Subsequently, you will be required to input your website URL and Stream name.
By default, Google Analytics will have the ‘Enhanced measurement’ option enabled. This feature enables the tracking of various metrics such as page views, scrolls, outbound clicks, file downloads, and more in Google Analytics. Following that, you can proceed to click the ‘Create stream’ button.


Now, you can view your Stream name, URL, ID, and Measurement ID. Additionally, it will display various enhanced measurements that it is set to record.

In the upper section, there is an alert bar providing instructions on integrating Google Analytics with your WordPress site. Feel free to click the ‘View tag instructions’ button. Subsequently, you will be presented with various methods for adding the Google Analytics tracking code to your WordPress website.

Proceed to the ‘Install manually’ tab in the next step. Here, you will encounter the Google Analytics tracking code.

Feel free to copy this tracking code, as you will need to paste it into your WordPress site depending on the method you choose below. Alternatively, you can leave this browser tab open and switch back to copy the code when necessary.
Now that you’ve established a Google Analytics account, let’s explore the process of installing Google Analytics in WordPress.
Configuring Google Analytics for Monitoring Website Visitors
Google Analytics stands out as the preeminent software for tracking website visitors, providing insights into visitor numbers and their activities on your site.
Nevertheless, the setup process for Google Analytics involves manipulating code snippets, a task that can be challenging for beginners. Even the smallest mistake in this process can disrupt your website’s tracking capabilities.
Enter MonsterInsights – the ultimate solution to simplify the integration of Google Analytics with your WordPress site. With MonsterInsights, you can establish a connection with Google Analytics without the need for code editing.
To begin, you must install and activate the MonsterInsights plugin.

After activating the plugin, you’ll be directed to a welcome screen, where a new menu item labeled ‘Insights’ will appear in your admin area. Navigate to the welcome screen and click the ‘Launch the Wizard’ button.

Now select the category for your website and click “Save and Continue“.

Now click “Connect Monsterinsights“.

Now connect to Google Analytics by clicking “Continue and Connect to Google“.

Now choose an Analytics Property and click complete action.

Observing Reports on Website Visitors in WordPress
To check your website visitors, you have the option of utilizing various MonsterInsights reports. These reports prove to be time-saving as they eliminate the need to navigate through Google Analytics to locate pertinent data for your business.
Please note that the dashboard reports may differ depending on the MonsterInsights plan you are using. Upgrading to the MonsterInsights Pro license provides access to additional reports directly within your WordPress admin panel. Now, let’s explore each report and its utility in monitoring website visits.
1. Overview Report
To initiate the process, access the ‘Insights > Reports’ page within your WordPress admin area. Here, the initial report presented is the ‘Overview’ report.

Choose the desired date range and observe your website’s aggregate sessions and pageviews, along with the average session duration and bounce rate.
A session denotes a single user’s visit to your website, and the Pageviews tab displays the count of pages and posts visited by users during their sessions.
It also provides a breakdown of both new and returning visitors.

Upon scrolling down, additional reports become visible, aiding in understanding the origins of your website visitors.
The ‘Top Countries’ report indicates the region generating the majority of your traffic. This data is valuable for devising strategies tailored to specific geographic locations. Adjacent to it is the ‘Top Referrals’ report, revealing the websites directing traffic to your site. Utilizing this information enables you to forge partnerships, identify guest post opportunities, or discover similar websites for promoting your posts and products.

The final report accessible under Overview is the ‘Top Posts/Pages.’ You can scroll down to see that report. It represents the landing pages and blog posts that draw the highest number of website visitors.
2. Publishers Report
Next, navigate to the ‘Publishers’ tab in the top menu to gain further insights into your visitors.
This report offers additional statistics concerning your popular landing pages, including the number of visits, average duration, and bounce rate.

Utilize this data to generate additional content topics and boost your web traffic.
Additionally, the report provides insights into the outbound links and affiliate links that receive the highest number of clicks. If you provide downloadable content, you can also monitor which file type garners the most downloads.


Another crucial report for monitoring website visits involves examining the demographics. MonsterInsights reveals the age and gender of your visitors.

3. Search Console Report
MonsterInsights aids in discovering the search terms people enter on Google to locate your website through its ‘Search Console’ report.

4. E-commerce Report
For those with an online store, MonsterInsights is instrumental in tracking its performance. The enhanced ‘eCommerce’ report provides a comprehensive overview of your online store’s conversion rate, number of transactions, revenue, and average order value.

It also highlights the best-selling products that drive significant sales. However, to monitor website visitors, you can navigate to the ‘Top Conversion Sources’ report by scrolling down.

5. Dimensions Report
MonsterInsights empowers you to monitor additional details about your visitors through custom dimensions. These reports are not inherently accessible in Google Analytics but enable you to track customized interactions on your website. It assists you in understanding the preferences of your visitors on your website and determining the optimal time for publishing blog posts.

6. Real-Time Report
The final report available in WordPress for monitoring your website visitors is the ‘Realtime’ report. This report displays the current number of active users on your site, providing a real-time count of your traffic.

FAQs – How to Check Site Visits on WordPress
What information does the ‘Realtime’ report in WordPress show about site visits?
The ‘Realtime’ report in WordPress provides information about the current number of active users on your site, offering a real-time count of your traffic. It is particularly useful for monitoring site activity during promotional campaigns or events.
How do I integrate Google Analytics with my WordPress site?
To integrate Google Analytics with your WordPress site, you can either manually insert the tracking code into your theme’s header or use a plugin like MonsterInsights. The plugin simplifies the process, allowing you to connect Google Analytics to your site without editing code.
What information does the ‘Realtime’ report in WordPress show about site visits?
The ‘Realtime’ report in WordPress provides information about the current number of active users on your site, offering a real-time count of your traffic. It is particularly useful for monitoring site activity during promotional campaigns or events.
Are there any privacy concerns when tracking site visits on WordPress?
It’s crucial to ensure compliance with privacy regulations when tracking site visits. Implementing cookie consent notices and anonymizing IP addresses in tools like Google Analytics can help address privacy concerns and comply with regulations.
How frequently should I check site visit reports for my WordPress site?
The frequency of checking site visit reports depends on your website’s activity and goals. Regular monitoring, such as weekly or monthly, is recommended to identify trends, assess the impact of content changes, and make timely optimizations.
Conclusion
In conclusion, understanding and tracking site visits on WordPress are pivotal for the success of your online presence. Utilizing tools like Google Analytics and plugins such as MonsterInsights offer comprehensive insights into visitor behavior, popular content, and the overall performance of your website. By regularly analyzing reports, you can make informed decisions to enhance user experience, optimize content, and tailor your strategies for maximum impact.


