
We are going to learn “How to setup DKIM?” DKIM is a method of authentication in the process of emailing that allows senders to digitally sign their messages, offering the recipient the capability to authenticate the domain of the sender. By integrating DKIM into your email setup, you gain extra security points for your emails and contribute to a better reputation for your domain in front of service providers in email, thus making the chances of reaching the inbox rather than the spam folder grow.
The setup procedure of DKIM could be scary to a non-technical person, but with proper guidance, installation may not be so difficult. This step-by-step will help guide you through the process of generating DKIM keys, setting up your email server configuration, and updating DNS records so that your emails are properly signed and verified.
Whether you want to protect your brand’s email communications, or you are an IT professional to improve security measures within your organization, this article will give you the tools you need to deploy DKIM successfully. Let’s dive in now and learn how to setup DKIM so that you can secure your email communications today!
What is DKIM?
DKIM is an addition to emails that enables authenticating the domain of the sender and verifying that the email has not been altered while traveling. The setup of DKIM also removes phishing and increases deliverability. CyberPanel has a built-in tool to set up DKIM quickly; this makes the procedure much easier for a user to host websites and emails on their server.
How Does DKIM Work?
DKIM works by signing your emails with a private key and allowing the recipient to verify the email using your public key, which is published in DNS. In CyberPanel, all of the public and private key pairs are automatically generated and published in the public key in DNS, or signed by the private key on outgoing emails.
Why You Should Enable DKIM?
Setting up DKIM on your domain has some benefits: firstly, increased deliverability and guarantees against tampering by irresponsible email participants; secondly, improvement of the reputation of your domain. CyberPanel can enable it in just a few clicks and saves you from the trouble of creating keys manually and setting up DNS.
How to Setup DKIM
The implementation of DKIM involves these steps:
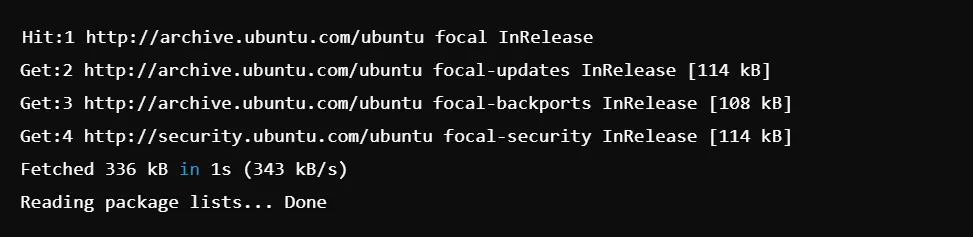
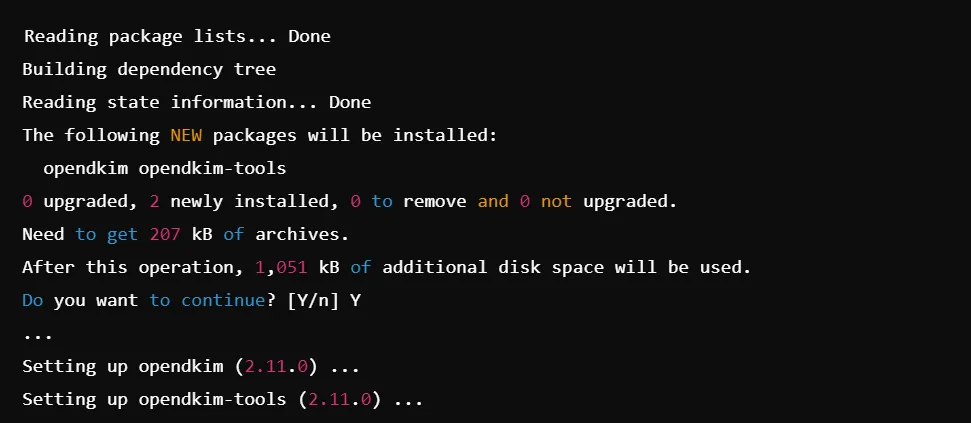
Step 1: Install Required Packages
First, update your package list and install OpenDKIM.


Step 2: Generate DKIM Keys
Now you have to create a directory for DKIM keys:

Command will complete successfully, now you have to generate DKIM keys for your domain


Step 3: Move the Generated Keys
Now, you have to move the generated private and public key files:

The command will be completed successfully.
Step 4: Set Up the Key Table
Now, open the key table file:

Add the following line:
default._domainkey.yourdomain.com yourdomain.com:default:/etc/opendkim/keys/yourdomain.com.privateStep 5: Set Up the Signing Table
Now, open the signing table file:

Then, add the following line:


Step 6: Restart OpenDKIM
Now, you have to restart the OpenDKIM service to apply the changes:

Step 7: Verify DKIM Installation
Now you have to verify DKIM installation. You can check the DKIM setup using:


Additional Steps to the Configuration of DKIM
Update Your DNS Records
To sign up with DKIM, you have to upload the public key into the DNS records of your domain. It is inside the yourdomain.com.txt you have made beforehand.
Using this you can see the contents of the public key file:


Now take the output and add it to your DNS records as a TXT record; that is, the whole line.
- Login to your domain registrar or DNS management portal.
- Proceed to the DNS settings of your domain.
- Add a new TXT record:
- Name: default._domainkey.yourdomain.com
- Value: v=DKIM1; k=rsa; p=MIGfMA0GCSqGSIb3DQEBAQUAA4GNADCB. (your full public key here)
Verify DKIM Signature
Send a message from your domain to a service that checks DKIM, such as Gmail or a DKIM validator.
To verify whether your message is properly signed, send an email to a Gmail user. Then examine the headers by opening the message and selecting “View Original” or “View Source.”
You will be seeking a line in the email headers as follows:

Check DKIM Configuration
Now you have to check the DKIM configuration. You can use a command to test DKIM signing directly from your terminal:


Monitor DKIM Logs
Check the logs for any issues or confirmations that DKIM is functioning correctly. You can do this by viewing the mail log:


Perform a DKIM Check
To perform a DKIM check using the terminal, you can use tools like dig to check the DNS records.
Check DKIM DNS Record
Run the following command to fetch the DKIM TXT record from DNS:

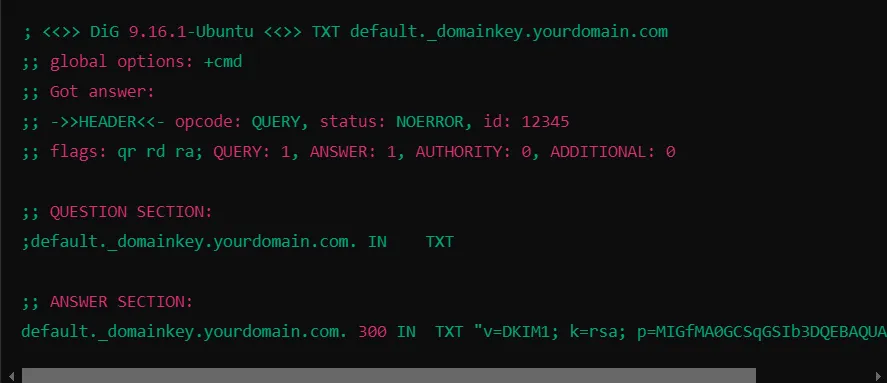
DKIM Record Example
Here’s a typical DKIM DNS TXT record that you will publish in your DNS settings:

- default._domainkey: The selector used to identify the DKIM record.
- v=DKIM1: It tells the version of DKIM being used.
- k=rsa: The encryption algorithm (RSA) used for signing.
- p=…: Your public key, which recipients’ servers will use to verify your emails.
Enable DKIM on Different Platforms
Google Workspace
- Access Google Admin Console.
- Go to Apps > Google Workspace > Gmail
- Under the Authenticate email click on Set up DKIM.
- You will then be prompted to create a DKIM record and then save it
Microsoft 365
- Access Microsoft 365 Admin Center.
- Navigate to Mail Flow > DKIM
- Select your domain and click on Enable
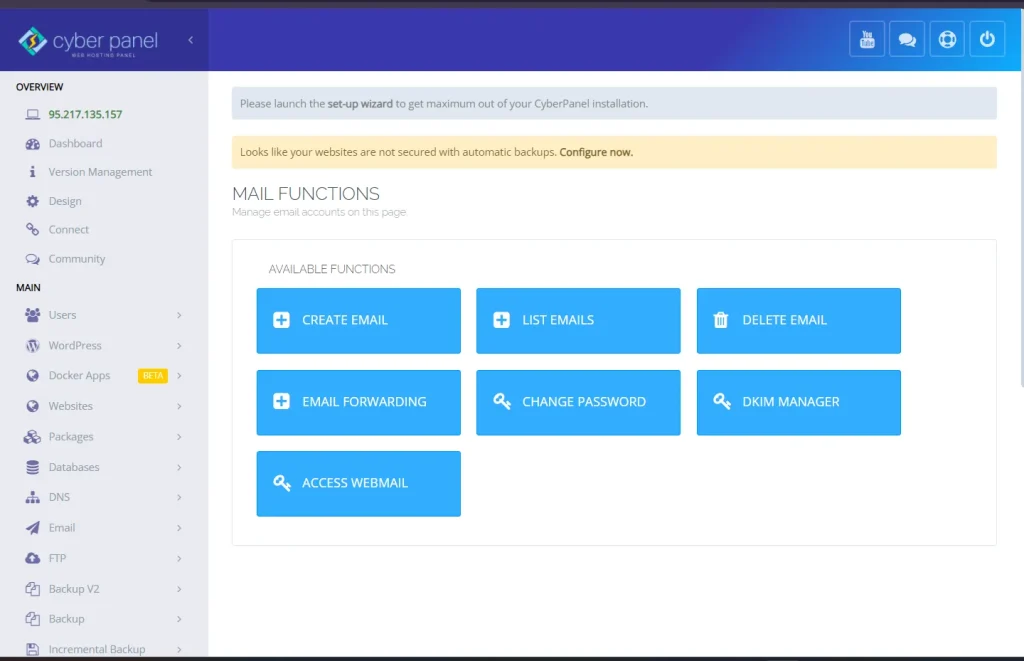
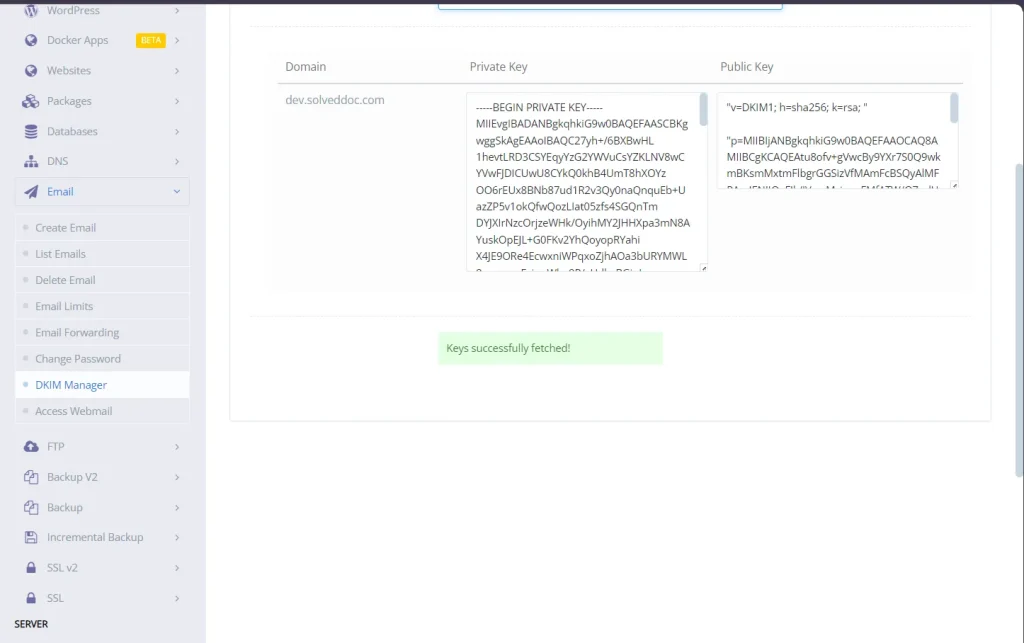
CyberPanel
- Log into CyberPanel
- Navigate to Mail > DKIM Manager.
- Select your domain and click on Enable DKIM. CyberPanel will auto-generate the DKIM keys and configure them in your DNS.
Troubleshooting DKIM Problems
In the event of a DKIM failure about your check, the following could be potential problems:
DNS Propagation Delay: DNS changes can take up to 24-48 hours to propagate.
Incorrect Selector: Make sure that the selector in your DNS matches the selector used by your mail server.
Improper Key Length: Use a 2048-bit key, as lesser keys are often rejected by many email providers.
CyberPanel Role in DKIM Setup
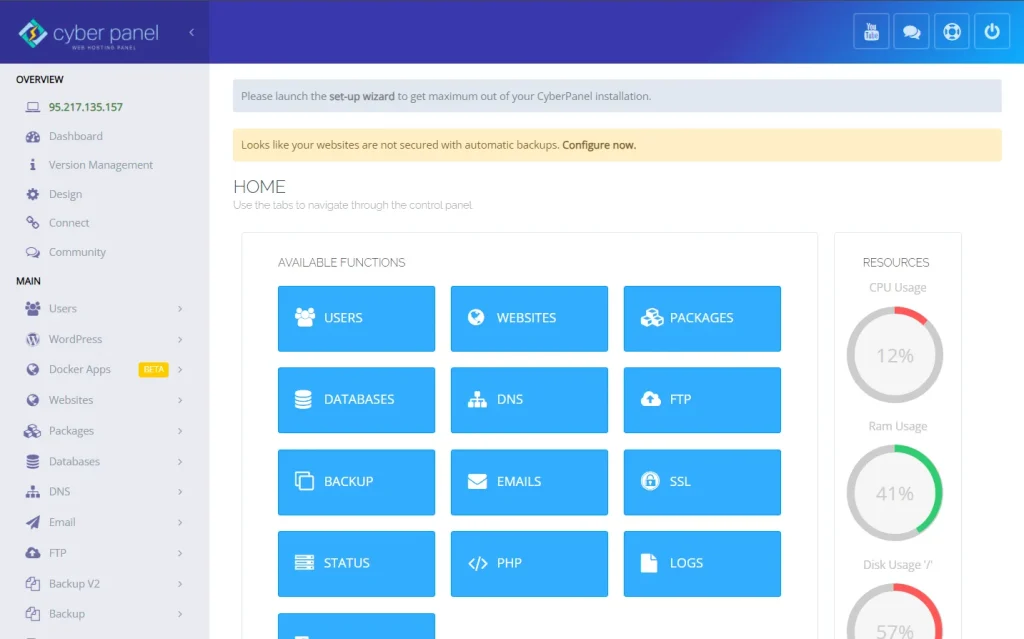
CyberPanel is a free open-source web hosting control panel, which makes it easy to manage the settings of servers and emails. During the setting up of DKIM for domain emails, CyberPanel has played the central role of easiness of access for email security and control over DNS management. Here’s how CyberPanel aids in the process of the DKIM setup.
Automated DKIM Configuration: CyberPanel has built-in DKIM capability. This feature lets you configure DKIM with just a few clicks without having to install and configure the OpenDKIM software within your server yourself.
Simplified DNS Management: CyberPanel’s DNS is extremely handy in adding DKIM records for your domain so you don’t have to do it manually from DNS zone files. Working with DNS files, for instance, can be complicated for beginners.
Email Security Features: Aside from DKIM, CyberPanel has SPF and DMARC which are the other two email authentication protocols. This offers an all-rounded security package that can protect the emails coming from a specific domain in case they are being spoofed or marked as spam.
Logging and Monitoring: CyberPanel allows you to easily check and monitor your mail server logs, so you’ll know right away whether DKIM signing is working properly. You can view email log files and troubleshoot DKIM issues directly from the dashboard of CyberPanel without having to use SSH to access your server.
User-Friendly Interface: Simplicity is designed into the control panel, so even those of you who aren’t tech-savvy can navigate them. This allows you to control DKIM settings and other email authentication methods without having to memorize, for example, how to run a complex command manually.
Steps To Configure DKIM in CyberPanel:
After learning how to setup DKIM, let’s discuss how to configure it in CyberPanel. Login into CyberPanel. To log into the dashboard of CyberPanel, use your admin credentials.
Email: Go to the “Email” section and click on the domain for which you want to enable DKIM.
Enable DKIM: Now you need to find where, under your domain’s email settings, DKIM can be enabled and toggle that option “on”.
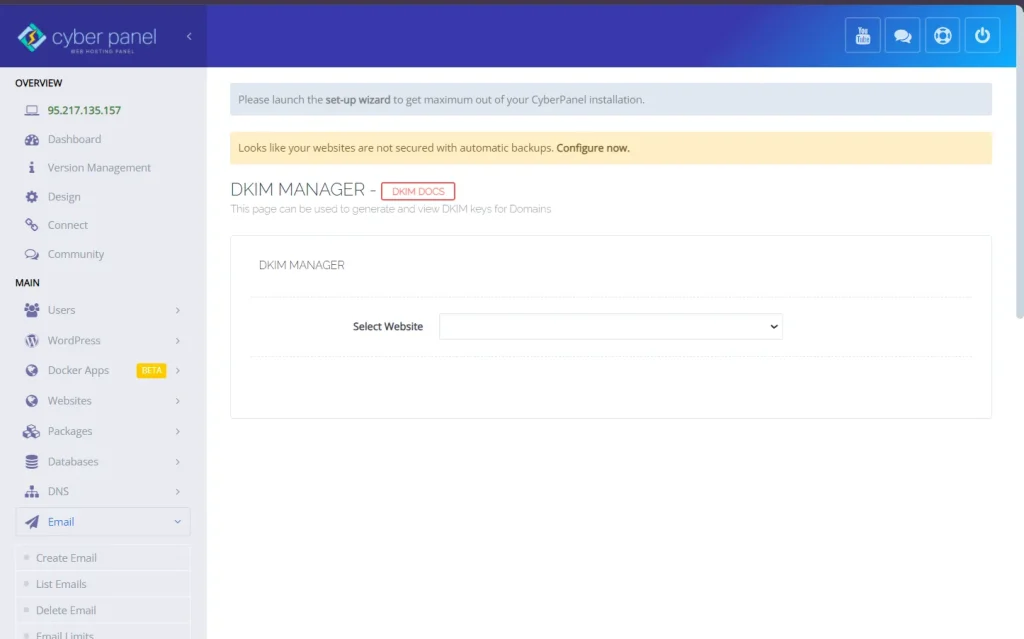
Add DNS Record: The keys for the DKIM will be automatically generated on the platform from the DNS record that is included. Add that record to your domain’s DNS zone using the DNS manager in CyberPanel.
Upon having installed DKIM in CyberPanel, one can then use the verification tools for DKIM testing through a test email or even using an online validator.
Why Use CyberPanel for DKIM
Non-Cli Interface: The process has been automated in CyberPanel, meaning you do not need to run commands or configure files in SSH.
Time-Effective: CyberPanel saves time in configuring DKIM and other email authentication protocols.
Easy DNS Management: The DNS manager in CyberPanel makes it easy to add or update DKIM records for any domain hosted on your server.
All-in-one Solution: Other than DKIM, CyberPanel also offers other features like website management, installation of SSL certificates, managing databases, and much more which makes it an all-in-one solution to manage all your web hosting and email.
What is DKIM?
DKIM is an abbreviation of DomainKeys Identified Mail. It is an email authentication method that uses a type of cryptographic signature, allowing receivers to verify that emails sent on behalf of your domain have not been tampered with during transmission.
How do I configure DKIM?
To install DKIM, do the following:
1. Generate a DKIM key pair.
2. Add a DKIM TXT record, using your public key, to your DNS.
3. Activate DKIM on your email server. CyberPanel has made it easy for you to do so by automatically generating keys and setting up your DNS.
What is a DKIM selector?
A DKIM selector is an identifier that helps the destination’s server find the appropriate DKIM key at your DNS. It’s part of the email header as part of the DKIM signature.
What is a DKIM check?
DKIM check is a process in which the receiving servers validate the DKIM signature in the mail through a match of the public key published in the sender’s DNS. One can use tools like MXToolbox or EasyDMARC DKIM checker to verify your DKIM configuration.
How long does it take for DKIM to be active?
Because DNS changes can be very slow to propagate across the internet, it can take up to 24-48 hours for your entire DNS configuration, including your DKIM record, to propagate fully. At that point, DKIM should function properly.
How does DKIM improve email deliverability?
DKIM authentication helps build trust with email providers since it gives proof that your emails are signed and legitimate. Chances of being tagged as spam or even rejected are thus reduced.
Conclusion
So far, you get the answer of “How to setup DKIM?” To sum up, DKIM is a domain configuration that will make you protect your emails from phishing and spoofing. This tutorial led you through the process of generating a DKIM key pair, setting up a DKIM record, and enabling DKIM on your mail server. Do remember to check in to your DKIM settings occasionally to ensure everything is working properly.
CyberPanel will configure DKIM automatically for you, along with nice DNS management. That way, even the not-so-techy folks can use it. Adding DKIM to your anti-spam strategy, together with SPF and DMARC, further strengthens the deliverability of email to your domain as well as the good name of your organization.
Supercharge your email deliverability now!
