The Magento platform has made setting up an ecommerce store and launching a website super easy for business owners without limitations. However, one of the most crucial parts of any ecommerce website is the search feature since there might be many categories and subcategories nested into each other.
Magento stores without an efficient real-time search feature can drop your conversions. This is where Elasticsearch comes into play. Magento developers continuously work to bring new technology components that improve user experience.
Magento 2 Elasticsearch is such a component that makes it super easy for users to find the right entity with smart search and short word queries. The Magento platform recommends installing Elasticsearch on the earlier versions of Magento 2.3x but with predefined configurations.
This blog will walk you through the requirements to install Elasticsearch on Magento 2 with a step by step guide.
What is Magento 2 Elasticsearch?
Elasticsearch is a full-text search solution that recommends suggestions related to the keywords. It is an advanced search and analytics engine with Magento 2 for fast, accurate, and scalable search functionality for Magento ecommerce stores. However, it is not just limited to search queries, it can perform store wide searches.
Magento 2 Elasticsearch is a server-based tool that is capable of fast web content search capability. The fast response is due to the indexing service used for contextual search. Magento 2 Elasticsearch suggests products, images, pricing, ratings, and information to narrow the searches.
Key Features of Magento 2 Elasticsearch:
Key features that set Magento 2 Elasticsearch apart are as follows:
- Elasticsearch delivers high speed search with rapid results even for stores with large volumes of data.
- Uses advanced algorithms to show relevant results based on search queries.
- Filters result by attributes and entities like price, categories, color, and more.
- Offers real-time search suggestions with autocomplete functionality to improve user experience.
- Handles high amounts of data and traffic without downtime.
- Offers multi-language support for optimized stores serving a diverse customer base.
How Does It Work in Magento 2?
Magento 2 Elasticsearch leverages its high-speed capabilities to index product data, resulting in fast query response. It performs advanced-level text analysis on search queries for accurate and relevant results.
Prerequisites to Set Up Magento 2 Elasticsearch
According to the official Magento release, Elasticsearch 2.x and early 5.x versions are no longer valid and you need to update to the latest version to use Elasticsearch. Be sure to check compatibility before upgrading to avoid last minute conflicts.
To use Elasticsearch with Magento 2.4, you must fulfill the following requirements:
- Web Server: Apache or Nginx.
- Database: MySQL 5.7 or MySQL 8.0.
- PHP: Version 7.4 or later (as supported by your Magento version).
Configure Server for Magento 2 Elasticsearch
Follow the following steps:
1. Install Elasticsearch on Your Server
- Access your server and log-in via SSH with sudo privileges.
- Add the Elasticsearch Repository, using the code:
sudo rpm –import https://artifacts.elastic.co/GPG-KEY-elasticsearch
- Create the repository file, using the code:
echo “[elasticsearch]
name=Elasticsearch repository

baseurl=https://artifacts.elastic.co/packages/7.x/yum
gpgcheck=1
gpgkey=https://artifacts.elastic.co/GPG-KEY-elasticsearch
enabled=1
autorefresh=1
type=rpm-md” | sudo tee /etc/yum.repos.d/elasticsearch.repo
- Install Elasticsearch, using the code:
sudo yum install elasticsearch
- Start and Activate Elasticsearch, using the code:
sudo systemctl start elasticsearch
sudo systemctl enable elasticsearch
2. Configure on Magento 2
- Edit the Elasticsearch configuration file, using the code:
sudo nano /etc/elasticsearch/elasticsearch.yml
- Update the yaml setting, using the code:
network.host: 0.0.0.0
http.port: 9200
discovery.type: single-node
- Restart Elasticsearch, using the code:
sudo systemctl restart elasticsearch
3. Set Up CyberPanel for Magento Hosting
- Set-up a website in Cyberpanel using the dashboard. Navigate to Websites> Create Websites and fill the details.
- Install Magento using CyberPanel’s Application Installer.
4. Configure Magento to Use Elasticsearch
- Navigate to Stores > Settings > Configuration > Catalog > Catalog Search to log-in to the Magento admin panel.
- Choose Elasticsearch 7 from the menu.
Enter Elasticsearch Details:
- Host: localhost or your server’s IP.
- Port: 9200.
- Index Prefix: magento2.
- Enable Autocomplete: Set to Yes.
- Save configuration, using the code: php bin/magento indexer:reindex
5. Verify Elasticsearch with Magento 2
Run the following code to test:
curl -XGET ‘http://localhost:9200‘
How to Install Magento 2 Elasticsearch in CyberPanel?
Installing Magento 2 Elasticsearch in CyberPanel is super easy. Here is how you can do so in a few easy steps:
- Log-in to your admin panel with the correct username and password.
- Go to Manage Applications.
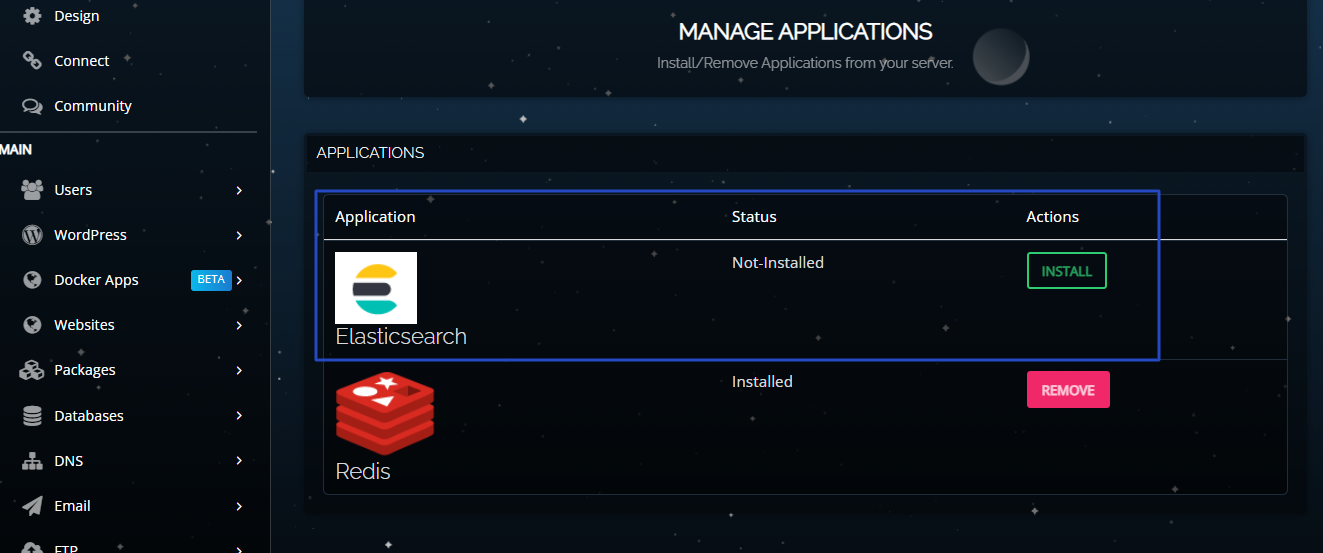
- Click on Install.
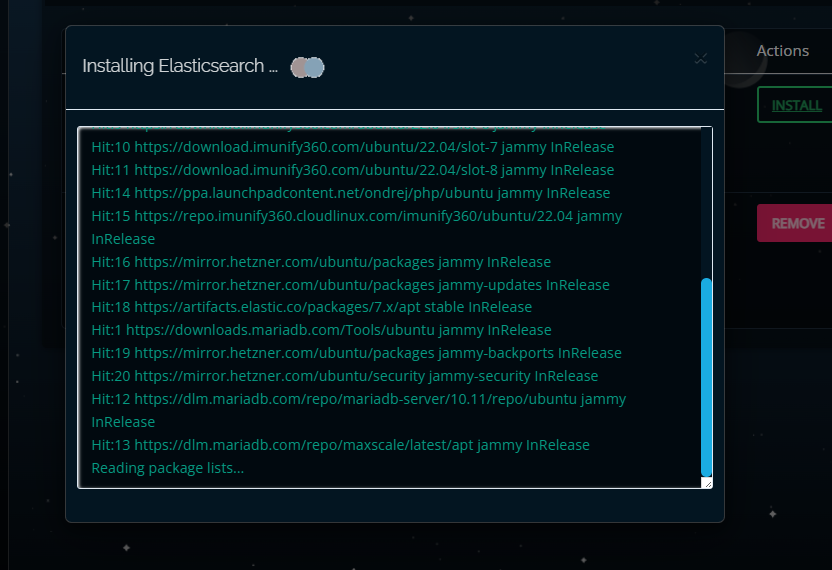
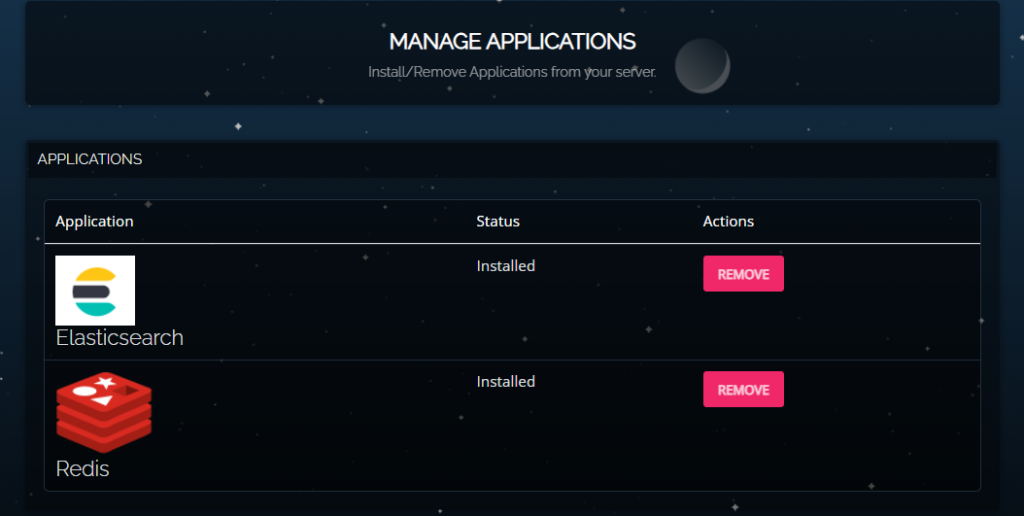
- And done!
Configuration for Magento 2 Elasticsearch via Admin Panel
After successfully installing Magento 2 Elasticsearch in CyberPanel, you need to head back to the Magento platform to complete the configuration process. With the latest version of Magento 2, Elasticsearch has become a default add-on, making configuration super easy.
Here is how you can do it.
- Log-in to the Magento admin as administration.
- Then click on stores> settings> configuration> catalog.
- Then tap on the catalog search section.
- Start entering the following data:
- Minimum query length: the keyword length where elasticsearch will be enabled.
- Maximum query length: maximum length of the search query Magento will accept.
- Number of top search results to cache: enter the number of popular searches that the module would store.
- Search Engine: Magento supports multiple search engines, but Elasticsearch is the default. Choose the appropriate Elasticsearch version (e.g., Elasticsearch 7).
- Autocomplete limit: set maximum number of similar searches.
- Elasticsearch server hostname: enter IP address or hostname.
- Elasticsearch server port: enter proxy port. The default is 9200.
- Elasticsearch Index Prefix: set your default prefix magento 2.
- Enable Elasticsearch HTTP Auth: Enable if authentication is required; provide credentials.
- Elasticsearch Server Timeout: Define server timeout limit.
- Enable Search Suggestion: set to YES for suggestions.
- Search Suggestions Count: define the count of suggestions.
- Show Results Count For Each Suggestion: Select YES.
- Enable Search Recommendations: Set YES to display string recommendations.
- Search Recommendations Count: set the count for search suggestions.
- Show Results Count for Each Recommendation: set YES to display the result count for each suggestion. Recommendations may be part of advanced configurations or additional modules.
Common Issues and Troubleshooting for Magento 2 Elasticsearch
| Issue | Description | Troubleshooting Steps |
| Elasticsearch service not running | The Elasticsearch server is not active or down. | – Check service status: systemctl status elasticsearch.- Restart the service: systemctl restart elasticsearch. |
| Incorrect Elasticsearch configuration | Magento cannot connect to Elasticsearch due to incorrect settings. | – Verify hostname and port in Magento Admin:Stores > Configuration > Catalog > Catalog Search. |
| Unsupported Elasticsearch version | Magento requires a specific Elasticsearch version. | – Check the Magento compatibility list.- Upgrade/downgrade Elasticsearch accordingly. |
| No products in search results | Products are not indexed or indexing failed. | – Reindex via CLI: bin/magento indexer:reindex.- Check indexing logs for errors: var/log/debug.log. |
| Slow search performance | Search queries take too long to return results. | – Optimize Elasticsearch memory usage.- Increase JVM heap size in jvm.options. |
| Search returns incomplete results | Some products or attributes are missing in search results. | – Check attribute settings: ensure they are searchable in Stores > Attributes > Product. |
| Magento cron jobs not running | Elasticsearch indexing is delayed due to cron jobs not executing. | – Verify cron status: bin/magento cron:check.- Set up cron jobs if missing. |
| Elasticsearch cluster health is yellow/red | Indicates an issue with Elasticsearch cluster status. | – Check cluster health with: curl -XGET ‘localhost:9200/_cluster/health?pretty’.- Resolve issues with node setup. |
| SSL/TLS connection errors | Magento cannot connect to Elasticsearch over HTTPS. | – Verify SSL certificate validity.- Update Magento configuration for secure connections. |
| Error: “No alive nodes found in your cluster” | Elasticsearch is unreachable from the Magento server. | – Check firewall and network settings.- Ensure Elasticsearch is accessible on the specified hostname and port. |
| Outdated Magento or Elasticsearch plugins | Compatibility issues between Magento and Elasticsearch. | – Update Magento and Elasticsearch plugins to their latest versions. |
Final Words!
Once you are done setting up Magento 2 Elasticsearch, your store would be ready to generate higher sales with a fast performing search across all content types. With a superior user experience and real-time autocomplete recommendations, all your leads will convert into paying customers!
Frequently Asked Questions: Magento 2 Elasticsearch
1. What are the system requirements for Magento 2 Elasticsearch?
Magento 2 supports specific Elasticsearch versions. Check Magento’s compatibility list and ensure your server meets the necessary hardware and software requirements.
2. Why is Magento 2 not indexing products in Elasticsearch?
This issue may occur due to cron job failures, incorrect settings, or indexing errors. Reindex using the CLI (bin/magento indexer:reindex) and ensure your cron jobs are running.
3. How do I optimize Elasticsearch for better performance in Magento 2?
You can optimize Elasticsearch by increasing JVM heap size, enabling caching, and fine-tuning query settings for faster response times.
4. Can I use Elasticsearch with Magento open source?
Yes, Elasticsearch is supported with Magento Open Source, starting from version 2.4. It powers search functionality and indexing, replacing MySQL search for better speed and accuracy.