Dealing with broken packages in Ubuntu is frustrating, but the proper methods will quickly solve that problem. Here are five powerful ways to fix broken packages in Ubuntu, keeping your system running smoothly and efficiently. The methods run from using command-line tools like apt and dpkg to using graphical interfaces such as Synaptic.
Whether you are trying to troubleshoot dependency conflicts or fix incomplete installations, our step-by-step instructions, real examples, and the role of CyberPanel in package management will give you the knowledge to tackle these challenges confidently. By the end of this article, you’ll have a complete understanding of how to fix broken packages in Ubuntu, maintain a healthy system, and avoid potential errors in the future.
What Are Broken Packages in Ubuntu and How Do They Occur?
Broken packages can be considered in Ubuntu when they haven’t installed properly, been updated, or set up correctly. Such mistakes could occur from broken installs, conflicts of dependency issues or even the package database can be corrupted. The possible issues created by such issues are malfunctioning of some software, system crashes, and the inability to upgrade or install other packages.
How Broken Packages Occur on Ubuntu:
Interrupted Installations or Updates: A package’s installation may be interrupted due to a power failure, network failure, or cancellation through any user interface. At times, this can leave the package partially installed, rendering it broken, as that installation cannot function correctly before its completion.
Dependency Conflicts: Most packages in Ubuntu depend on other packages or certain versions of other packages. If the dependencies for any package are not installed properly or updated, dependency problems occur, thus rendering a package broken. For instance, a package could necessitate a version of another package that is not installed or outdated, making the package unusable.
Corrupt package database: The package database, which manages the installation of the software on your system, can sometimes go bad and result in broken or missing packages. It could happen due to improper shutdowns, hard disk errors, or filesystem problems.
Get exclusive access to all things tech-savvy, and be the first to receive
the latest updates directly in your inbox.
Incorrect Package Removal or Purging: Sometimes, users may attempt to manually remove or purge packages using apt-get or dpkg commands without fully understanding the dependencies. This could accidentally remove critical packages or parts of other installed software, leading to broken functionality.
Package version inconsistency: Installing third-party sources or using packages not from the official Ubuntu source could sometimes lead to package conflicts. This is because some of those packages might not be perfectly compatible with other packages or specific versions of libraries may not be available, hence making the packages broken.
How to Find Broken Packages in Ubuntu
Here’s how you can find broken packages on your system before “Ubuntu fix broken packages”:
1. Using the dpkg Command:
The dpkg tool can help detect partial or broken installations of packages. Run the following command in your terminal:


This command will search for any packages that are not configured properly and list them. It will highlight packages that are only partially installed or are in a broken state.
This tells you that the package name was unpacked but wasn’t configured correctly, which is a sign of a broken package.
2. Checking APT Logs for Broken Packages:
APT logs keep track of every installation, removal, and upgrade. You can scan for entries related to broken packages using the following command:

This will highlight where there have been instances that had broken packages causing a failure in the installation during some past updates or package operations.
3. Using apt-get check:
The apt-get check command checks for any dependency and package errors that have broken dependencies. It does not correct them but rather points out the issue:


This will check for any un-resolvable package dependencies and errors and show you the broken packages that need attention.

4. Verifying Installed Packages with dpkg -l:
You can also list all the packages installed and look for ones that are not properly installed or configured. Type in:


This will show you all the packages that are broken. The output displays the packages that are not marked ii; thus, they are probably being installed or are broken.
5. Using Synaptic Package Manager
If you rather like having a graphical frontend to manage your packages Synaptic package manager makes broken packages pretty easy to locate.
- Launch Synaptic: Look for it in your Application Menu Open Custom Filters > Broken.
- This filter will list all the packages that are broken or missing dependencies.
- Synaptic allows you to quickly reinstall or remove broken packages through its graphical interface.
How To Fix Broken Package in Ubuntu: 5 Methods
Here we will discuss five methods for “Ubuntu fix broken packages”, with detailed explanations and real output examples for each.
1. Using apt-get to Fix Broken Packages
This is the first method for “Ubuntu fix broken packages”. apt-get is one of the most reliable and common tools for managing packages in Ubuntu. The tool can automatically handle broken packages, resolve dependencies, and fix other package-related issues.
Steps:
First update the package list by running:

Then use the following command to try to repair broken packages:

The -f (or –fix-broken) option instructs apt-get to try to fix any broken dependencies.
Explanation:
When you run sudo apt-get install -f on Ubuntu, it will scan the system for missing dependencies or packages that were not properly installed. It then attempts to fix those by downloading and installing the appropriate versions or completing unfinished installations.
Output

2. Using dpkg to Reconfigure and Resolve Packages
The second method for “Ubuntu fix broken packages” is dpkg. dpkg refers to a low-level package manager that deals with the installation of packages and their configurations. If the case comes to broken packages, it may help reconfigure partially installed packages.
Steps:
To reconfigure packages that were perhaps not installed and configured in the right way, you can use this command:

Explanation:
The –configure -a option forces dpkg to configure any packages that were unpacked but not fully configured. This is useful if the installation process is interrupted or if the system was rebooted during a package configuration.
Output:

3. Using apt-get dist-upgrade to solve dependency problems
Sometimes packages are broken due to the dependency problem that prevents them from upgrading. The reason why the dist-upgrade command is useful is that, in addition to upgrading, it also solves any dependencies or conflicts.
Steps:

First, update your entire system

Then run this command to upgrade your package more comprehensively:
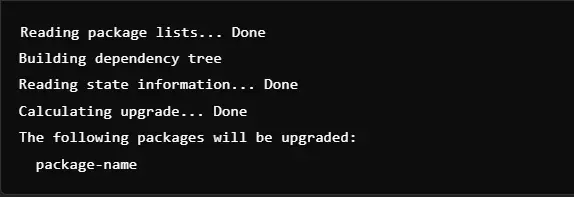
The dist-upgrade command upgrades more than a regular upgrade. It tries to correct broken packages by installing or removing additional dependencies. This is very useful when a package’s dependencies have changed or are no longer compatible with the system.

4. Using Synaptic Package Manager (Graphical Method)
The fourth method for “Ubuntu fix broken packages” is using the synaptic package manager. If you would rather use a graphical tool, Synaptic Package Manager is a great way to find and repair broken packages. Synaptic is a graphical application for managing software and for fixing broken packages without a terminal.
Steps
- Launch Synaptic Package Manager using your application menu. End.
- In Synaptic, go to Custom Filters > Broken. A list of packages with broken dependencies will appear.
- Highlight broken package(s) and then mark for reinstallation or mark for removal – or you can try and upgrade or downgrade the package accordingly.
- Once you have clicked on the packages you will be using, click apply to fix the broken package(s).
Explanation
Synaptic is able to manage packages more intuitively, with reinstall, remove, or upgrade options to solve the problems. It automatically identifies broken dependencies and gives recommendations.
Example Output
After the changes are applied, Synaptic may output a message like this:

5. Manual Uninstall and Reinstall of Package
The fifth method for “Ubuntu fix broken packages” is manually uninstalling and reinstalling of the package. If nothing else works, manual uninstall and reinstallation of the broken package could be a good solution for package problems. This procedure ensures that the package is completely removed before reinstalling it, which may remove problems due to corrupted installation.
Steps:
First of all, uninstall the broken package using the following command:

After uninstalling the package, clean up the system to remove any remaining configuration files:

Finally, reinstall the package:

Explanation
This method completely removes the package, including its configuration files, and then reinstalls it. This approach is useful when there are deep-rooted issues with the package installation, such as corrupted files or incorrect configurations.
Output
When you remove the package:

When reinstalling:

How CyberPanel Helps For “Ubuntu Fix Broken Packages”

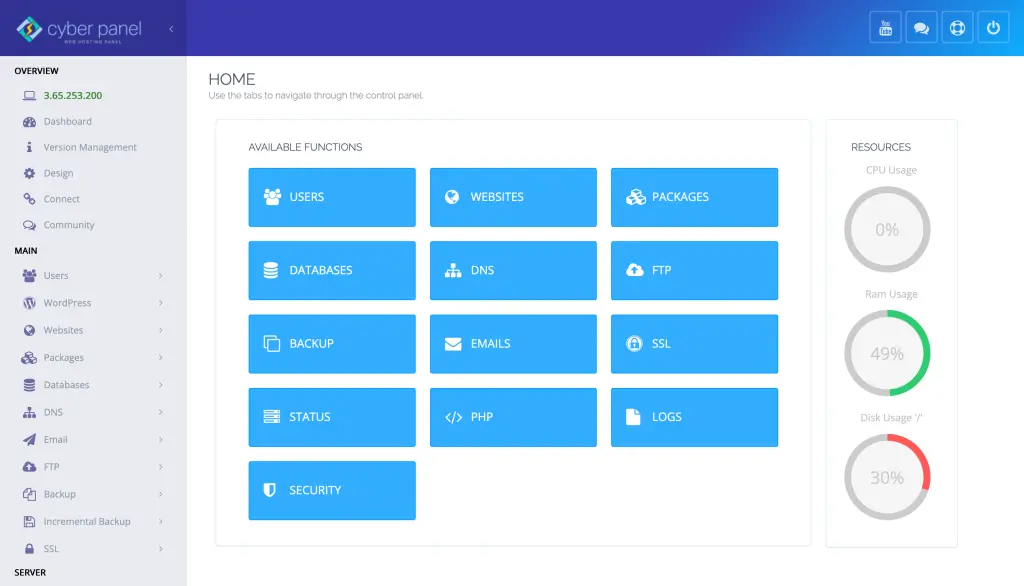
CyberPanel, a powerful open-source web hosting control panel, simplifies server management, among which is fixing broken packages in Ubuntu. It includes several tools that help with package handling, making it an excellent choice for web hosting environments.
Features:
Automated Package Management: Your packages are automatically updated and managed without any manual effort. This feature prevents breaking packages by automatically updating them and repairing them.
Real-Time Logs: CyberPanel’s logging tools are there to help you monitor package-related issues in real-time. These logs give possible errors, which makes your work easier in identifying faults and fixing them quickly.
Terminal Access: You now have built-in terminal access. This allows you to run APT and dpkg commands directly from its control panel interface. In summary, you can do everything that apt-get install -f or dpkg –configure -a commands entail without having to exit CyberPanel.
The use of automated management with real-time monitoring and easy access to command-line tools makes CyberPanel one solution that eliminates the headache associated with server package management, especially in hosting environments, where efficient management is the backbone of maintaining server stability and performance.
FAQs: Fix Broken Packages Ubuntu
1. How do I identify broken packages in Ubuntu?
You can use sudo apt-get check or dpkg –audit to find broken packages.
2. Do broken packages harm my system?
Yes, unresolved dependencies or broken packages may crash your system or result in an error.
3. What is the difference between APT and dpkg?
APT is a front-end package management tool, while dpkg is working at a lower level.
4 Can I fix broken packages without an internet connection?
Yes, you can, by using a local repository or by downloading the files in.deb format beforehand.
Conclusion: Ubuntu Fix Broken Packages
Fixing broken packages in Ubuntu is not complicated using the right methods. Using apt-get, dpkg, and Synaptic Package Manager tools, you can easily rectify any issues associated with packages, and this makes your system run very smoothly. You will enjoy automated updates, real-time logs, and access to terminal commands using one single click on CyberPanel.
Take control of your system’s health by fixing broken packages now. Start implementing these solutions now for a more stable and efficient Ubuntu experience.


