
The Linux kernel fills the gap between hardware and software so that communication and resource management may be done without friction. You have to do an Ubuntu update kernel. It is important to ensure optimal system performance, security, and compatibility with hardware and features.
Ubuntu kernel kernel updates eliminate some problems that may arise with your system. Knowing how to update the kernel is important to maintaining a reliable and secure environment.
This guide provides a comprehensive walkthrough of updating the Linux kernel in Ubuntu. We’ll cover various methods, including using the apt package manager, manual updates, and graphical tools like Ukuu.
Let’s dive together into the Ubuntu kernel update!
Understanding Linux Kernel
The Linux kernel is the bridge between the hardware and the computer’s software. This kernel allows your applications to interact with the hardware with little trouble by managing the system resources for the CPU, memory, and devices.
Why Update the Kernel
- Security Fixes: Protect against vulnerabilities and exploits.
- Performance Improvements: Increase speed and efficiency based on optimizations.
- Hardware Compatibility: Add support to newly installed devices and features.
- Bug Fixes: This is used to address stability issues; the system becomes less reliable.
You may miss kernel upgrades that expose your systems to attacks or low performance.
Prerequisites For Ubuntu Update Kernel
Here are some pre-requisites for Ubuntu Linux Kernel update:
1. Backup Your System
Critical file backups ensure data safety when performing the update in case something goes wrong. Use rsync to back up efficiently.
Command


2. Check the Current Kernel Version
Knowing your kernel version can help confirm that your update went just fine.
Command


3. Ensure Enough Disk Space
Low disk space may interfere with updating the kernel. Use the df command to view your available storage.
Command


4. Update Existing Packages
Update all packages to avoid potential dependency problems that may happen while updating the kernel.
Command

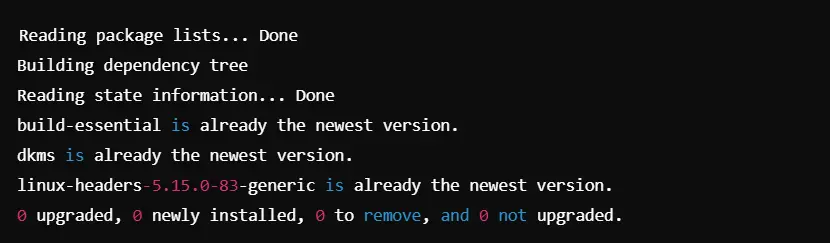
5. Install Build Environment
Kernel upgrades may need build-essential, dkms, and kernel-header tools.

Command

6. Update the Method depending on your distribution
You must be using your update method which is slightly different for most distributions. On Ubuntu, this should usually be done with apt.
Command: Checking if any new kernel versions exist


7. Configure GRUB
If you want the GRUB bootloader to work, it needs to recognize the new kernel.
Command Update GRUB


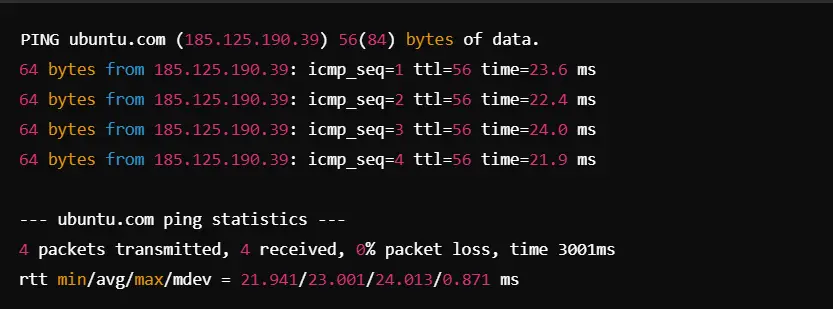
8. Stable Internet Connection
Confirm internet connectivity before proceeding.
Command

Method 1: An Integrated Ubuntu Update Kernel via the System Update Process
You can update the Linux Kernel via the update process available in your distribution may be the most straightforward and safest way to ensure you’re running the latest stable kernel version. It makes it easier to use your distribution package manager since it will automatically update all of the dependencies needed for the update process.
Steps to Update the Kernel Using the System Update Process
1. Open Terminal:
You can use the shortcut – Ctrl+Alt+T or you can look for “Terminal” in the applications menu.
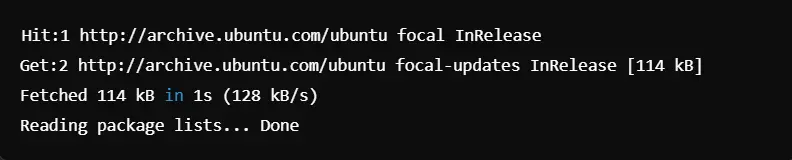
2. Update Package List
Before upgrading any package in the Ubuntu Linux kernel, we need to update the package list. You can use the following command:
Command

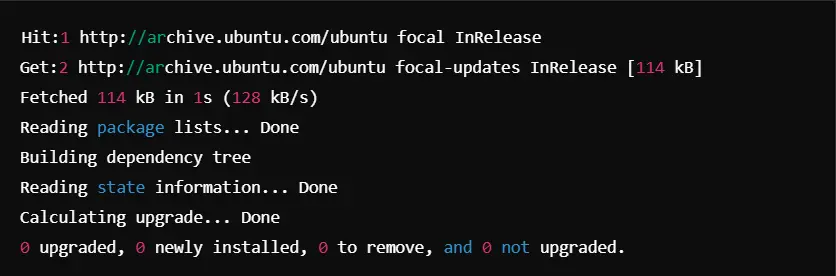
3. Upgrade Available Packages:
To update the Ubuntu kernel and your whole system, execute the following command. It installs all the available updates, so the system becomes up-to-date, followed by security patches and kernel improvements.
Command


4. Ubuntu Update Kernel:
You can use the following command to update the Ubuntu Kernel:
Command


This command will help upgrade the kernel to an updated version of Linux kernel Ubuntu. It will automatically resolve dependencies and install any necessary packages to ensure that the kernel works thoroughly.
5. Reboot Your System:
After updating the Kernel, reboot your system to load the new kernel. This makes your system use the latest kernel version when it starts up.
6. Verify the Update:
After rebooting, verify that the updated kernel Ubuntu has been applied successfully by checking the kernel version.
Command:


Advantages of Using the System Update Process For Ubuntu Update Kernel
Security and Stability: Since the system update process pulls packages directly from your distribution’s official repositories, you’re assured that the updates have been tested and are stable. This is crucial when performing an Ubuntu update Linux kernel to ensure your system remains secure.
Dependency Resolution: The package manager resolves dependencies for you so that the risk of problems occurring from missing or incompatible libraries is minimized.
Convenience: It is a very simple process that does not involve manual intervention. You can even stop kernel updates in Ubuntu if need be by changing the update settings according to your requirements.
It ensures you get the latest kernel so that your kernel is updated correctly, and your system maintains stability and security with enhancements in features as well as performance. This way, updating the Linux kernel Ubuntu is quite easy, but dependable at the same time.
Method 2: Force Ubuntu Update Kernel with System Update Process
Sometimes, a newer kernel is available but isn’t immediately compatible with your current Ubuntu release. For example, users running Ubuntu 22.04 may notice that a more advanced kernel version is present in Ubuntu 23.10. This method helps force an update to the latest kernel version while preparing for potential risks by taking necessary precautions.
Save important files somewhere before proceeding since the process might result in data loss.
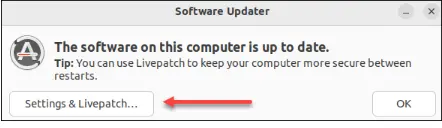
Step 1: Launch the Software Updater
Press the Super Key (Windows key for most keyboards) and type Software Updater in the search bar.
Open the Software Updater application.

If your system is already up to date, you will receive a notification stating that no updates are necessary. If available, update them now.
Select the button Settings & Livepatch to continue.


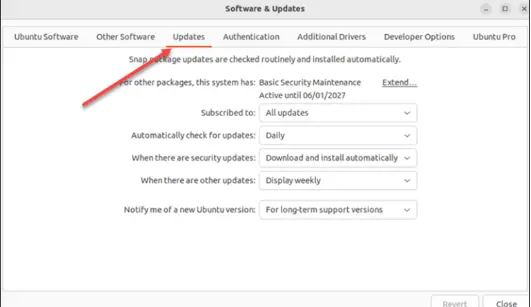
Step 2: Configure Software Update Settings
To get access to the latest Ubuntu builds and their kernels, you need to change the updater settings:
In the newly opened window, go to the Updates tab.
Click the Subscribed dropdown menu and click on All updates so that you receive every update that’s out.
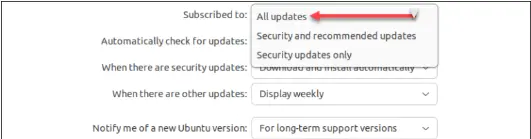
Then, click at the bottom on Notify me of a new Ubuntu version to check one of the options given here:

- For long-term support versions if you want stable, highly-tested upgrades
- For any new version, if you like trying new stuff but can live with the possibility of some bugs.
Close the settings window. Upon reopening the Software Updater, it will reflect your changes and offer updates if available.
Step 3: Forcing Kernel Update
Software Updater could not display an upgrade option. You can force the update manually from the terminal.
1. Open a terminal window by clicking Ctrl+Alt+T.

2. If you get an error, this will appear:

3. Now, open the configuration file

Now, locate the line:

Change it to:

Save and exit by pressing Ctrl+O, then Enter, and finally, Ctrl+X.
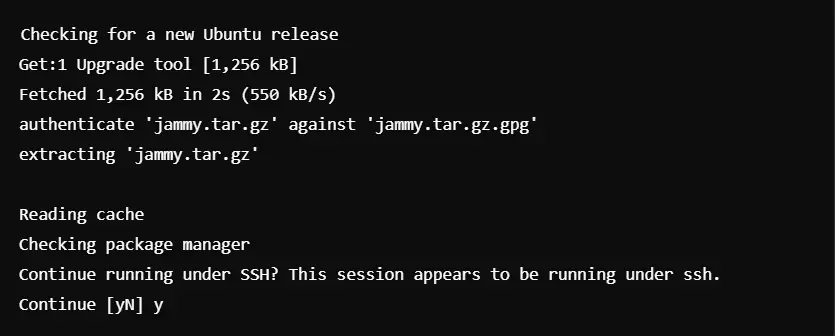
4. Run the sudo do-release-upgrade command again.

5. Observe the Upgrade Process

Best Practices To Update Linux Kernel Ubuntu
Here are a few best practices for Ubuntu update Linux Kernel:
1. Always Backup Before Ubuntu Update Kernel
- Create a full system backup, including critical files and configurations.
- Use tools like RSync or Timeshift for efficient backups.
- If you are using CyberPanel, use its backup to safeguard hosted websites and databases.
2. Compatibility Test For Ubuntu Update Kernel
- Test the new kernel version against your hardware and software.
- For server environments, test application dependencies, especially for web servers such as OpenLiteSpeed or databases such as MariaDB.
3. Testing Updates in a Staging Environment
- Test the new kernel on a staging server before updating any production system.
- Verify that all services and applications are working correctly with the new kernel.
4. Preserve the Old Kernel Before Ubuntu Updates Kernel
- Do not delete the current kernel right after the upgrade. Instead, preserve it as a fallback in case the new kernel starts malfunctioning.
- To get to the old kernel, use the GRUB boot menu.
5. Schedule Updates During Off-Peak Hours
- Schedule updates of the server for when utilization is low so that in case of any downtime, it causes minimal disruption.
- Notify users or interested persons about possible outage times.
6. Employ a Trustworthy Method For Ubuntu Update Kernel
- Use package managers such as apt for automatic dependency resolution.
- When updating forcibly, make sure configuration changes and commands occur appropriately.
7. Check System Logs After Ubuntu Updates Kernel
- Check the kernel activity of the update through journalctl or /var/log/kern.log.
- Look for errors and warnings that signal possible problems.
8. Automate Routine Updates
- Implement unattended upgrades for regular security patches without manual interaction.
- Configure CyberPanel to automate associated server management tasks.
Common Troubleshooting Tips for Ubuntu Update Kernel
Despite following best practices, issues can arise during or after a kernel update. Here are common problems and solutions:
1. Boot Failure After Ubuntu Update Kernel
Symptoms: The system doesn’t boot or gets stuck during startup.
Solution:
- Reboot and select the previous kernel version from the GRUB boot menu.
- Use sudo apt-get purge Linux-image-<version> to remove the faulty kernel.
2. Missing Kernel Headers
Symptoms: GCC compilation errors with drivers or software applications due to non-availability of headers.
Solution: Get the headers for the currently installed kernel version:

3. Application Compatibility Issues
Symptoms: Certain applications do not open up or open up with abnormal behavior.
Solution:
- Scan the application logs for specific errors.
- Switch to the previous kernel version if required.
4. GRUB Configuration Errors
Symptoms: GRUB doesn’t list all kernel versions or shows incorrect entries.
Solution: Update the GRUB configuration:

5. High Resource Usage After Update
Symptoms: Increased CPU or memory usage post-update.
Solution:
- Check for misbehaving processes using top or htop.
- Ensure all drivers are updated to match the new kernel
Role of CyberPanel in Kernel Update Management
CyberPanel is an extremely powerful web hosting control panel, provides completely hassle-free management of server environments, including kernel updates. This doesn’t mean CyberPanel handles kernel updates but rather is an essential part of ensuring that the overarching stability of the server, as well as services hosted on it, are maintained. Here’s how CyberPanel supports this process:
System Monitoring: Under CyberPanel, you can monitor your server’s performance and resource usage. This is especially important when updating the kernel since the potential issues will materialize post-update.
Backup Management: Before you update the kernel, the backup system of CyberPanel keeps your website data and databases, along with configurations, intact. So, in case of any problem after upgrading the kernel, you can bring back the working state.
Service Restart: CyberPanel will restart services that are essential to the proper functioning of OpenLiteSpeed, MariaDB, and PureFTPd immediately after the kernel update to implement all the changes.
Security Updates: CyberPanel can be integrated with the server’s update system. This enables you to create some important updates that you must make regularly, even for the system kernel.
FAQs on Ubuntu Update Kernel
1. How do I manually update my Ubuntu kernel?
Use the command sudo apt update && sudo apt upgrade in Ubuntu to update the kernel manually. If an update for the kernel is available, it will be on the list. For advanced users, you can download and install kernel updates from Ubuntu’s official repository or even by compiling from source
2. Can I turn off kernel updates in Ubuntu?
Yes, you can hold the kernel package and prevent the automatic upgrade of the kernel. This comes in handy when you prefer stability over new features.
3. What are the benefits of the Ubuntu update kernel?
The advantage of Ubuntu Linux kernel updates improve system security, compatibility with the hardware, and bugs or performance issues. This ensures that your system is always optimized and secure through regular updates.
4. How do I resolve Ubuntu update Kernel errors?
Common problems during the kernel updates are dependency errors or the inability to boot. Use sudo apt-get -f install to correct dependencies. If you cannot boot, use the GRUB menu to revert to the previous kernel.
5. Would updating the Linux kernel on Ubuntu require a reboot?
Yes, you can use live patching tools such as Canonical’s Livepatch Service to update kernels on Ubuntu without requiring a reboot. This, however, is more for critical security patches.
Concluding Note!
Keeping the Ubuntu kernel updated is central to keeping your system safe, performing efficiently, and allowing it to run smoothly on all your hardware. If you don’t opt for the automatic update route, follow the best practices that guarantee a smooth process with minimal risks. Back up important data before you begin any type of update to avoid experiencing any data loss.
Web hosting environments particularly utilizing CyberPanel usually have the updating of the kernel to be integrated with all other server management tools. Stay proactive in your server’s health through backup and service management via CyberPanel.
Ready to optimize your server with CyberPanel? Start using CyberPanel today and take charge of your system update and hosting environment seamlessly!