Nginx, a widely praised open-source web server and reverse proxy server, has garnered significant attention thanks to its outstanding performance, scalability, and proficiency in handling concurrent connections and serving static content. Originally designed to tackle the “C10k problem” (managing 10,000 simultaneous connections), Nginx has now become a popular option for hosting web applications, websites, and APIs, including hosting WordPress on Nginx. Its versatility and efficiency make it an ideal choice for various online ventures.
Introduction to WordPress and Nginx Integration
In the realm of web development and content management, the seamless integration of WordPress, a widely popular open-source content management system, with Nginx, a high-performance web server, has gained significant traction. This integration offers a powerful solution for optimizing website performance, enhancing security, and ensuring efficient handling of web traffic.
WordPress, renowned for its user-friendly interface and extensive range of plugins and themes, has become a go-to platform for creating websites and blogs. Its dynamic content management capabilities allow users to effortlessly publish, manage, and organize a variety of online content.
On the other hand, Nginx (pronounced “engine-x”) has earned its reputation as a robust and efficient web server. Unlike traditional Apache servers, Nginx is designed to handle a large number of concurrent connections with minimal resource consumption. Its event-driven architecture makes it particularly adept at handling static files and serving as a reverse proxy server.
This article delves into the intricacies of integrating WordPress with Nginx, guiding you through the process of setting up and configuring this powerful duo. We’ll explore the step-by-step installation, cover essential configuration settings, delve into performance optimization techniques, and provide insights into troubleshooting common challenges that may arise during the integration process.
How to Speed Up WordPress on NGINX?
In the fast-paced digital landscape, a swift and responsive website is crucial for engaging users and driving conversions. If your WordPress site is struggling with sluggish load times, it’s time to unlock the full potential of NGINX, the high-performance web server. In this comprehensive guide, we’ll walk you through proven strategies to turbocharge your WordPress site on NGINX, ensuring a seamless and lightning-fast user experience.
Get exclusive access to all things tech-savvy, and be the first to receive
the latest updates directly in your inbox.
Harnessing NGINX’s Power for WordPress Speed
Discover the art of leveraging NGINX’s cutting-edge technology to enhance your WordPress site’s speed and performance. We’ll guide you through the process of setting up NGINX, optimizing configurations, and tapping into its robust features for a performance boost.
Masterful Caching Techniques for Lightning-Fast Load Times
Unearth the magic of caching and its impact on website speed. Dive into NGINX’s caching mechanisms, including FastCGI, proxy, and object caching. Learn how to implement efficient caching strategies that drastically reduce server requests and propel your site’s performance to new heights.
Content Delivery Optimization: Serve at the Speed of Light
Explore the world of content delivery optimization with NGINX. Discover how to distribute your static assets across a network of servers strategically, ensuring users receive content from the nearest location. Say goodbye to latency and hello to faster loading times for users worldwide.
Code Optimization: Trim the Fat, Boost the Speed
Uncover the secrets of code optimization for a leaner and meaner website. We’ll delve into techniques such as minification, compression, and concatenation of CSS, JavaScript, and HTML files. By optimizing your code, you’ll minimize file sizes and maximize your site’s loading speed.
Load Balancing for Scalability and Resilience
Prepare your WordPress site for traffic surges and high demand with NGINX’s load-balancing prowess. Learn how to distribute incoming requests across multiple servers, ensuring optimal resource utilization and consistent performance, even during peak times.
Securing Speed: Strengthening Performance Without Compromising Security
Achieve the perfect balance between security and speed. Explore best practices for implementing security measures, such as firewalls, SSL/TLS encryption, and security plugins. Safeguard your site while maintaining the lightning-fast performance your users expect.
Mobile Optimization: Speed for Every Device
In the mobile era, delivering a swift experience on smartphones and tablets is essential. Dive into mobile optimization strategies tailored for NGINX and WordPress, ensuring your site loads quickly and flawlessly across all devices.
Continuous Improvement: Monitoring, Testing, and Fine-Tuning
The journey to speed never ends. Learn how to monitor your site’s performance using tools like GTmetrix and Google PageSpeed Insights. Uncover bottlenecks, troubleshoot issues, and continuously fine-tune your NGINX configuration to ensure consistent speed gains.
WordPress NGINX Vs Apache
When it comes to hosting your WordPress website, the web server you choose can significantly impact your site’s performance and user experience. Let’s take a closer look at the pros and cons of running WordPress on NGINX and Apache to help you make an informed decision.
NGINX: The Speed King
NGINX is renowned for its lightning-fast performance and efficient handling of concurrent connections. With its event-driven architecture and exceptional static content delivery, NGINX shines in delivering quicker load times and a seamless user experience.

Apache: The Veteran’s Versatility
Apache is a versatile web server with a long history. Its extensive community support, robust modules, and .htaccess configuration offer flexibility for various website needs. Although it might not match NGINX’s raw speed, Apache’s familiarity and adaptability make it a reliable choice.
Whether you prioritize speed or familiarity, both NGINX and Apache have their unique advantages to offer in the realm of WordPress hosting.
Why use NGINX for WordPress?
When it comes to WordPress, NGINX stands out as a powerful choice, offering an array of advantages that can elevate your website to new heights. Let’s explore why using NGINX for WordPress is a smart decision.
Blazing-Fast Performance
NGINX’s architecture is finely tuned for speed. It excels in handling concurrent connections with minimal resource usage, ensuring lightning-fast load times for your WordPress pages. Whether it’s delivering static content or processing dynamic requests, NGINX’s efficiency translates to an exceptional user experience.
Efficient Resource Utilization
NGINX’s lightweight design means it consumes fewer resources compared to other web servers. This efficiency becomes crucial as your website grows and traffic increases. With NGINX, you can handle more simultaneous users without straining your server, leading to cost savings and smoother operation.
High Scalability
As your WordPress site gains traction, the need for scalability becomes evident. NGINX’s load-balancing capabilities allow you to distribute incoming traffic across multiple servers, preventing overload and ensuring consistent performance even during traffic spikes.
Advanced Caching Mechanisms
Caching is a key element in speeding up websites, and NGINX excels in this area. Its caching mechanisms, including FastCGI and proxy caching, optimize content delivery by storing frequently accessed resources. This leads to reduced server load and faster page loading times for your users.
Security Enhancements
Security is paramount in today’s digital landscape. NGINX’s design inherently enhances security by minimizing the attack surface through efficient request handling. Its ability to handle malicious requests and prevent common vulnerabilities adds an extra layer of protection to your WordPress site.
Seamless Handling of Static Content
WordPress sites often consist of a mix of dynamic and static content. NGINX’s expertise lies in efficiently serving static content, such as images, CSS, and JavaScript files. This specialization reduces the server load and ensures quick delivery of essential assets.
Configuration Flexibility
NGINX’s configuration structure, although initially different from traditional servers like Apache, offers powerful customization options. Once you’re familiar with its syntax, you can fine-tune your server settings for optimal performance, security, and compatibility with WordPress.
Dedicated WordPress Community Support
The popularity of both NGINX and WordPress means there’s a wealth of community support, tutorials, and resources available. Whether you’re a seasoned developer or a WordPress enthusiast, you’ll find a supportive community to guide you through using NGINX with WordPress.
Step-by-Step Guide: Installing Nginx Web Server on Ubuntu
Let’s go step by step through the complete procedure.
Log in to your SSH Server
Input your host, port, and username details; opt for the password from the Initial Method dropdown, and proceed by clicking the “login” option. A password prompt will emerge, allowing you to enter your SSH password.
Upon successful login, select “New Terminal Console,” prompting the immediate display of a terminal window.
System Update
First, update your system using the below command.
sudo apt updateBelow output will appear.

Upgrade system packages to their latest versions by executing:
sudo apt upgrade
Installation
The installation will take some time and then the below output will appear.
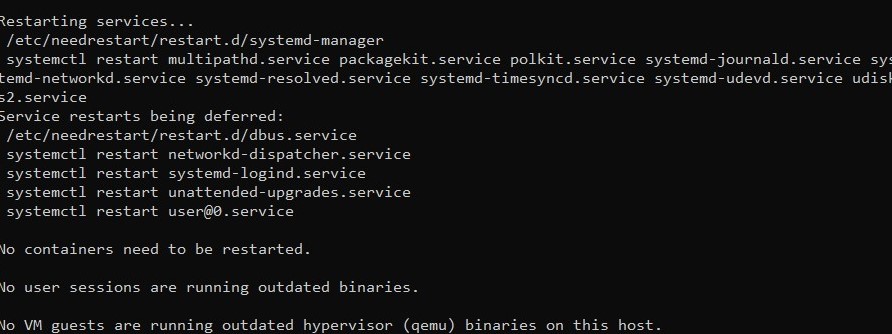
Now install nginx using the below command.
sudo apt install nginx
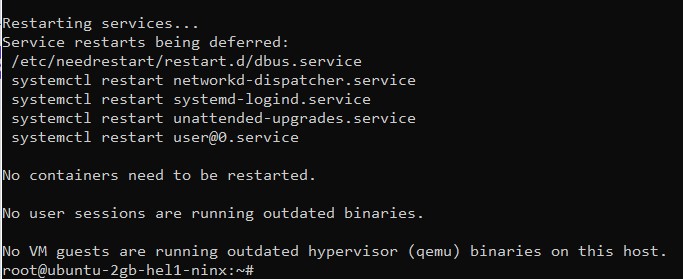
The installation process will require some time. Once the installation is finished, the Nginx service will initiate automatically. To check the service status, enter the following command:
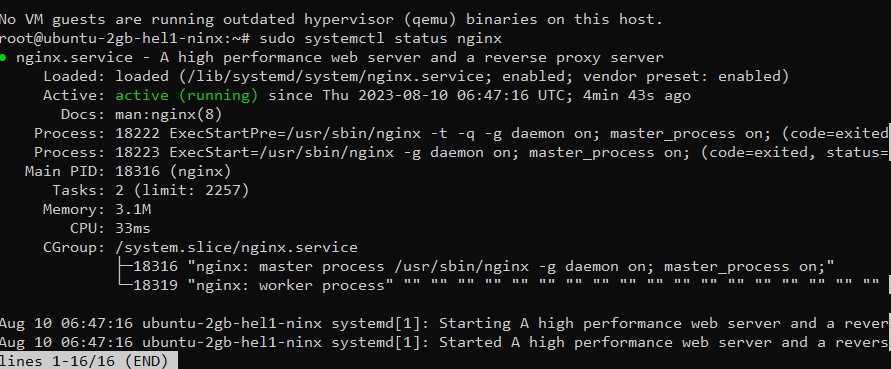
sudo systemctl status nginx
The below output shows the active running status of the Nginx service
Configuring UFW (Optional)
If you utilize UFW (Uncomplicated Firewall) for VPS firewall management, it’s necessary to unlock ports 80 and 443 for HTTP and HTTPS correspondingly. You can activate the complete Nginx profile, which encompasses regulations for both ports which can be achieved by executing:
sudo ufw allow 'Nginx Full'
For confirmation of the status, you can employ:
sudo ufw status
MySQL Database – WordPress on Nginx
For data storage, MySQL will be employed. If MySQL is not currently installed, you can obtain it through the following procedure:
sudo apt install mysql-server
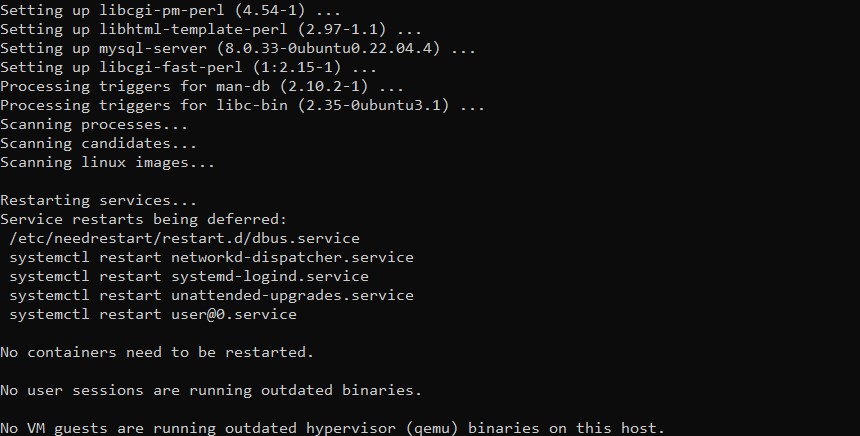
The installation will take some time then the MySQL Database will be started automatically. You can use the below command to check its status:
sudo systemctl status mysqlThe below output shows the active status.

Subsequently, you can access the MySQL shell by employing:
mysql -u root -pUpon executing this command, you will transition to the MySQL console, discernible by the presence of “mysql>” at the beginning of the line.
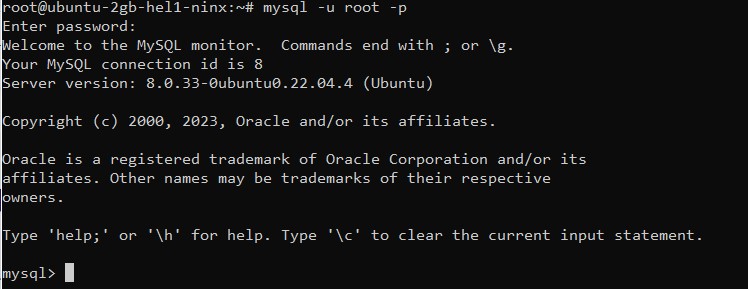
In this context, you have the ability to generate a database and a corresponding database user name of your choice i.e. WordPress and WordPress User, respectively. This action will establish a fundamental database configuration ready for utilization in the WordPress setup.
CREATE DATABASE WordPress CHARACTER SET utf8mb4 COLLATE utf8mb4_general_ci;CREATE USER 'FileUser'@'localhost' IDENTIFIED BY 'cyber123';
GRANT ALL ON File.* TO 'FileUser'@'localhost';FLUSH PRIVILEGES;EXIT;PHP Installation
You have the option to conveniently install all the necessary PHP extensions at once through a single command but if your terminal doesn’t support that you can run them separately as well. If PHP packages have not been installed on your server then you need to install a PHP version that your server supports. You can check that by running this command:
sudo apt update
apt search php

Replace <php-package-name> with the actual name of the PHP package, you want to install.
For example, if you want to install PHP 8.1, you can use the following command:
sudo apt install php8.1
Now install all the required PHP extensions using:
sudo apt install php8.1-cli php8.1-fpm php8.1-mysql php8.1-opcache php8.1-mbstring php8.1-xml php8.1-gd php8.1-curl

Upon the successful conclusion of this installation, PHP-FPM will initiate automatically.
How to install WordPress on Nginx
For installing WordPress with Nginx, begin by establishing a directory where you can download the WordPress archive:
sudo mkdir -p /var/www/html/sample.comYou can obtain the most recent WordPress installations from the official WordPress website. Download the installation package into the /tmp directory. Navigate to this directory using the following command:
cd /tmpwget https://wordpress.org/latest.tar.gz
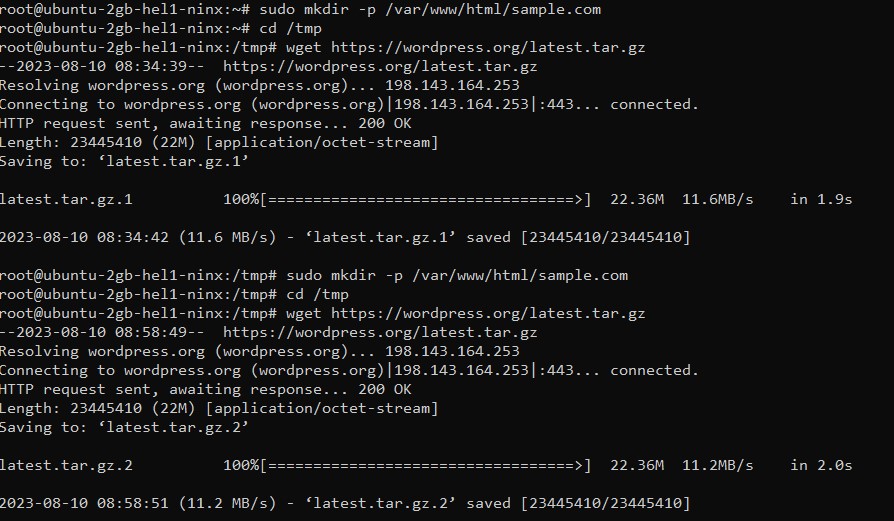
To extract this archive into the previously established directory, employ:
tar xf latest.tar.gzsudo mv /tmp/wordpress/* /var/www/html/sample.com/(Optional) If the directory is not empty then first use the below command and then the above command i.e. sudo mv /tmp/wordpress/* /var/www/html/sample.com/
sudo rm -r /var/www/html/wordpress.com/*
The web server needs full access to these files. Adjust the permissions using:
sudo chown -R www-data: /var/www/html/sample.com
Set up Nginx for WordPress
For setting up Nginx with WordPress, we need to establish a fresh server block dedicated to our WordPress installation.
Go to the New SFTP window from there go to enter /etc/nginx/sites-available and generate a file named sample.com. Make sure the filename matches your domain name.

Enter this code into the new file:
# Redirect HTTP -> HTTPS
server {
listen 80;
server_name www.sample.com sample.com;

include snippets/letsencrypt.conf;
return 301 https://sample.com$request_uri;
}

# Redirect WWW -> NON-WWW
server {
listen 443 ssl http2;
server_name www.sample.com;

ssl_certificate /etc/letsencrypt/live/sample.com/fullchain.pem;
ssl_certificate_key /etc/letsencrypt/live/sample.com/privkey.pem;
ssl_trusted_certificate /etc/letsencrypt/live/sample.com/chain.pem;
include snippets/ssl.conf;

return 301 https://sample.com$request_uri;
}

server {
listen 443 ssl http2;
server_name sample.com;

root /var/www/html/sample.com;
index index.php;

# SSL parameters
ssl_certificate /etc/letsencrypt/live/sample.com/fullchain.pem;
ssl_certificate_key /etc/letsencrypt/live/sample.com/privkey.pem;
ssl_trusted_certificate /etc/letsencrypt/live/sample.com/chain.pem;
include snippets/ssl.conf;
include snippets/letsencrypt.conf;

# log files
access_log /var/log/nginx/sample.com.access.log;
error_log /var/log/nginx/sample.com.error.log;

location = /favicon.ico {
log_not_found off;
access_log off;
}

location = /robots.txt {
allow all;
log_not_found off;
access_log off;
}

location / {
try_files $uri $uri/ /index.php?$args;
}

location ~ \.php$ {
include snippets/fastcgi-php.conf;
fastcgi_pass unix:/run/php/php7.2-fpm.sock;
}

location ~* \.(js|css|png|jpg|jpeg|gif|ico|svg)$ {
expires max;
log_not_found off;
}
}
To simplify administration, generate a symbolic link to the sites-enabled directory.
sudo ln -s /etc/nginx/sites-available/sample.com /etc/nginx/sites-enabled/You can verify the Nginx configuration by employing.
sudo nginx -tAfterward, you can initiate a restart of Nginx by employing:
sudo systemctl restart nginx
Setting up WordPress to work with Nginx
Step 1: Accessing the Installation Page
The final step is all about setting up your very own WordPress site!
Open Your Web Browser and Enter the Domain: Launch your preferred web browser and type in your domain name, e.g., http://sample.com. Make sure to replace “sample.com” with your actual domain.
Step 2: Language Selection
Choosing Your Preferred Language: Once the page loads, you’ll encounter a language selection screen. Pick your desired language from the available options.
Step 3: Getting Started
Following the Instructions: After selecting the language, an instruction page will appear. Read through the instructions and proceed to the next page.
Step 4: Database Configuration
Configuring Your Database Details: On the next screen, you’ll have the chance to customize your Database details.
Step 5: Installation
Initiating the Installation: Ready to begin? Click the installation button to kickstart the process.
Step 6: Additional Information
Entering Extra InformationOn the subsequent page, you’ll be able to provide additional information, including setting up your WordPress username.
Step 7: Username Security
Enhancing Security: Choosing a Username: For security reasons, it’s advisable to modify the default “admin” username to something unique and not easily guessable.
Step 8: Logging In
Accessing Your DashboardOnce you’ve completed the installation, you’ll be redirected to the login page.
Step 9: Exploring the Dashboard
Navigating the WordPress Dashboard: Congratulations! You’re now logged in and can explore your WordPress dashboard.
By following these steps, you’ll have successfully configured WordPress to work seamlessly with Nginx on your Ubuntu server. Enjoy creating and managing your content with ease!
FAQs
What is Nginx, and why is it popular in web hosting?
Nginx is a powerful open-source web server known for its exceptional performance, scalability, and efficient handling of concurrent connections. It gained prominence by addressing the “C10k problem” and has become a popular choice for hosting websites, web applications, and APIs
How does Nginx differ from traditional web servers like Apache?
Unlike traditional web servers like Apache, Nginx is event-driven and designed to handle a large number of simultaneous connections with minimal resource consumption. Its architecture makes it particularly effective for serving static content and functioning as a reverse proxy.
How does Nginx contribute to optimizing website performance?
Nginx enhances website performance through optimized delivery of static content, proficient load balancing, and advanced caching mechanisms. It’s efficient handling of connections and content delivery contributes to faster page loading times and improved user experiences.
Are there security considerations when setting up WordPress with Nginx?
Yes, security is an important aspect of the integration. The article addresses security measures, such as choosing a secure username for WordPress and configuring SSL certificates for secure communication.
Are there any considerations for scaling my WordPress-Nginx setup as my website grows?
Scaling your setup for increased traffic and demand is an important consideration. While the article provides a foundation, additional strategies, such as load balancing and high availability, may be needed for extensive scaling.
Wrapping Up
In conclusion, the integration of WordPress, a versatile and user-friendly open-source content management system, with Nginx, a high-performance and resource-efficient web server, represents a powerful synergy that embodies the best of both platforms. With WordPress’s dynamic content management capabilities and Nginx’s exceptional handling of connections and content delivery, websites and web applications can achieve optimal performance, enhanced security, and efficient traffic management. This comprehensive guide has illuminated the intricate process of seamlessly merging these two forces, encompassing installation, configuration, security considerations, and performance optimization.


