When experimenting with electronics, creating prototypes, or getting into embedded systems, Arduino IDE Linux has become a staple name in the community. Whether you are a hobbyist working with LEDs or an engineer prototyping sensor networks, Arduino boards offer a powerful yet easy-to-use platform to bring ideas to life. However, to get the most out of these small boards, you must have the right development environment. That’s where the Arduino Integrated Development Environment (IDE) enters the picture.
Though the Arduino IDE on Linux is compatible with various operating systems like Windows, macOS, and Linux, Linux enjoys an exceptional position within the developer and maker community. Most open-source developers, learners, and professionals use Linux due to its light nature, flexibility, and compatibility with the open-source ideology. Operating the Arduino IDE on Linux comes naturally to those who already use tools like GCC, Python, Git, or Docker in their daily activities.
This tutorial is a step-by-step tour of all you want to know about Arduino IDE on Linux. We will begin with the fundamentals of what the IDE is, then move on to installation techniques, configuration, project examples, troubleshooting, advanced tricks, and more. At the end, you won’t just have installed and know how to use Arduino IDE on Linux, but also how to optimize it for a hassle-free development experience.
What is Arduino IDE?
The Arduino IDE is a software application designed to make it easier to write, compile, and upload code (known as sketches) to Arduino boards. Its interface is intentionally simple: a code editor, a message console, a toolbar with buttons for common functions, and menus to configure your board and port.
Key features include:
- Code editor with syntax highlighting for C/C++ (the language Arduino uses).
- One-click verification and upload to assemble and send code to your board.
- Serial monitor and plotter for looking at data from sensors and debugging your code.
- Library and board manager to support new components and Arduino-compatible hardware.
The IDE has progressed. The traditional Arduino IDE (1.x series) is minimalistic and straightforward, whereas the newer Arduino IDE 2.x (based on Electron and Monaco Editor, the same engine used for VS Code) provides a contemporary look, improved autocomplete, and built-in debugging. The two versions are compatible with Linux, so use whichever suits your taste.
Why Use Linux for Arduino Development?
If you’re already a Linux user, the solution is clear: you feel at home in an open-source system, and you like the level of control Linux provides over your machine. But even for beginners, Linux has some benefits for Arduino development:
- Performance: Most Linux distributions are light compared to Windows, so you’re able to run the IDE without worries even on old hardware.
- Open-source alignment: Arduino itself is open-source, and Linux is the obvious partner for makers who appreciate openness and community-driven software.
- Flexibility: Linux makes it simple to integrate with other tools—command line tools, Git, or Python scripts—that can extend your Arduino workflow.
- Stability: Unlike Windows, Linux does not catch you off guard with surprise updates or driver clashes.
- Community support: Since the maker and Linux communities tend to have overlap, if you’re having trouble, someone has probably already figured it out and posted it online.
Installing Arduino IDE on Linux
There are various methods for installing the Arduino IDE under Linux. The one you should use is based on your distribution, whether you prefer updates, and if you want to use the classic or the modern version. Let’s have a look at the most popular ones.
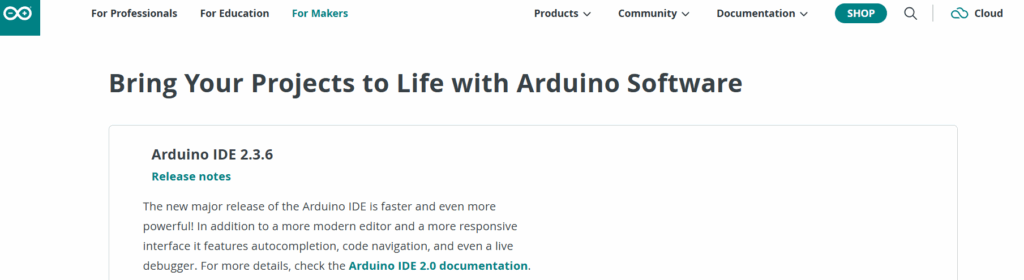
Method 1: Download from Arduino Official Website (Recommended)
The safest method is to download the package directly from the Arduino website
. Here’s how:
Visit the official Arduino downloads page.
Choose “Linux 64-bit” (or 32-bit if you’re running an older system).
Download the .tar.xz package.
Unpack it with:
tar -xf arduino-ide_Linux_64bit.tar.xz cd arduino-ide
Run the install script:
sudo ./install.sh

This sets up menu entries, and you can now start the Arduino IDE from your applications menu.
Method 2: Install using Snap
If your distro supports Snap (Ubuntu and its derivatives do by default), the IDE can be installed in one line:
sudo snap install arduino
This is handy, but occasionally Snap packages will have slower start times than native installs.
Method 3: Install using Flatpak
Flatpak is another multi-distro package format. On a distro with Flatpak support enabled, use:
flatpak install flathub cc.arduino.IDE2
Then run with:
flatpak run cc.arduino.IDE2
Method 4: Using Distribution Package Managers
Some distros have Arduino IDE in their repos. For instance:
On Ubuntu/Debian:
sudo apt update
sudo apt install arduino
On Fedora:
sudo dnf install arduino
On Arch Linux (via AUR):
yay -S arduino-ide
Distro repositories tend to be behind the newest version, though. If you need the latest features, it’s best to get it from the official website.
Setting Up Arduino IDE on Linux
After the installation, there are a few things you should do to make it work smoothly.
1. Add Your User to the Dialout Group
On Linux, serial devices such as /dev/ttyUSB0 or /dev/ttyACM0 need special permissions. Uploading a sketch without doing this setup might result in a “Permission denied” message.
Resolve it by adding your user to the dialout group:
sudo usermod -aG dialout $USER
Then log out and log back in for changes to take effect.
2. Connect Your Board
Plug in your Arduino via USB. Then check if it’s detected:
ls /dev/tty*
You should see something like /dev/ttyUSB0 or /dev/ttyACM0.
3. Configure the IDE
- Open Arduino IDE.
- Go to Tools > Board > Arduino AVR Boards > Arduino Uno (or whichever board you’re using).
- Select the right port under Tools > Port.
Now you’re ready to upload sketches.
Writing Your First Sketch on Linux
The traditional first project is the Blink sketch—getting an LED to blink. This may already be preloaded onto Arduino boards, but let’s write and upload it ourselves.
Fire up Arduino IDE and copy in the following:
<code>void setup() {<br>pinMode(13, OUTPUT); // Define pin 13 as an output<br>}<br>void loop() {<br>digitalWrite(13, HIGH); // Light LED on<br>delay(1000); // Wait one second<br>digitalWrite(13, LOW); // Turn LED off<br>delay(1000); // Wait one second</code>Click the Upload button (right arrow icon). The IDE will compile the code, and when everything is properly configured, the LED on your board will flash on and off once a second.
Installing Libraries and Boards on Linux
Arduino’s true strength lies in its massive ecosystem of libraries and third-party board definitions.
Installing Libraries
- Sketch > Include Library > Manage Libraries…
- Search for the library you require (e.g., “DHT sensor library”).
- Click Install.
Libraries are kept in your home directory, typically at ~/Arduino/libraries.
Adding New Boards
If you work with ESP8266, ESP32, or other Arduino-compatible boards, you must add their board definitions:
- Open File > Preferences.
- In the “Additional Board Manager URLs” box, enter the relevant URL. For example, for ESP32:
https://dl.espressif.com/dl/package_esp32_index.json - Go to Tools > Board > Board Manager, type ESP32, and install.
Troubleshooting Common Issues on Linux
Even when set up correctly, you may encounter some problems. Below are some of the common ones and solutions:
Problem: Permission Denied on /dev/ttyUSB0
Resolution: Ensure you added your user to dialout group and rebooted.
Problem: Board Not Detected
- Verify dmesg displays the board upon insertion:
dmesg | grep tty - If not, you might need extra drivers for some clones (CH340, FTDI). Install them through your package manager.
Problem: Upload Fails with Stk500 Error
- Ensure the correct board and port are selected.
- Reset the Arduino before uploading.
- Try a different USB cable (some cables are power-only).
Advanced Usage
Arduino CLI
If you’re comfortable with the terminal, Arduino provides a command-line interface (CLI).
Install it:
curl -fsSL https://raw.githubusercontent.com/arduino/arduino-cli/master/install.sh | shExamples:
Compile a sketch:
arduino-cli compile --fqbn arduino:avr:uno MySketch
Upload a sketch:
arduino-cli upload -p /dev/ttyUSB0 --fqbn arduino:avr:uno MySketch
This is excellent for scripting, automation, and CI/CD pipelines.
Running Multiple IDE Versions
You can run both Arduino IDE 1.x and 2.x together. Just unpack them into separate directories and run whichever you want to.
Portable Mode
If you put a portable folder within the IDE installation directory, all of the libraries, preferences, and sketches will be kept there. This is convenient if you’d like a self-contained environment.
Alternatives to Arduino IDE on Linux
Although Arduino IDE is easy to use for beginners, advanced developers sometimes prefer alternatives:
- PlatformIO with VS Code: Offers IntelliSense, debugging, unit testing, and has a lot of boards supported.
- Arduino Pro IDE: An experimental one that has more features.
- Vim or Emacs with Arduino CLI: For serious Linux terminal users.
Best Practices for Linux Makers
- Update the IDE regularly: New releases patch bugs and include support for new boards.
- Backup your sketches: Version control your projects using Git.
- Use meaningful names for sketches and libraries to prevent conflicts.
- Inspect dmesg while debugging hardware problems.
- Take advantage of Linux scripting: Use Linux scripting to automate such activities as uploading multiple sketches to various boards.
Conclusion
The Arduino IDE under Linux is not merely a development platform it’s an entry point into open-source electronics. From blinking LEDs and elementary projects to sophisticated IoT applications, the union of Linux and Arduino provides you with a solid, versatile, and robust environment in which to make your concepts become reality.
Whether you’re a newcomer installing the IDE for the first time or a seasoned developer wanting to automate processes with the CLI, Linux has everything you require. With its performance and stability, as well as community support, Linux is perhaps the ideal platform on which to develop Arduino.
FAQs
Is Arduino IDE free on Linux?
Yes, the Arduino IDE is completely free and open-source across all platforms, including Linux.
Do I need internet access to use Arduino IDE?
Not always. Once installed, you can work offline, though you’ll need internet to install libraries or board definitions initially.
Which is better on Linux: Arduino IDE 1.x or 2.x?
If you prefer simplicity and lightweight performance, stick with 1.x. If you want modern features like autocomplete and debugging, go for 2.x.