
Containerization is something that goes on in today’s fast-paced environment. The Docker install is therefore seen as a procedure for any developer or system administrator. Whether one needs to install Docker on Ubuntu, or macOS, or even integrate it into CyberPanel, learning the Docker install procedures can equip one with the ability to treat applications in all aspects of their management and deployment.
This guide will take you from A to Z on how to install Docker on Ubuntu, its configuration in CyberPanel for the management of apps, and touch on the issues of Docker’s installation with macOS. We’ll see on licensing history at Docker-OSX and the end whether it has been removed and the current legal position in 2024.
Understanding Docker
Docker is an open-source platform with automation in application deployment, scaling, and management of applications within lightweight and portable containers. With Docker, developers can package an application and all its dependencies inside one container, which would ensure their application runs the same, regardless of the environment. This avoids the classic “it works on my machine” problem-sometimes it runs in one but fails in another system, either due to some libraries or configuration mismatch.
Importance of Docker
Docker has been able to revolutionize the whole sector of software development and infrastructure in modern days. The company has made it easier to develop, test, and deploy applications on various platforms because of the isolation of applications in containers. More than that, these containers take far less time to spin up than traditional virtual machines, even though they use shared system resources and have no overhead for entire operating systems. As such, Docker is a significant enabler for teams working with the practice of DevOps to deploy faster as well as ensure continuous integration and effective collaboration between development and operations teams.
Benefits of Using Docker
Portability: Container images created using Docker can be easily moved around and run on any computer that supports Docker, whether it is a local computer, a server, or a cloud-based platform. Portability ensures that applications will behave similarly on whatever system they are being deployed on.
Efficiency: Docker containers share the host OS’s kernel, so they’re lighter than virtual machines. This makes resource usage lower and causes faster start times.
Scalability: Docker makes the process of scaling applications horizontally easier. You can deploy numerous containers across various systems and environments. You can manage large-scale container deployments using orchestration tools like Docker Swarm or Kubernetes.
Consistency: Containers encapsulate everything your application needs to dependencies. This makes your software behave consistently, which lessens the possibility of compatibility conflicts between your environments.
Security: Docker implements process isolation, so containers do not interfere with other containers or the host system. This limits the chance of security flaws that could exist to influence other containers or your host machine.
Installing Docker in Ubuntu
So, Docker has created a great streamlined process for Linux distributions, particularly Ubuntu.
Prerequisites
- 64-bit version of Ubuntu
- Sudo privileges or root access
Now, let’s see how to Docker install on Ubuntu:
1. Update package database:
You have to use the following command to update your package database:

2. Installing required packages:
Use this command to install the required packages:
sudo apt install apt-transport-https ca-certificates curl software-properties-common
3. Adding Docker’s official GPG key:

Write this command:


4. Add Docker’s repository to your system:
sudo add-apt-repository "deb [arch=amd64] https://download.docker.com/linux/ubuntu $(lsb_release -cs) stable"You will find the output:
You are about to add the following PPA:

Docker CE (Community Edition) is a free, open-source, and widely adopted container platform.

...
5. Update the package database again:


6. Docker Install:


7. Checking Docker Status:

Now you have successfully installed Docker on your Ubuntu system. You can verify the installation by running:


Now, you are ready to run Docker on Ubuntu.
How To Docker Install on CentOS
Prerequisites
You have to make sure:
- A 64-bit version of CentOS (7 or later)
- Sudo privileges or root access
Step-by-Step Installation Guide
1. Updating package databases:


2. Installing required packages:


3. Adding Docker’s official repository:
Here is the command:
sudo yum-config-manager --add-repo https://download.docker.com/linux/centos/docker-ce.repo
4. Docker Install:


5. Starting Docker:

6. Verifying Installation:


How To Install Docker In CyberPanel
CyberPanel plays a crucial role in Docker management. You can install Docker in CyberPanel. We will discuss the first manual method:
1. Login to CyberPanel.
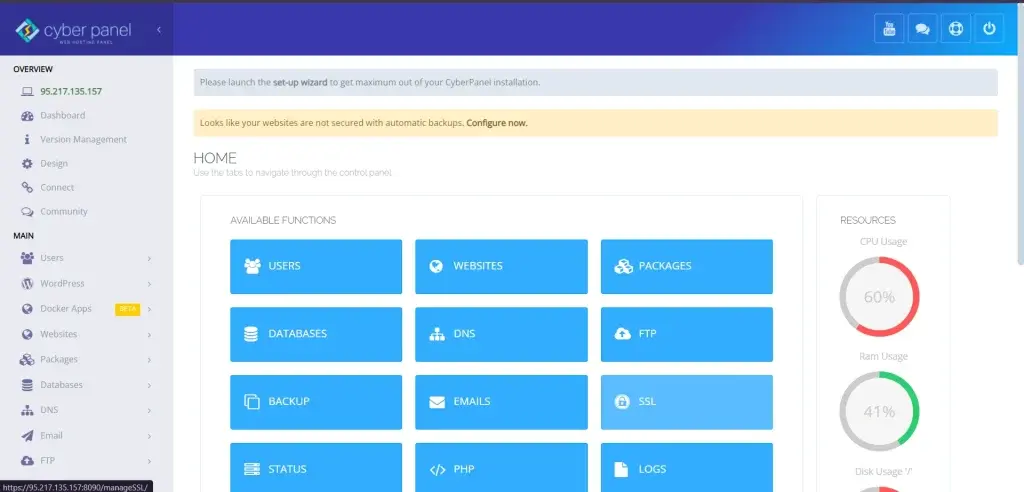
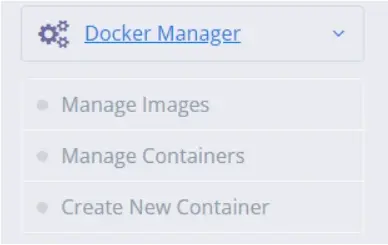
2. Go to Docker Manager in the sidebar and click Create New Containers.
3. Click on Install Docker, CyberPanel will handle the installation process automatically.
4. After installation, you can verify by navigating to the Docker section in CyberPanel.
Now, here is the step-by-step installation using Ubuntu:
Prerequisites
- A server running CyberPanel.
- Root access to your server or sudo privileges.
- An active internet connection lets you download all the packages you need.
Step 1: Update Your System
Firstly, you have to update your system packages for the most up-to-date security updates and dependencies.

Step 2: Installing Packages Needed
Now you have to install some prerequisite packages that will let apt use packages over HTTPS.
Write this code:
sudo apt install apt-transport-https ca-certificates curl software-properties-common -yOutput:

Step 3: Add Docker’s Official GPG Key
Now you have to add Docker’s official GPG key to verify the authenticity of the Docker packages.


Step 4: Add Docker Repository
Now, add the Docker repository to your APT sources.
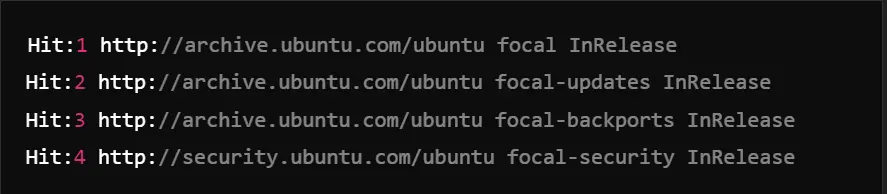
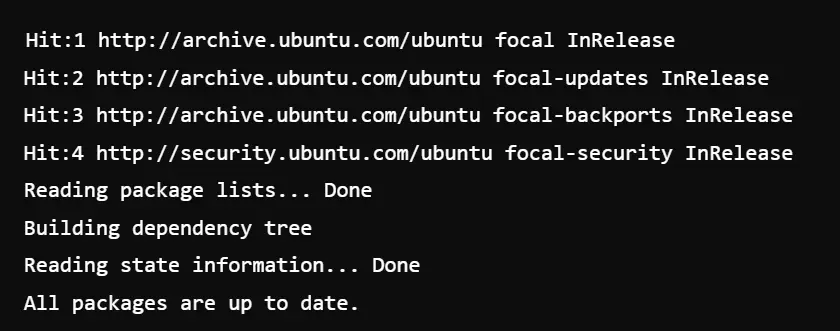
sudo add-apt-repository "deb [arch=amd64] https://download.docker.com/linux/ubuntu $(lsb_release -cs) stable"You will find this output:
Hit:1 http://archive.ubuntu.com/ubuntu focal InRelease
Hit:2 http://archive.ubuntu.com/ubuntu focal-updates InRelease
Hit:3 http://security.ubuntu.com/ubuntu focal-security InRelease
Get:4 https://download.docker.com/linux/ubuntu focal InRelease [64.3 kB]
Get:5 https://download.docker.com/linux/ubuntu focal/stable amd64 Packages [7,539 B]
Fetched 71.9 kB in 2s (32.4 kB/s)
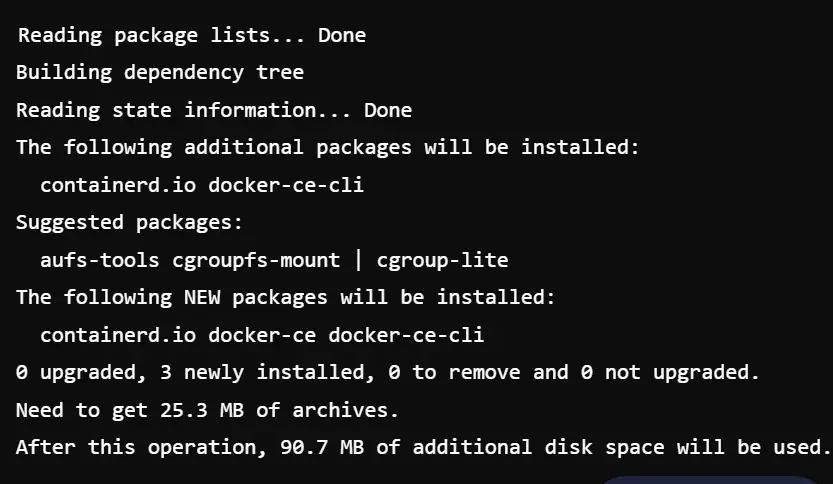
Reading package lists... DoneStep 5: Installing Docker Engine
You have to use the following command:

Step 6: Start Docker and Enable It to Run at Boot
Now, you have to start the Docker service and enable it to start on boot.

You will find this output:
Created symlink /etc/systemd/system/multi-user.target.wants/docker.service → /lib/systemd/system/docker.service.Step 7: Verify Docker Installation
Now, you have to verify if the Docker installation is installed correctly.


Step 8: Testing
Now, you have to run a simple Docker container to test working:


Congratulations! You have installed Docker in CyberPanel successfully. You can, therefore, use the containerization powers of Docker to effectively deploy and manage applications. You may control your containers using a terminal in CyberPanel or SSH into your server because you can access Docker commands.
How To Deploy WordPress Using n8n Docker Apps in CyberPanel
Introduction to n8n and What It Can Do
n8n is an open-source tool for workflow automation, which supports Docker with integration. Users can create multiple, complex workflows using several applications.
Setup Docker for WordPress in CyberPanel
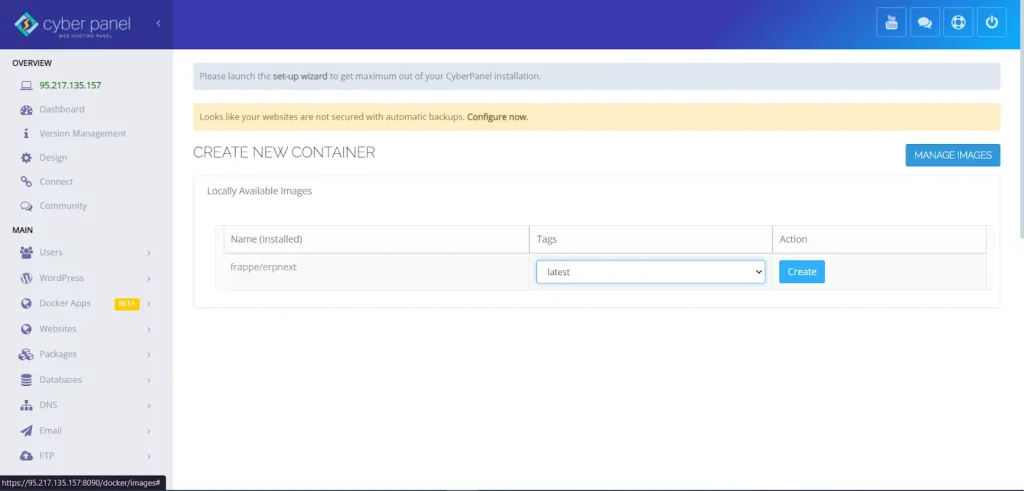
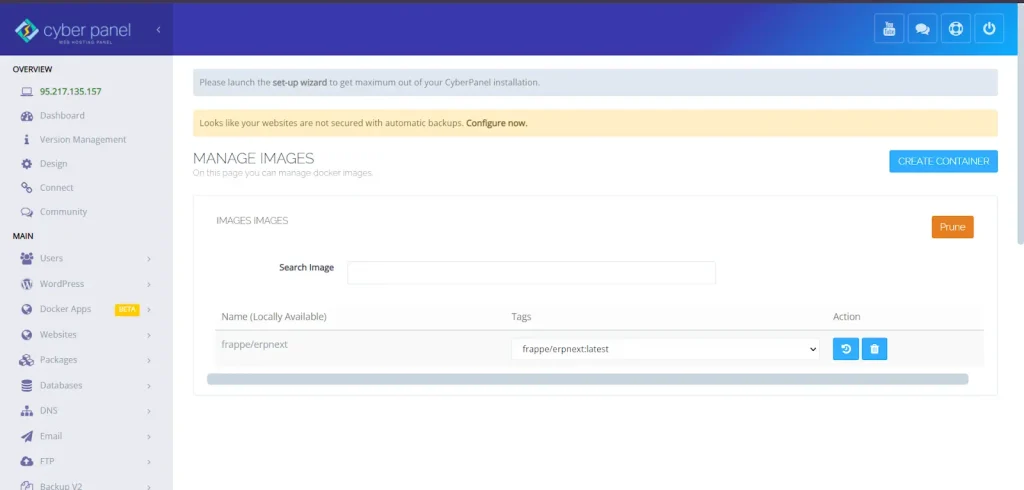
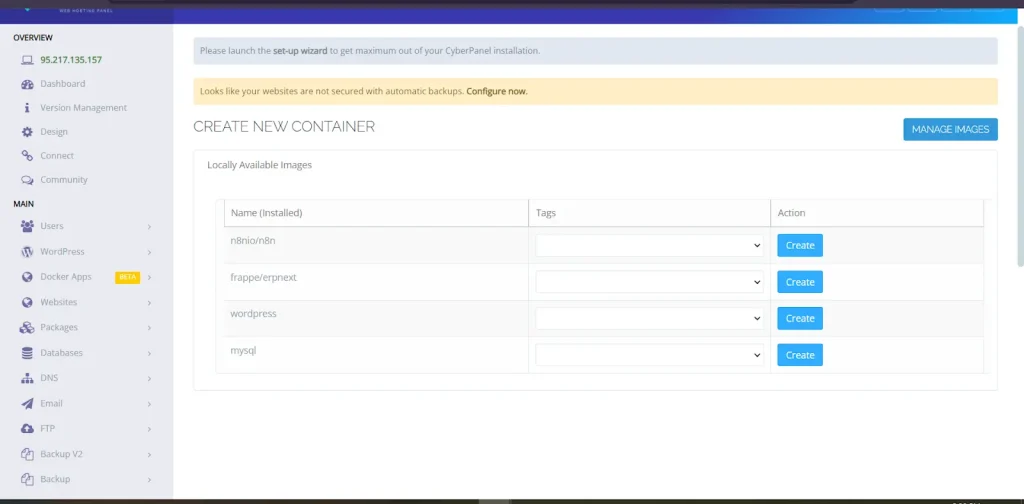
1. Creating the New Docker Container
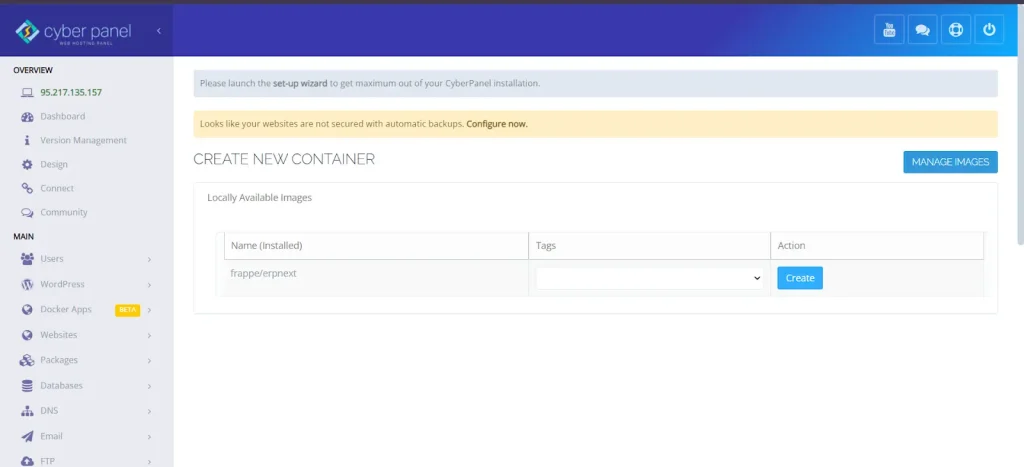
Click on the Create Container button in the Docker Manager provided by CyberPanel.
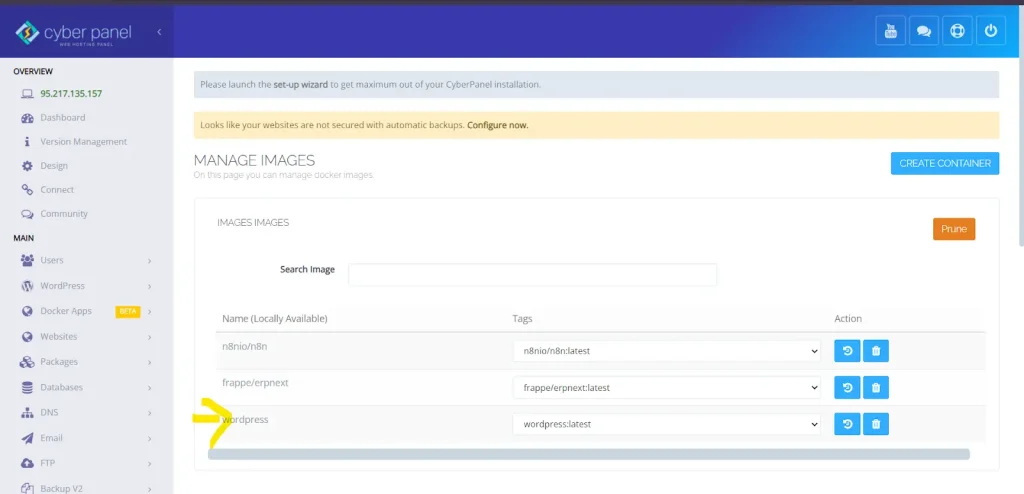
2. Configure the WordPress Container
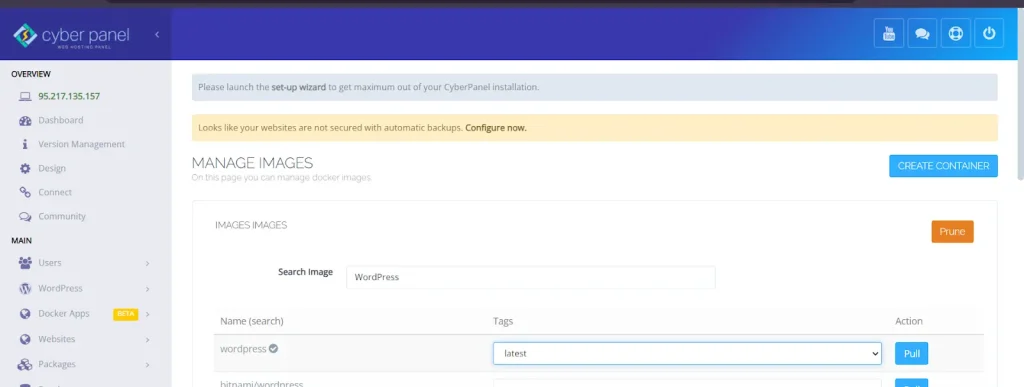
If you want to set up your Docker image. Choose the Official WordPress image provided by Docker Hub.
For ports, set up the ports. You should be mapping port 80 to a custom port, like 8080.
3. Start the Container:
Click on Start Container to launch your WordPress site.
4. Access WordPress:
Open up your browser and go to http://your-server-ip:8080 to complete the installation of WordPress
How to Install WordPress in n8n Docker Apps Step-by-Step
1. Access n8n:
Open up the n8n in your browser.
2. Create a New Workflow:
Click on Create and choose HTTP Request as the trigger point.
3. Connect to the WordPress API:
You will need some nodes that will permit the actions you want to do, such as creating posts or updating content, etc.
4. Test the Workflow:
Run the workflow to prove it sends traffic to your WordPress installation.
Docker-OSX/ Docker Install OSX: Previous and Present Scenario in 2024
Docker-OSX is the application that allows for running macOS on non-apple hardware based on the user of Docker containers in conjunction with QEMU. However, this was removed by Docker Hub in 2021 by its request over a DMCA takedown notice from Apple for violating its licensing agreement of macOS.
Reason for Takedown:
Apple’s macOS software license prohibits usage to only work on Apple hardware, and Docker-OSX broke this as it allows running macOS on non-Apple hardware. That raised major legal concerns about virtualizing macOS on non-Apple hardware.
Impact
Users lost easy access to simulate macOS environments using Docker containers with the removal of Docker-OSX from Docker Hub. This would leave developers either seeking alternative solutions or having to rely on authorized macOS virtual machines, which Apple restricts strictly to running on Apple hardware.
Legal Consequences
Licensing was based on macOS software license, which strictly limits usage just to Apple hardware. While Docker-OSX utilized an open-source license (usually under GPL v3+), this put it head-to-head with Apple’s licensing.
Non-Apple hardware use of Docker-OSX then could technically be argued as a violation of the licensing terms from Apple, which made users potentially liable to legal action.
2024 Scenario
As of now, in 2024, Docker-OSX is not found on Docker Hub. The project is maintained by the community on GitHub still; however, a user should keep in mind the legal impact.
Apple’s licensing restrictions for macOS haven’t changed, and the state of running macOS on non-apple hardware stays in the gray area.
To get macOS up and running on virtualized environments, developers are advised to make use of licensed methods implemented by Apple. These instances include the need to run on Apple hardware.
Docker Desktop and Licensing 2024
Docker Desktop is still available on macOS, it supports the latest releases that can run on M1/M2 chips. But in 2021, the company introduced a new licensing model. For commercial users, any company having more than 250 employees or exceeding revenue of $10 million has had to buy a subscription.
This is a subscription model that falls under the Docker Subscription Service Agreement. Users have to agree to it when they install Docker Desktop. The agreement contains usage limitations as well as subscription tiers, so it is clear that large organizations and those using Docker Desktop at large commercial scales need a license.
The company continues to support both individual developers as well as enterprises, but the licensing shift has significantly impacted organizations that rely on Docker’s ecosystem.
Docker Install macOS
You can check Docker’s official website for detailed information.
Quick Overview of Docker Install on macOS
- Download: Obtain Docker Desktop from the Docker Hub website.
- Install: Download and click open the dmg file.
- Launch: Open Docker from the Applications folder and continue with what it tells you there.
- Authorize: When prompted by the system for your password.
- Verify: Run the command docker –version from the Terminal to confirm the installation.
This shall be merely a simplified overview of the steps to install Docker on macOS.
Recommendations
NOTE: The provided information is not meant to defame any official body. We have just written information and recommend you to cross-verify.
- Always refer to the official Docker documentation for the most accurate and up-to-date licensing information.
- Consult with legal experts if there are uncertainties regarding the usage of Docker or any third-party Docker images.
Other References Regarding Docker OSX:
- We take source from bleepingcomputer
- GitHub
Common Errors and Their Solutions
Error: Cannot connect to the Docker daemon.
Solution: Run Docker, for Linux – use `sudo systemctl start docker
Error: Permission denied while trying to connect to the Docker daemon.
Solution: Run Docker commands with sudo or add your user to the docker group with:

FAQs: Docker Install
1. Can Docker-OSX still be installed in 2024?
As of 2024, Docker-OSX cannot be installed. It was removed from Docker Hub in 2021 after a takedown request from Apple due to licensing violations. The code is still on GitHub, but using it on non-Apple hardware is risky. It does not follow Apple’s licensing rules.
Gaining a license for Docker-OSX is not possible, as Apple does not allow macOS to run on non-Apple hardware. To run macOS legally, it is best to use programs like Parallels Desktop or VMware Fusion on Apple devices. These options comply with Apple’s regulations and help avoid legal issues.
2. Can I run macOS on non-Apple hardware with Docker?
The running of macOS on non-Apple hardware with or without Docker is a violation of the license agreement with Apple. Lawsuits may be filed to enforce its violation.
3. What are the licensing requirements of Docker Desktop?
The cost of using Docker Desktop is free for personal, educational, and small business use. Large organizations need to subscribe to Docker’s paid service.
4. How do I legally run macOS virtualized?
Running macOS on a virtualized machine is legal only if you make use of Apple-branded hardware and comply with the macOS software license of Apple.
5. What is the Docker Subscription Service Agreement?
The Docker Subscription Service Agreement is the term to use Docker Desktop-it requires larger enterprises to subscribe to Docker’s paid service to use it commercially.
Final Remarks
In a nutshell, mastering Docker Install is something very significant for developers and system administrators willing to unleash power from containerization. Facilitating rather seamless application deployment and management, Docker Install changes the whole scenario regarding software development, testing, and horizontal scaling. We understand the installation procedures of Docker in Ubuntu, CentOS, and MacOS.
As you start your journey with Docker, keep in mind that the very first installation of Docker is just the commencement. More depth can be added to your development workflow by incorporating capabilities such as orchestration with Docker Compose or Kubernetes. You can make sure your applications run efficiently, consistently, and reliably using Docker and independent of infrastructure.
Now that you have learned the information contained in this guide, you can install Docker and start discovering all that it has to offer for modern software development.
Happy Docker environment!
