
Often times you need to move your site from one server to another and while moving your site you need to also move your website database. However, some huge sites may have database size in GBs (2GB or more), which can’t be easily exported or imported via PHPMyAdmin. Let see how we can create MySQL dump from command line and restore it.
You can see here that many people have hard time importing huge databases, sometime due to upload limits and sometime due to import error.
Lets solve this problem and do MySQL dump restore from command line.
Command Line
We will first create and restore MySQL backup using command line.
Step 1: Create MySQL Dump from Command Line
The first step is to create MySQL dump from command line. Usually people don’t run into problems while creating the dump, so you can also do that via PHPMyAdmin. But in this tutorial we will create the dump using command line.
To create the dump you need to SSH into your server, you can read our other article regarding transfer files over ssh in which we’ve explained how to SSH into your server using Bitvise.
Once inside SSH, run the command to create the dump
sudo mysqldump -u [user] -p[password] [database_name] > [filename].sqlTo create MySQL dump you need to have user and its password (this user should have access to the database). Read this guide to List Users in MySQL.
- Replace [user] with user who have access to database
- Replace [password] with actualy password of the above user
- Replace [database_name] with the datbase you want to create backup for
- [filename].sql will be the resulting file once the dump is done, so give it some friendly name.
Once MySQL dump is created, you need to move this file to the server where you want to restore it, you can use this guide to move this file: Transfer files over ssh
Step 2: MySQL Restore from Dump using Command Line
Second step is to restore the dump file we’ve just created above. Log into your server via SSH where you have transferred this file.
Step 1: Create Database
Before doing the restore you need to create database where this dump will be restored. If you are using CyberPanel you can create database using this guide.
You can also create database using command line, first login to your MySQL server:
mysql -u root -p<ROOT_PASSWORD>Replace <ROOT_PASSWORD> with your MySQL root password.
Create database
create database [DATABASE_NAME]Replace [DATABASE_NAME] with name of database and your database will be created.
Step 2: MySQL Restore Dump
Once database is created it is time to restore your dump using the command below

mysql -u [user] -p [database_name] < [filename].sqlReplace [user] with root or actual user of database, also make sure to replace [filename].sql with actual path to your dump file that you have transferred above.
PHPMyAdmin
We will now create database backup using PHPMyAdmin and then restore it via PHPMyAdmin.
You will need to install CyberPanel. CyberPanel will automatically install PHPMyadmin for you, PHPMyAdmin is graphical user interface to manage MySQL.
Step 1: Create MySQL Dump from PHPMyAdmin
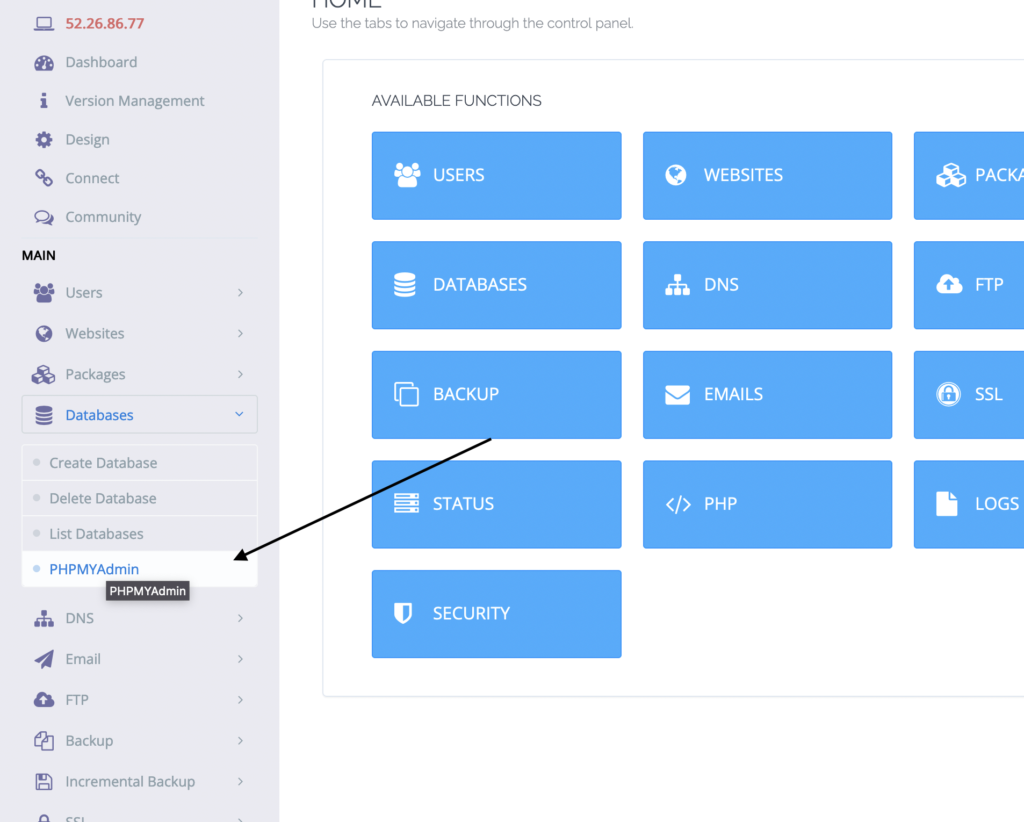
Once CyberPanel is installed, select PHPMyAdmin from left-side menu and it will automatically log you into PHPMyAdmin
Inside PHPMyAdmin select the database for which you want to create MySQL dump (or backup) from left menu, then click Export from top menu and finally click Go.

It will then allow you to download complete dump of your MySQL database.
Step 2: MySQL Dump Restore using PHPMyAdmin
Once you have created the dump file from PHPMyAdmin it is time to restore that dump from PHPMyAdmin, it is super easy to do so.
Step 1: Create database
You can create database using the same method that we’ve used above, or you can create the database from PHPMyAdmin.
Note: If you are using CyberPanel, you can create database from CyberPanel too (which is what we recommend if you are using CyberPanel).
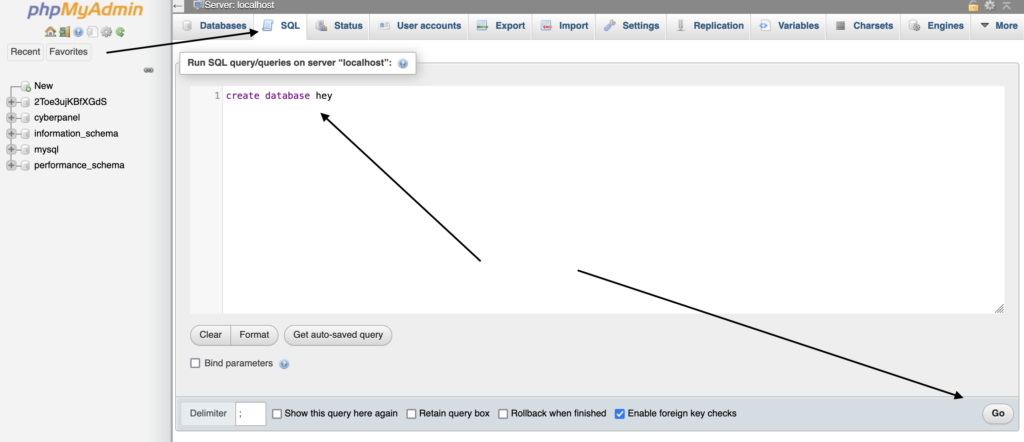
However, to create database from PHPMyAdmin select SQL from top menu and enter the follow query in the box
create database [DATABASE_NAME]Replace [DATABASE_NAME] with name of database and finally click Go.
Step 2: Restore Database
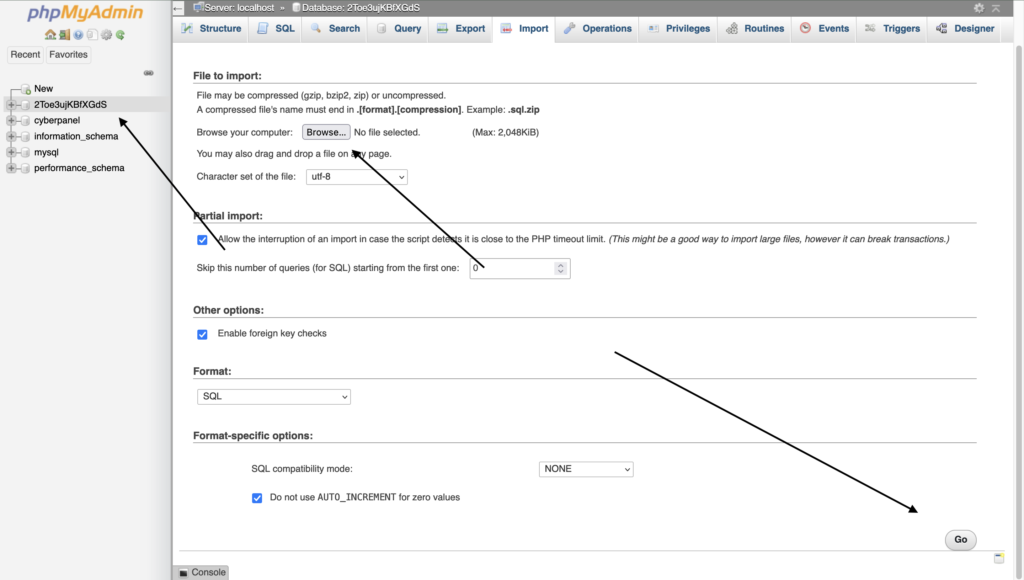
From left hand menu in PHPMyAdmin select the database that you have created above, and from top menu click Import and use browse option to select the dump file that you have created above.
Finally click Go and it will first upload and then restore your MySQL dump using PHPMyAdmin.
Summary
As I’ve mentioned in the start of the article that creating and restoring backup of your database can be really tricky some times. As we’ve seen many people struggling with this.
We’ve tried our best to cover both scenarios, so , in-case if you are having troubling create and restore backup using PHPMyAdmin you can do so via command line.
If you have any questions, feel free to ask them in the comment box below.
Related Content


6 Responses