
In this tutorial we will learn how to Leverage browser caching in WordPress to speed up your site.
There are a number of ways to speed up WordPress websites in general, however during website speed optimization analysis, browser caching is the most frequently discovered problem.
You can use a variety of internet tools, including Google PageSpeed Insights, GTMetrix, and Pingdom, to track and test the speed of your website. They give you precise findings and show you where your website needs work. You may have seen the “Leverage Browser Caching” warning while assessing the site’s speed.
You may also read: Serve Static Assets With An Efficient Cache Policy
What is Leverage Browser Caching?
Caching is the length of time that browsers keep the cacheable resources of a website on their local systems.
Images, JavaScript, CSS, and other resources are among them. The cacheable materials that are saved on your machine are uploaded back every time someone sees the website. Thus, there is a noticeable increase in the website’s loading speed. People desire to use browser caching in WordPress for this reason.
How Does Leverage Browser Caching in WordPress Works?
There are numerous processes running in the background whenever a user enters a certain domain.
Your WordPress website is made visible by everything that is communicated to the user’s browser. These website elements include scripts, graphics, stylesheets, content, and more. When necessary, they must be transferred from the website’s server to the user’s browser. Following are the steps in this process:
- A URL is entered into the visitor’s browser.
- A request is made by the browser to the server that hosts your website (the HTTP request).
- The user receives the data after it has been assembled by the server. Users start to experience a slowdown at this point. People can minimize the size of the scrips, optimize the image sizes, and other measures to stop this slowness.
- The browser may now finally display the website after the data has been transferred. When users access different pages, the procedure is repeated. Low performance can result from the server receiving a large number of requests all at once. People must therefore optimize their websites in order to maintain their speed.
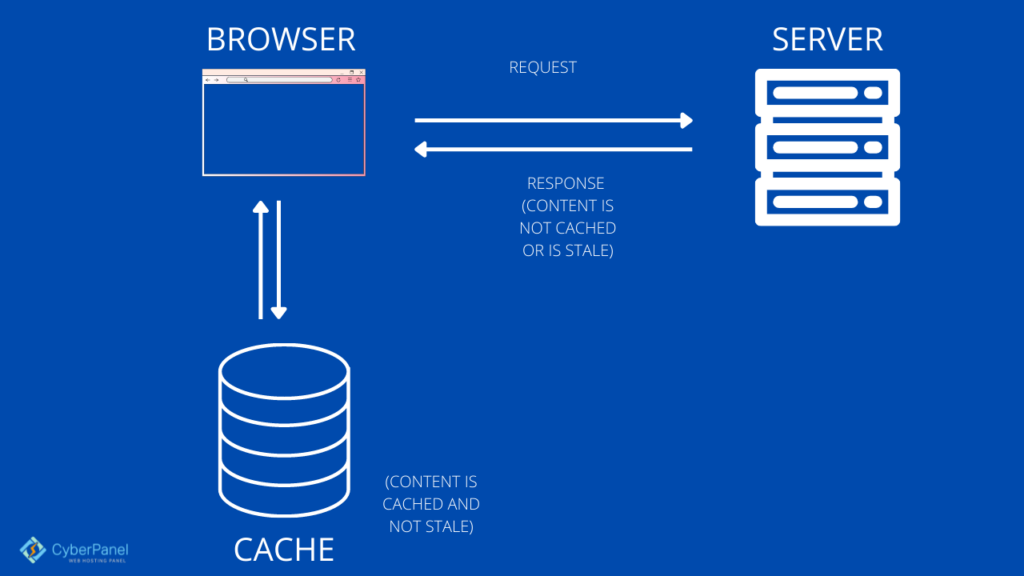
Both web browsers and software programs use cached content. It is momentarily saved on your local disc. The term “Web Cache” or “HTTP Cache” refers to this data. The browser will upload the data from your computer and download the website’s content each time you visit the same website.
You need to use a particular tool to determine if your WordPress website effectively utilizes browser caching.
Difference Between Browser Caching and Server Caching
In order to reduce load and latency on web servers, server-sides web caching (For Server-side caching we always recommend LiteSpeed Cache for WordPress) often entails using a web proxy that stores web responses from the web servers it stands in front of. Web caching on the client-side can also include browser-based caching, which saves a cached copy of previously accessed web content.
This procedure entails using the webserver to produce cached web pages for your website. The aforementioned actions are an example of webpage caching, which is primarily server-side.
You may enhance the server caching system in a few different ways. The best choice would be to update Apache’s headers. The next stage would be to use WordPress plugins, and then the CDN would be added.
Method 1: Manually Leverage Browser Caching in WordPress
Note: This method only works with LiteSpeed Enterprise or Apache.
By including some code in the .htaccess file, you may manually leverage browser caching in WordPress. For three distinct goals, you actually need to add three bits of code:
- Add Expires Headers
- Add Cache-Control Headers
- Turn ETags off
You must have access to your website files in order to add this code, which you can accomplish by signing into your hosting account or CyberPanel.

Go to your CyberPanel dashboard

Click on WordPress -> List WordPress from the left hand side menu
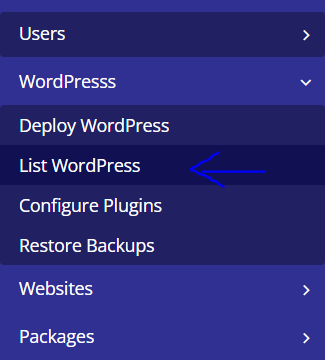
You will enter the List WordPress Websites. From here, Click on your WordPress Site Title
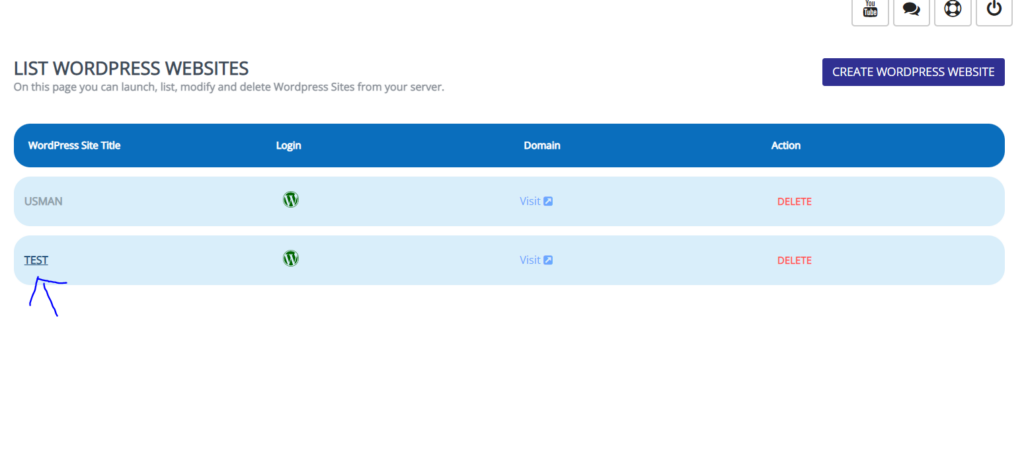
This is your CyberPanel WordPress Manager. Click on File Manager.
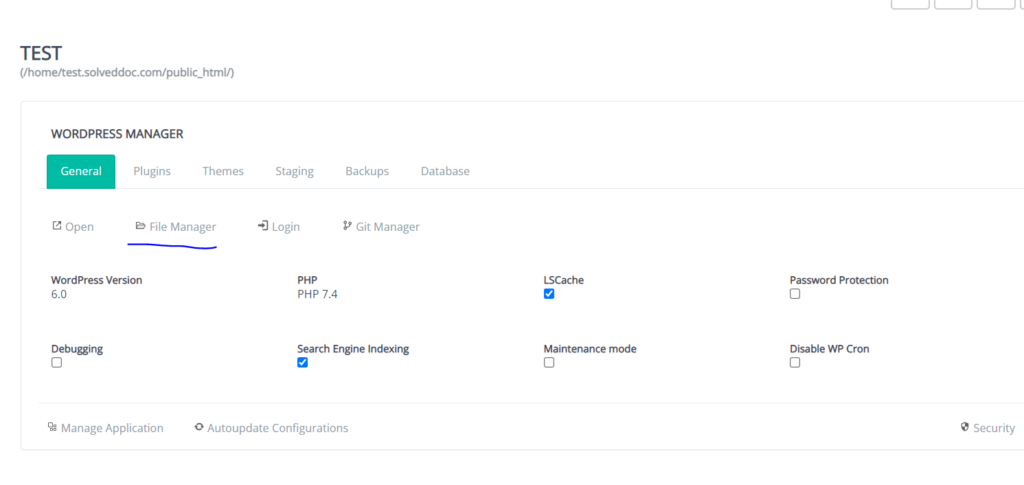
In public_html, you will find .htaccess file. Do note this that htaccess rules are only supported by LiteSpeed Enterprise. It is not supported by OpenLite Speed. Right click on it and click on CodeMirror
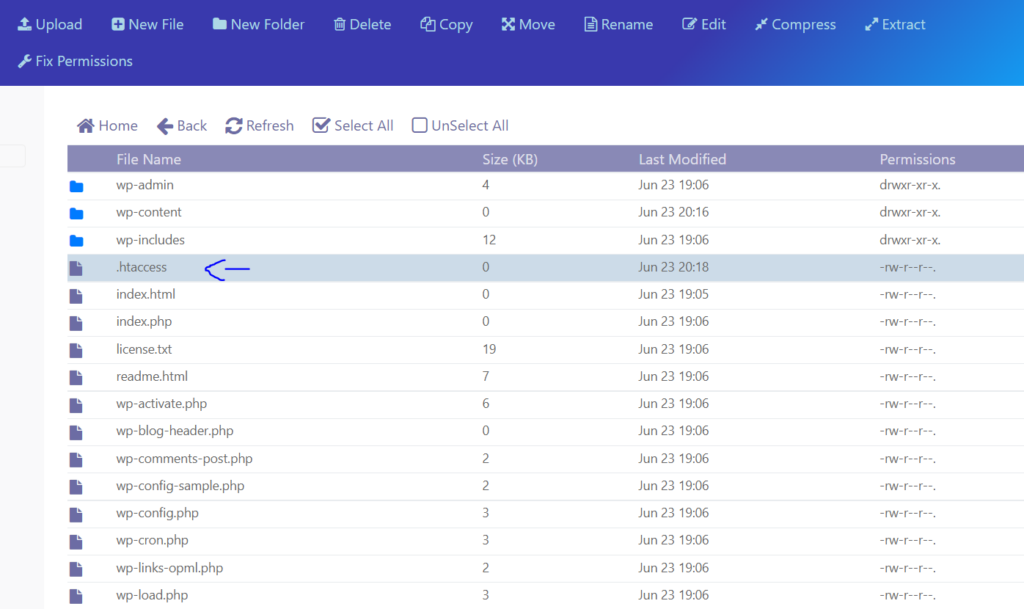
Add the following code at the end of the .htaccess file’s content by copying and pasting it. Don’t modify the file in any other ways.
#Customize expires cache start - adjust the period according to your needs
<IfModule mod_expires.c>
  FileETag MTime Size
  AddOutputFilterByType DEFLATE text/plain text/html text/xml text/css application/xml application/xhtml+xml application/rss+xml application/javascript application/x-javascript
  ExpiresActive On
  ExpiresByType text/html "access 600 seconds"
  ExpiresByType application/xhtml+xml "access 600 seconds"
  ExpiresByType text/css "access 1 month"
  ExpiresByType text/javascript "access 1 month"
  ExpiresByType text/x-javascript "access 1 month"
  ExpiresByType application/javascript "access 1 month"
  ExpiresByType application/x-javascript "access 1 month"
  ExpiresByType application/x-shockwave-flash "access 1 month"
  ExpiresByType application/pdf "access 1 month"
  ExpiresByType image/x-icon "access 1 year"
  ExpiresByType image/jpg "access 1 year"
  ExpiresByType image/jpeg "access 1 year"
  ExpiresByType image/png "access 1 year"
  ExpiresByType image/gif "access 1 year"
  ExpiresDefault "access 1 month"

</IfModule>
#Expires cache end
The aforementioned code instructs the browser to deliver a cached copy of the static resources rather than downloading a new one.

The refresh/expiration times are also included in the settings:
HTML takes 600 seconds.
JavaScript and CSS for one month
For images, a year
Visitors won’t have to download particular resources too frequently thanks to their expiration dates. If necessary, you can quickly change the expiration times.
To establish browser caching policies on how a resource is cached, where it is cached, and the maximum age before expiring, we need to include Cache Control headers. We don’t need to repeat the expiration times as we already mentioned them earlier.
the following code, then paste it:
# BEGIN Cache-Control Headers

<IfModule mod_expires.c>
  <IfModule mod_headers.c>
    <filesMatch "\.(ico|jpe?g|png|gif|swf)$">
      Header append Cache-Control "public"
    </filesMatch>
    <filesMatch "\.(css)$">
      Header append Cache-Control "public"
    </filesMatch>
    <filesMatch "\.(js)$">
      Header append Cache-Control "private"
    </filesMatch>
    <filesMatch "\.(x?html?|php)$">
      Header append Cache-Control "private, must-revalidate"
    </filesMatch>
  </IfModule>
</IfModule>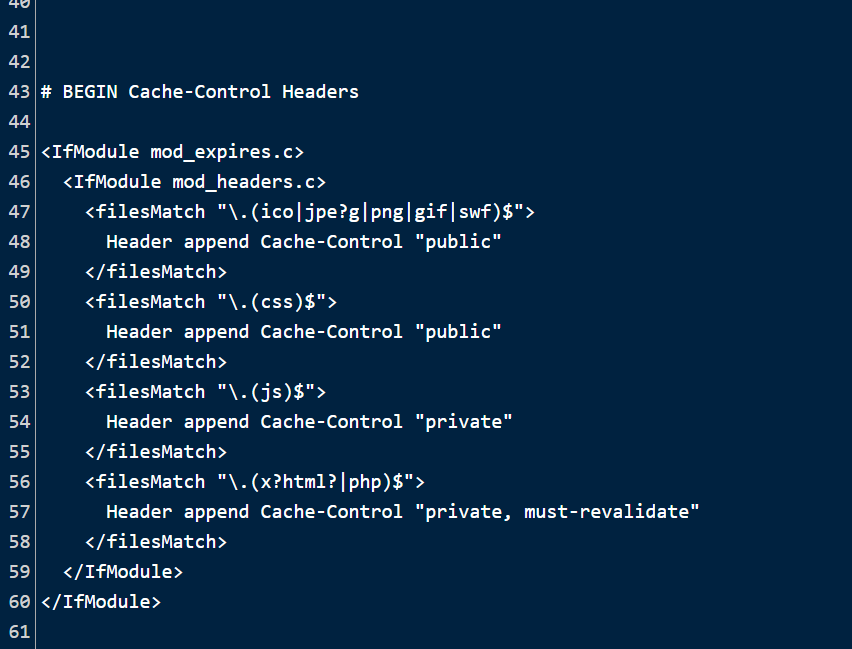
E-tags will be disabled so that browsers must use expires headers and cache control in place of verifying files. Here is the key:
Turn Etags off

<IfModule mod_headers.c>
            Header unset ETag
</IfModule>
FileETag None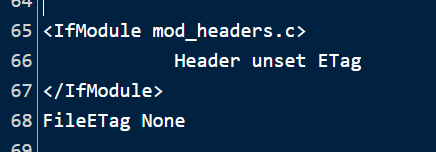
Once your done, click on Save.
Method 2: Leverage Browser Caching in WordPress Using Plugins
A single error can completely ruin your website, therefore editing the.htaccess file can be pretty dangerous. Thus, you can use plugins like W3 Total Cache if you don’t want to take any unnecessary risks.
W3 Total Cache plugin
Here’s how to use W3 Total Cache, one of the best plugins for the purpose, to leverage browser caching.
Enter your WordPress Dashboard
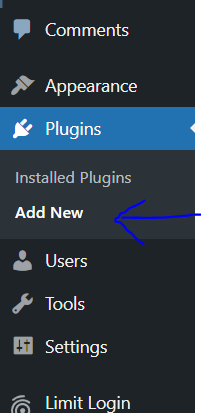
Click on Plugins -> Add New from the left hand side menu
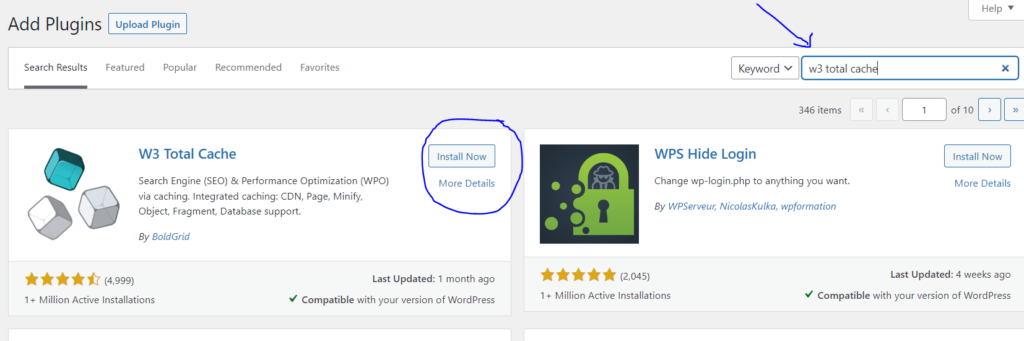
Search for W3 Total cache. Now Install and activate this plugin
Performance tab will appear in the left hand side meu. Click on Performance -> General Settings from the left hand side menu

Scroll down to Browser Cache and make sure its enable and save the changes

Now Click on Performance -> Browser Cache from the left hand side menu

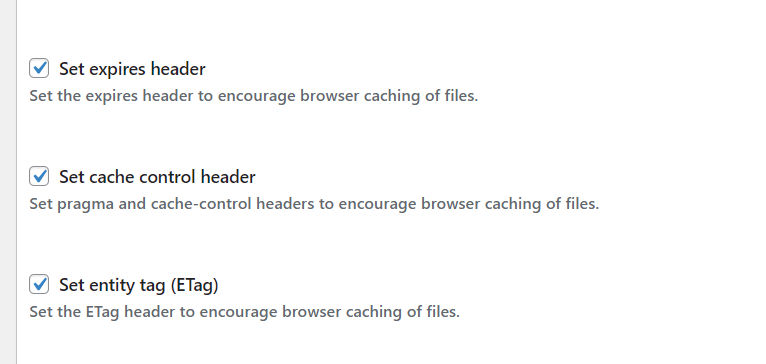
Make sure that
- Set expire header
- Set cache control
- Set entity tag
are enabled. Save all the changes.
LiteSpeed Cache Plugin
CyberPanel gives every user LiteSpeed Cache by default with every WordPress site deployment. If you are not using CyberPanel, you can download it from here.
By simply turning on the feature, the caching plugin LiteSpeed Cache enables you to exploit browser caching.
Go into your WordPress Dashboard
Click on LiteSpeed Cache -> Cache from the left hand side menu
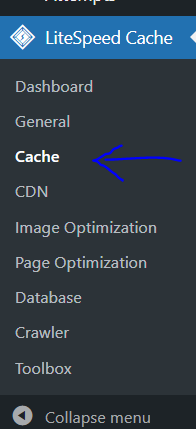
Click on Browser tab from the top bar

Make sure that Browser Cache is enabled and click on Save Changes

Conclusion
Remember that sometimes after installing a plugin, you won’t notice the changes you make right away. The CSS/Stylesheet file is to blame for this delay. You won’t be able to view the changes you’ve made because of the browser cache you already saved on your machine. It is advised to use your browser’s Incognito feature to view the website in order to see it correctly after multiple modifications. You won’t consume cache resources if you use this function, and you should be able to clearly notice the changes.
The approach you select to leverage browser caching is ultimately irrelevant. Observing it in action is the only thing that counts. The method you used to get there is irrelevant as long as Leverage Browser Caching in WordPress functions as intended. There is no right or wrong approach; the outcome will be the same regardless of your choice. Leverage Browser Caching will improve loading times whether you decide to make changes to the .htaccess file or employ a plugin.
