On this page
If you’re looking to install RoundCube on your server, CyberPanel provides an efficient way to handle the process. In this guide, we’ll walk you through the steps to install RoundCube using CyberPanel, enabling you to access and manage your emails smoothly.
What is RoundCube?
RoundCube is a free and open-source webmail software that allows users to access their email accounts via a web browser. It provides an intuitive, user-friendly interface and supports multiple email protocols like IMAP and SMTP, making it a popular choice for webmail applications.
Pre-requisite to Install Roundcube
Here’s the complete walkthrough of Roundcube installation.
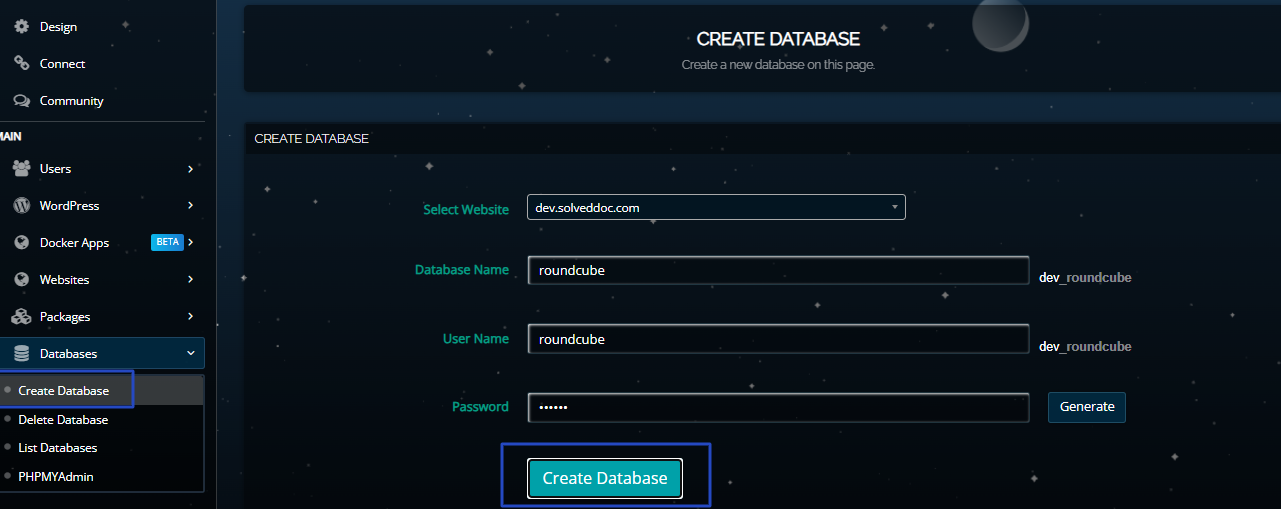
Step 1: Create a Database on Main Domain
Navigate to the Create Databases menu from CyberPanel and add the following information:
- Selecting your Domain
- Database name
- User name
- Lastly, your highly protected database password
Step 2: Upload Roundcube
First thing first, we need to install Roundcube from their official website. On their website, you will see various Roundcube versions like stable, complete, LTS, Framework etc. However, we will pick up the Complete version in order to get this done.
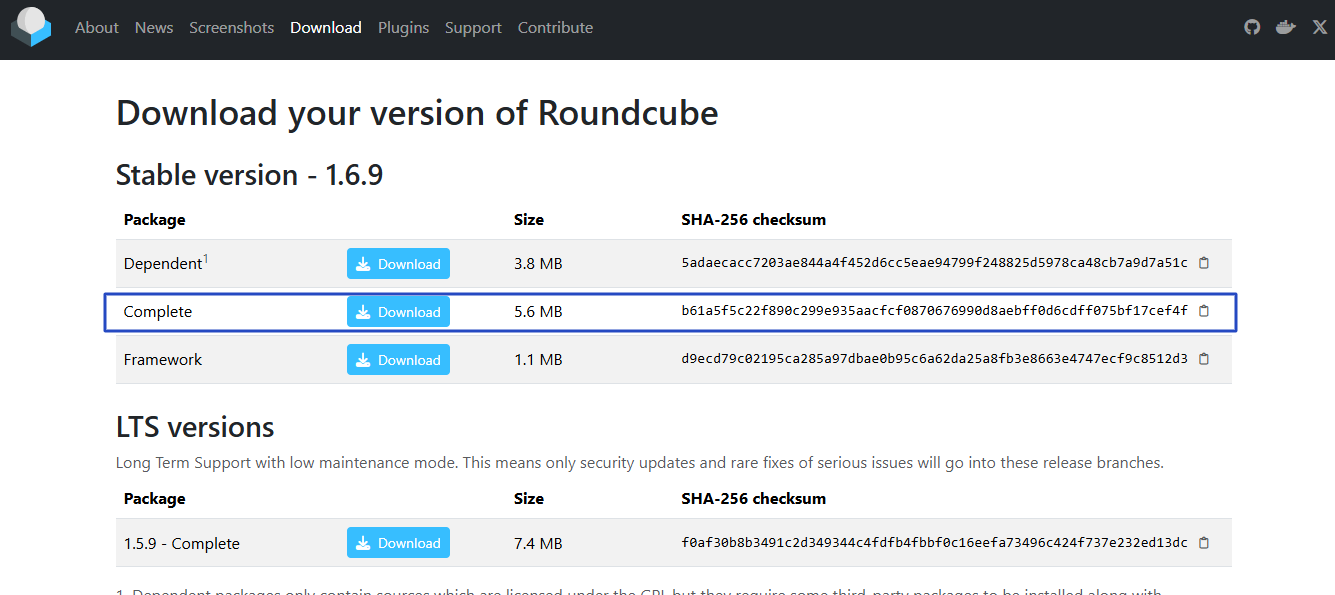
Once you downloaded the Roundcube, it’s time to upload it. Navigate to the CyberPanel Filemanager option and upload the file.
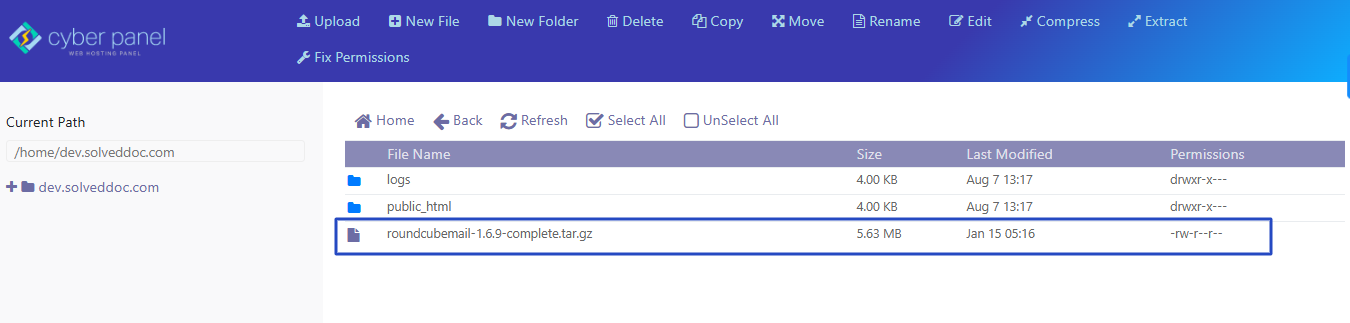
As you can see Roundcube installation file was uploaded. Let’s extract it and move it to the main directory.
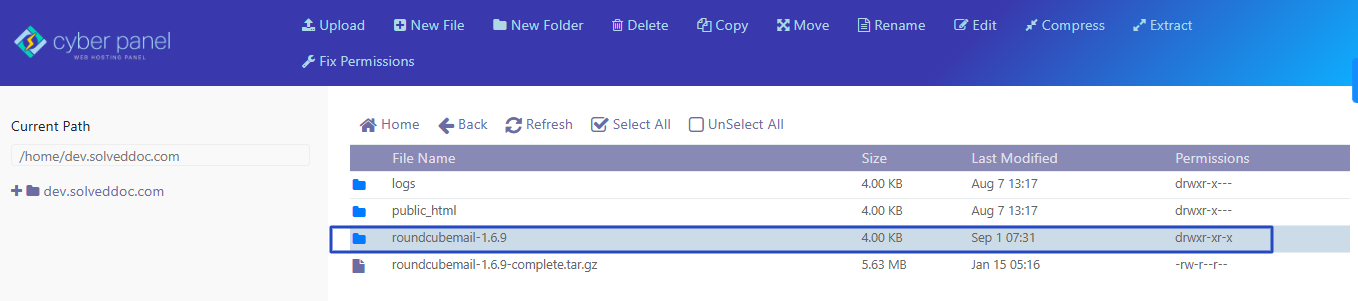
Our file has been extracted and don’t forget to move it to the main domain directory.
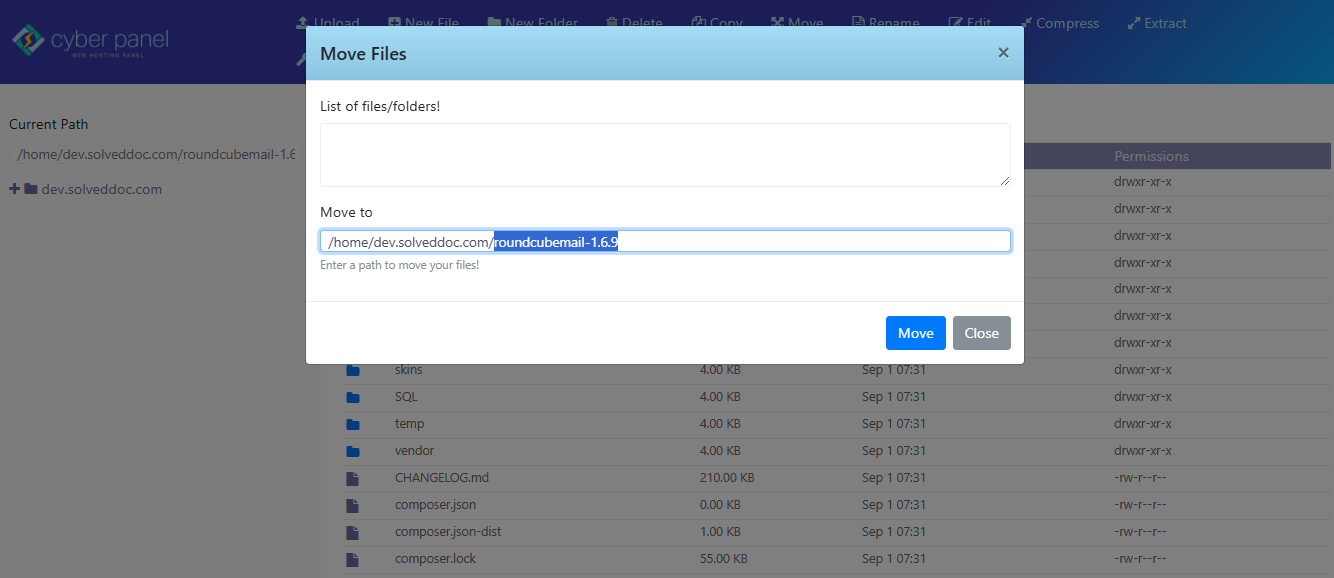
Please remove the last slug of the Roundcube1.6.9 and click on Move.
Step 3: Run the Roundcube Installer
Access the Installer with your selected domain name, xyz.com/installer – The Roundcube installer will share some of the required information about the PHP version and PHP extension. Since CyberPanel comes with all the basic PHP extensions.
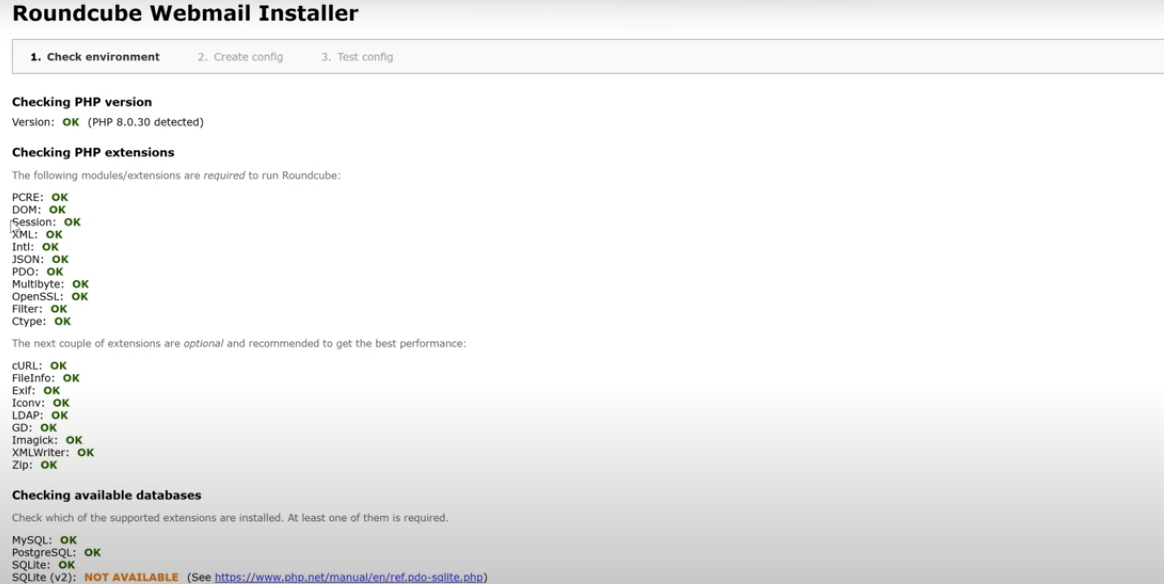
Just in case, you’re missing any PHP extension you can install it by navigating to the PHP section, selecting your desired PHP version, and installing the missing PHP extension.
As of now, we don’t need to install any of them because we have all the desired extensions already installed.
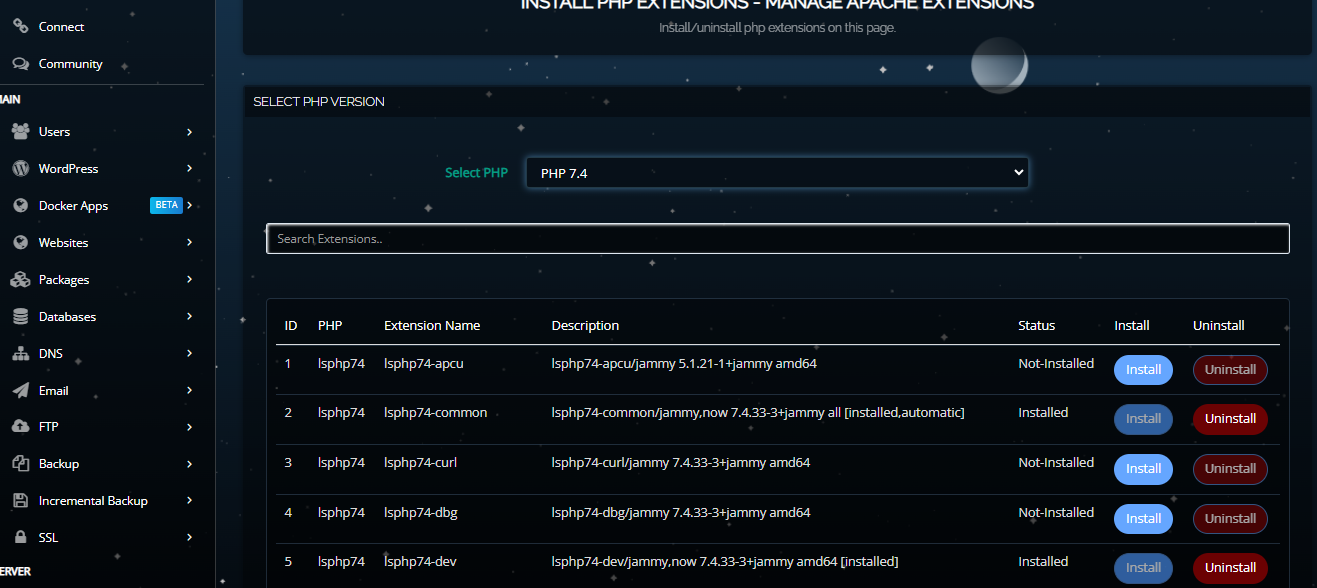
Step 4: Roundcube Configuration
It’s time to run some Roundcube configuration parts as far as General Configuration is concerned keep it default. What you need to tweak is Database setup.
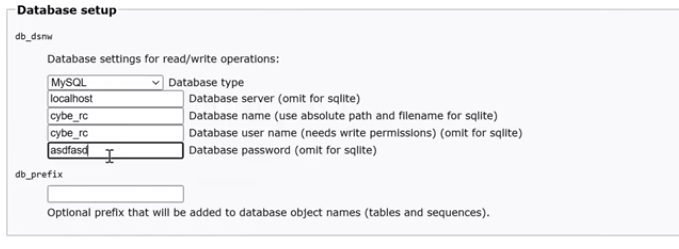
As you know, I created the database in the beginning just to replicate with your database user name, database user name, and password.
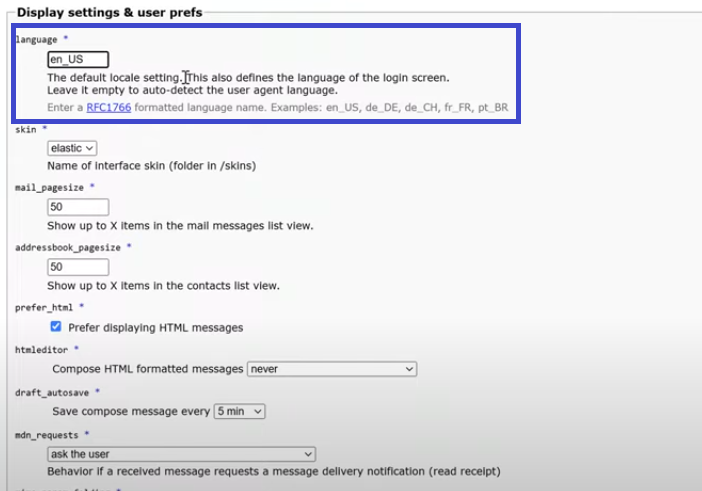
On the Roundcube display setting, I just set up my preferred, and the rest remain same.
Once you’re done. Click on Config.
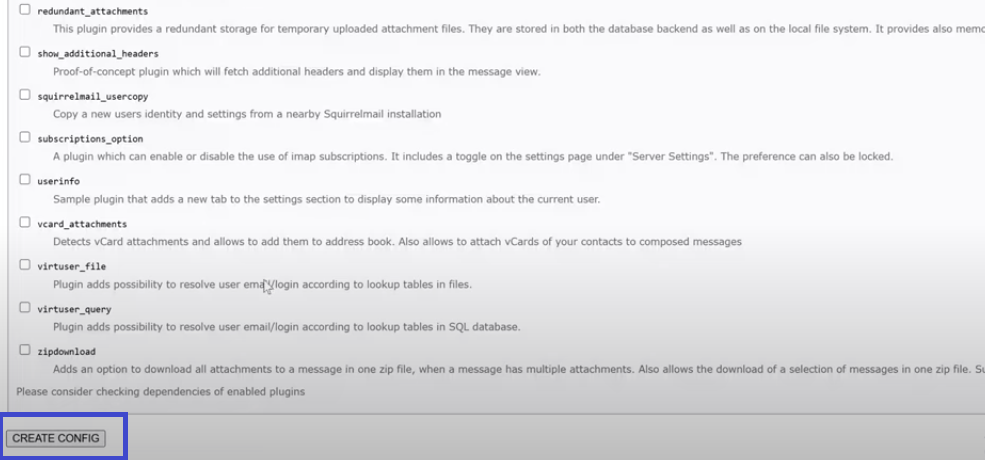
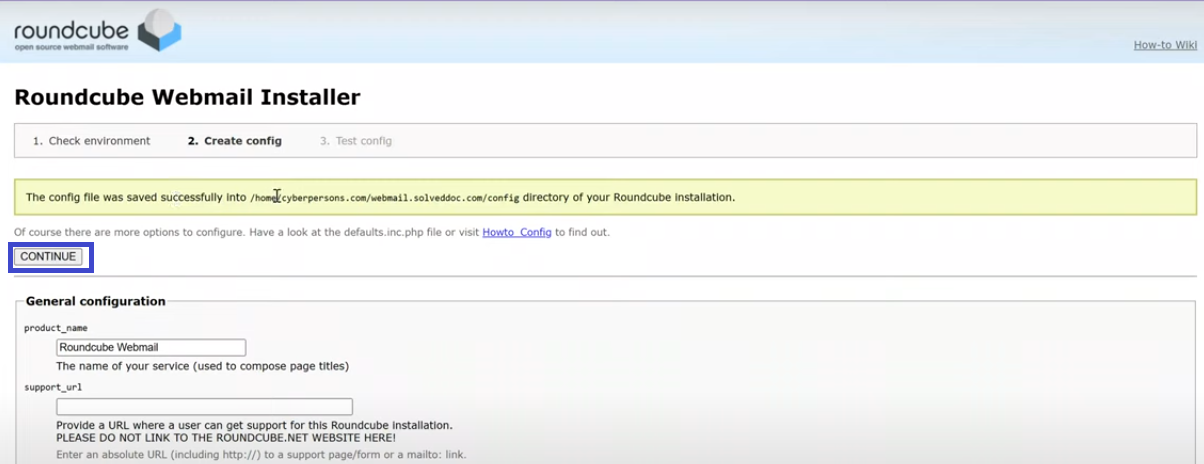
As you can see, we’ve successfully completed our configuration part. Click, on Continue to move to the next step.
Step 4: RoundcubeTest Config
Here, we can see everything seems OK apart from the Database Schema.
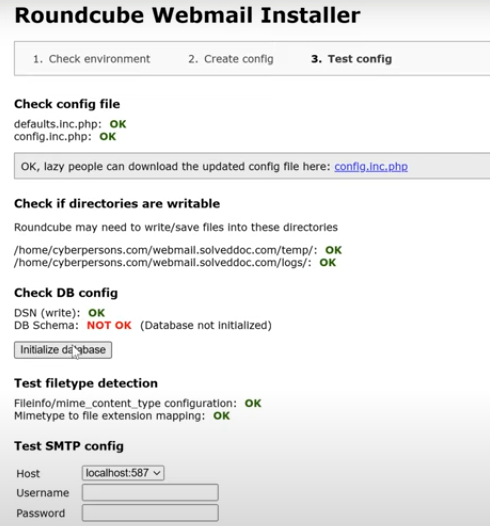
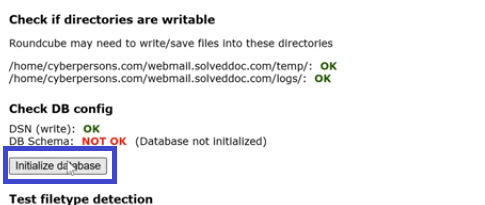
So, click on Initialize database.
Lastly, there are two things remaining that you need to set up your email records on your particular server.
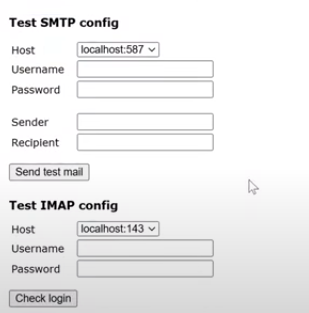
Here you need to provide your username, password, sender and recipient email address.
Step 5: Verifying Rounfcube Installation
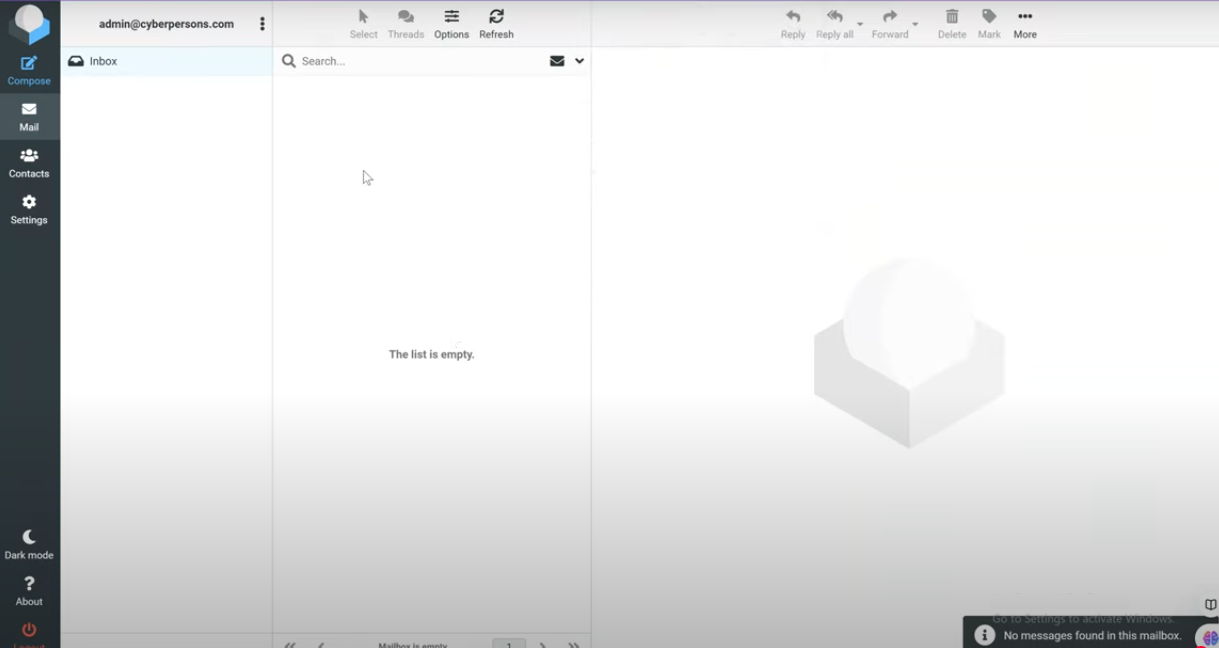
In order to verify the Rouncube installation using CyberPanel. You need to access with your given URL.

And here’s the Roundcube installation dashboard. You can access it with your own credentials.
Final Words!
In conclusion, installing RoundCube using CyberPanel is a straightforward process that can enhance your email management experience. By following the steps outlined above, you’ll have your webmail system set up and ready to use in no time.