In this article we will discuss Varnish cache NGINX reverse proxy and how you can set it up.
A proxy server with an emphasis on HTTP caching is Varnish. It is made to be an HTTP accelerator and may function as a reverse proxy for your Apache or NGINX web server. Websites with a lot of traffic and high prominence have implemented Varnish.
What is Varnish Cache?
For a web-based firm, the cache is frequently the most crucial piece of software. Varnish Cache is a potent, open-source HTTP engine/reverse HTTP proxy that does exactly what its name implies: caches (or stores) a copy of a webpage the first time a visitor views it. This may speed up a website by up to 1000 percent. Varnish makes a single request to your server to cache the page, after which it handles any subsequent requests for the same page. This results in incredibly quick content delivery and less demand on backend server resources.
- Varnish’s core competencies are speed and performance.
- Server infrastructure savings
- Scalability – Varnish enables your site to meet demand regardless of the volume of visitors or requests.
- Protection from outages: Varnish keeps serving cached information even if your server crashes.
- Flexibility: The Varnish Configuration Language (VCL) allows for the creation of specialized solutions, rules, and modules.
- Enhanced user experience
How does Varnish Cache works?
Before they reach the backend of your web server, Varnish processes all incoming requests. Its cache handles all web traffic and, by default, refreshes every two minutes.

Varnish will route the request to the web server’s backend and cache the outcome, as we just saw in the generic reverse proxy paragraph if the request is not cached.
Once the requests have been cached, they are put into the memory and may then be quickly retrieved and sent to customers. Varnish employs the VCL language to express settings, caching policies, and other rules (Varnish Configuration Language).
Get exclusive access to all things tech-savvy, and be the first to receive
the latest updates directly in your inbox.
You can respond to each request differently using this language and its variations. For instance, you may direct certain requests to a specific backend or instruct Varnish to take a different action based on the characteristics of the incoming request or its results.
Cached material may still be provided even when the web server is unavailable because to a built-in feature called backend polling, which is another amazing Varnish function. Varnish will continue to provide cached content for a time frame known as grace time if it detects a downtime. The backend polling queries the server at a frequency that you may flexible set.
What is Nginx?
NGINX is open-source software that may be used for video streaming, caching, reverse proxies, web serving, and other functions. It originally began as a web server built for utmost speed and dependability. NGINX may operate as an HTTP server, an email proxy server (IMAP, POP3, and SMTP), a reverse proxy, and a load balancer for HTTP, TCP, and UDP servers in addition to serving as an HTTP server.
What is reverse proxy?
A reverse proxy’s primary function is to shield web servers from incoming traffic. Each connection request is received by a reverse proxy, which forwards it through many servers before connecting to the one that handled the request.
Each reverse proxy operation has three main phases:
- Connection request collection: At the edge of the network, the reverse proxy accepts incoming requests.
- TCP three-way handshake: A connection to the reverse proxy is created after a TCP three-way handshake, and the first connection is closed.
- Origin server connection: Using a fictitious IP address, the reverse proxy connects the origin server to the client request.
Users can never connect directly to an origin server since all web browser connections to web apps are always made through a reverse proxy.
How can you set up Varnish cache Nginx reverse proxy?
Install Nginx on your server
First of all we need to install Nginx from the Ubuntu repository using the apt command
sudo apt update
apt install nginx -y
After installation is complete, we need to start and enable Nginx to launch every time at system boot using the systemctl command
systemctl start nginx
systemctl enable nginx
Configure Nginx on port 88
We’ll set up Nginx to use the unconventional HTTP port 8080 for operation. To do this, we must modify the virtual host files located in the “sites-available” directory.
nano /etc/nginx/sites-available/default
Change ‘listen’ line value to 8080. Save and exit.


Check for errors by testing the Nginx settings right now. Restart the service after that.
nginx -t
systemctl restart nginx
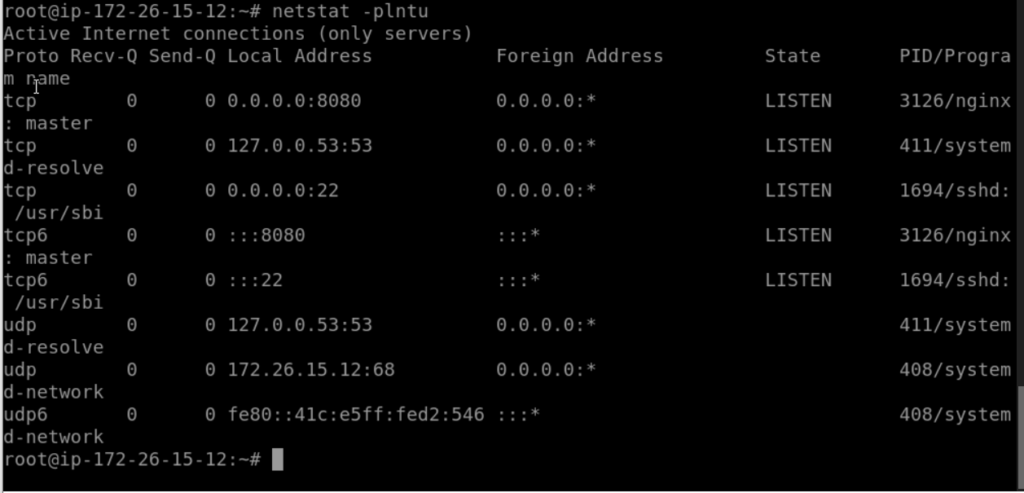
Check Nginx once more using netstat, and confirm it is operating on the unconventional HTTP port 8080.
netstat -plntu
It has been installed, and port 8080 is currently being used by the Nginx web server.
Install Varnish on Ubuntu
We have to install varnish using the apt command
sudo apt install varnish -y
Using the systemctl commands listed below, start varnish and set it to begin automatically when the system boots.
systemctl start varnish
systemctl enable varnish
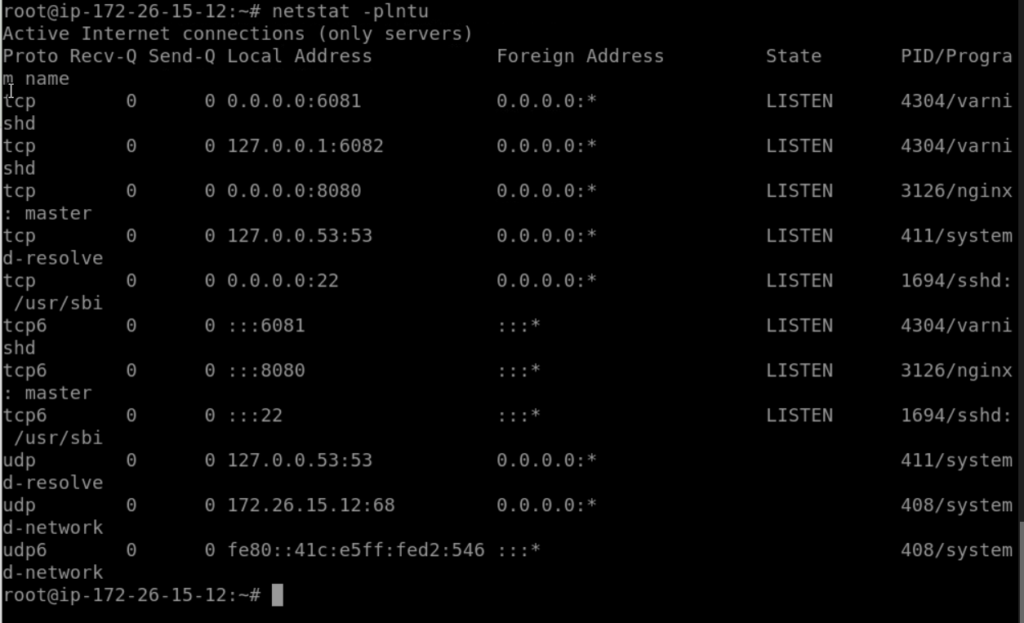
By default, varnish will use port 6082 for the admin web interface and port 6081 for public access. Make sure certain ports are listed by using the netstat command to check.
netstat -plntu
Varnish HTTP accelerator has been installed
Configure Varnish as a reverse proxy for Nginx
As a reverse proxy for the Nginx web server, Varnish will be used. The Nginx web server will be operating on HTTP port 8080, while Varnish will be running on HTTP port 80.
In this phase, we will set up Varnish for Nginx, identify the backend server, and modify Varnish so that it uses HTTP port 80 as its default port.
Edit the “default.vcl” file by going to the varnish configuration directory right away. and make sure host is 127.0.0.1 and port is 8080
nano /etc/varnish/default.vcl

The configuration of the backend is finished.
The next step is to set up Varnish to use HTTP port 80. Edit the varnish configuration file by going to the ‘varnish’ directory in the ‘/etc/default’ directory.
nano /etc/default/varnishMake sure your default port is 6081 and HTTP port is 80

The varnish service file in the ‘/lib/systemd/system’ directory should now be edited. Edit the varnish.service file by going to the systemd system directory.
cd /lib/systemd/system
nano varnish.service
Replace HTTP port 80 with varnish port 6081 on the ‘ExecStart’ line.

Now reload the systemd configuration and restart varnish
systemctl daemon-reload
systemctl restart varnish
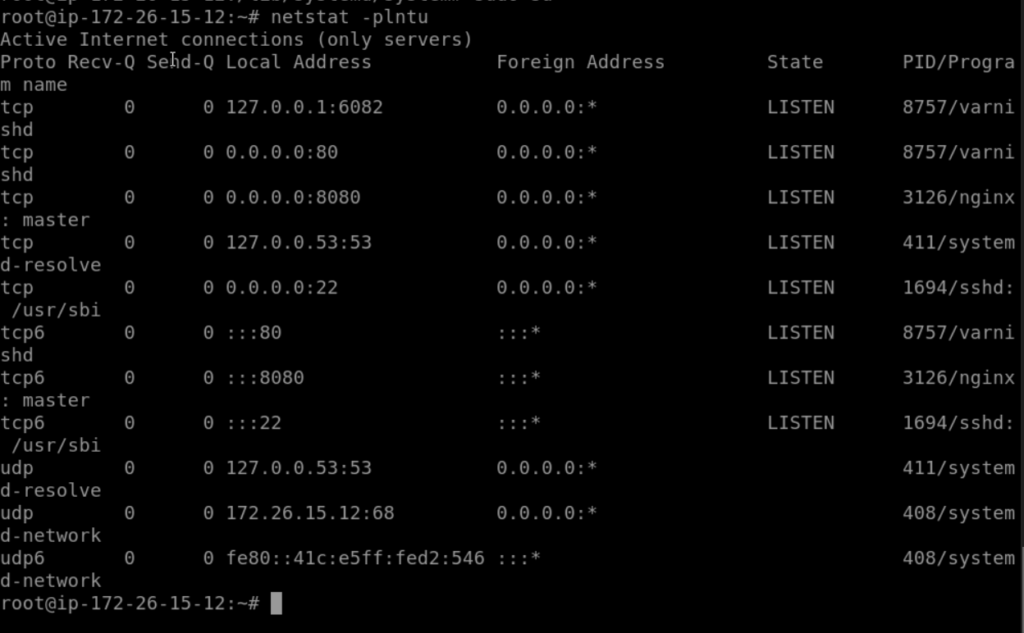
Check varnish using netstat command
netstat -plntu
varnish configuration as a reverse proxy for Nginx has been completed
Configure UFW firewall
The default human-readable firewall on the Ubuntu operating system is called “UFW.” Use the apt command shown below to install them if you don’t already have the package.
sudo apt install ufw
We’ll turn on the firewall and open fresh SSH, HTTP, and HTTPS ports.
the ufw commands listed below.
ufw allow ssh
ufw allow http
ufw allow https
Now turn on the firewall and make it such that it always starts up at boot time.
ufw enable
Now that the UFW firewall is active, both the HTTP and HTTPS ports are reachable from the outside network.


