Did you know Docker multi stage builds can reduce image size by 50%, which helps deploy and optimize your CI/CD pipelines faster and very efficiently.
Docker teams love Docker multi stage build, because instead of bundling everything in a Docker image, Multi stage Docker build allows you to use multiple build stages and only keep what’s necessary meaning you get lighter, more secure, and faster deployments. That’s why famous major companies from NETFLIX to PAYPAL are relying on it today.
Let’s explore and walk you through how to use Docker multi stage builds, best practices, and everything else you must know!
Understanding Docker Multi-Stage Builds
Docker multi stage build is a method that allows you to divide the process of creating a Docker image into several stages. This approach helps you produce images that only include the essential dependencies for the final application’s functionality, reducing both time and storage space. Initially, you create an image that contains just the dependencies required to build your application.
Once this image is ready, you can add any extra layers needed for your application and set it up for deployment. This technique ensures that the images contain only the code necessary for building the application, effectively optimizing and minimizing the size of the container images. Lightweight images mean quicker pull and start times.
If you have several images that share many similarities, think about making a reusable stage that contains the common elements, and then create your specific stages from that. Docker will only build the common stage once. As a result, your derived images will use memory on the Docker host more effectively and will load faster.
How Docker Multi Stage Builds Work
With docker mult stage builds, you can include several FROM statements in your Dockerfile. Each FROM command can specify a different base image, initiating a new build stage. This allows you to selectively transfer artifacts from one stage to another, discarding anything unnecessary for the final image.
It’s worth mentioning that although the stages are listed in order in the Dockerfile, Docker can execute independent stages simultaneously. This automatic parallelization can greatly enhance the build speed, particularly for complex applications with various independent components or dependencies.
The example Dockerfile below illustrates two distinct stages: one for compiling a binary and another for transferring that binary from the first stage to the second.
# syntax=docker/dockerfile:1<br>FROM golang:1.23<br>WORKDIR /src<br>COPY <<EOF ./main.go<br>package main<br><br>import "fmt"<br><br>func main() {<br> fmt.Println("hello, world")<br>}<br>EOF<br>RUN go build -o /bin/hello ./main.go<br><br>FROM scratch<br>COPY --from=0 /bin/hello /bin/hello<br>CMD ["/bin/hello"]You only require one Dockerfile; there’s no need for an additional build script. Simply execute the command:
docker build -t hello .This process produces a minimal production image that contains only the binary. The final image does not include any of the build tools used to create the application.
How does this function? The second FROM command initiates a new build stage using the scratch image as its foundation.
The line COPY –from=0 transfers only the built artifact from the previous stage to this new one, leaving behind the Go SDK and any temporary files, which are not included in the final image.
Naming Your Build Stages
By default, build stages are unnamed and are identified by their integer values, starting with 0 for the first FROM instruction. However, you can assign names to your stages by adding AS to the FROM instruction. This example enhances the previous one by naming the stages and utilizing those names in the COPY instruction. This way, even if you rearrange the instructions in your Dockerfile later, the COPY command will still function correctly.
syntax=docker/dockerfile:1
FROM golang:1.23 AS build
WORKDIR /src
COPY <<EOF /src/main.go
package main

import "fmt"

func main() {
fmt.Println("hello, world")
}
EOF
RUN go build -o /bin/hello ./main.go

FROM scratch
COPY --from=build /bin/hello /bin/hello
CMD ["/bin/hello"]
Stop at a Specific Build Stage
When building your image, you don’t have to compile the entire Dockerfile with all stages. You can specify a target build stage. The following command assumes you are using the previous Dockerfile but stops at the stage named build:
docker build --target build -t hello .Some scenarios where this can be beneficial include:

- Debugging a specific build stage
- Utilizing a debug stage with all debugging symbols or tools enabled, while having a streamlined production stage
- Implementing a testing stage where your app is filled with test data, but building for production with a different stage that uses real data
Use an External Image as a Stage
In multi-stage builds, you can copy from images that you did not create in your Dockerfile. You can use the COPY –from instruction to pull from an external image, whether it’s a local image name, a tag available locally or on a Docker registry, or a tag ID. The Docker client will pull the image if needed and copy the artifact from it. The syntax is:
COPY --from=nginx:latest /etc/nginx/nginx.conf /nginx.confUse a Previous Stage as a New Stage
You can continue from where a previous stage ended by referencing it in the FROM directive. For example:
# syntax=docker/dockerfile:1<br><br>FROM alpine:latest AS builder<br>RUN apk --no-cache add build-base<br><br>FROM builder AS build1<br>COPY source1.cpp source.cpp<br>RUN g++ -o /binary source.cpp<br><br>FROM builder AS build2<br>COPY source2.cpp source.cpp<br>RUN g++ -o /binary source.cppImplementing Multi-Stage Builds in a CI/CD Pipeline
Integrating with GitHub Actions
To set up GitHub Actions, create a file named .github/workflows/docker.yml with the following content:
name: Docker CI/CD
on: [push]
jobs:<br>build:<br>runs-on: ubuntu-latest<br>steps:<br>- name: Checkout Code<br>uses: actions/checkout@v2- name: Build Docker Image
    run: docker build -t my-app .

  - name: Push to Docker Hub
    run: |
      echo "${{ secrets.DOCKER_PASSWORD }}" | docker login -u "${{ secrets.DOCKER_USERNAME }}" --password-stdin
      docker tag my-app my-dockerhub-user/my-app:latest
      docker push my-dockerhub-user/my-app:latest
Jenkins Integration
pipeline {<br>agent any<br>stages {<br>stage('Build') {<br>steps {<br>sh 'docker build -t my-app .'<br>}<br>}<br>stage('Push') {<br>steps {<br>sh 'docker push my-dockerhub-user/my-app:latest'<br>}<br>}<br>}<br>}This setup builds Docker images and uploads them to Docker Hub whenever new code is pushed.
Best Practices for Multi-Stage Builds
To effectively utilize multi-stage builds and enhance your Dockerfiles, keep these best practices in mind:
Optimizing the build sequence
Arrange the stages in your Dockerfile to streamline the build process. Place stages that are less likely to change at the beginning. This approach allows for better cache reuse in future builds. For instance, if your application dependencies change less often than your application code, position the dependency installation stage before the application code stage.
# Install dependencies<br>FROM node:20 AS deps<br>WORKDIR /app<br>COPY package*.json ./<br>RUN npm ci<br><br># Build the application<br>FROM node:20 AS build<br>WORKDIR /app<br>COPY --from=deps /app/node_modules ./node_modules<br>COPY . .<br>RUN npm run build<br><br># Final runtime stage<br>FROM nginx:alpine<br>COPY --from=build /app/dist /usr/share/nginx/htmlIn this scenario, the dependencies are installed in a separate stage (deps) that precedes the application build stage (build). This setup allows the deps stage to be reused from the cache if only the application code is modified.
Selecting the right base image for each stage
Pick the appropriate base image for every stage of your multi-stage build. For build stages, select an image that includes the necessary tools and dependencies. For runtime stages, opt for a lightweight image that has only the essential runtime dependencies. This practice minimizes the final image size and enhances security.
# Build stage
FROM golang:1.22 AS build
# Build instructions
# Runtime stage
FROM alpine:3.20
COPY --from=build /app/main ./
In this example, the build stage utilizes the golang image, which comes with the Go compiler and tools, while the runtime stage employs the lightweight Alpine image, leading to a smaller final image.
For further information here’s an Official multi stage Docker build best practices!
Real-World Use Cases & Examples
Example 1: Docker Multi stage builds for a Node.js application
FROM node:18 AS build
WORKDIR /app
COPY . .
RUN npm install && npm run build

FROM nginx:alpine
COPY --from=build /app/dist /usr/share/nginx/html
CMD ["nginx", "-g", "daemon off;"]
Example 2: Using multi-stage builds in a Python/Flask project
FROM python:3.10 AS build
WORKDIR /app
COPY requirements.txt .
RUN pip install -r requirements.txt
COPY . .

FROM python:3.10-slim
WORKDIR /app
COPY --from=build /app .
CMD ["python", "app.py"]
Conclusion
Docker Multi stage Builds is a game changer for CI/CD pipelines, It builds enhanced images by distinguishing between the build and runtime environments, which boosts security and accelerates build times. By refining the build sequence, utilizing cache, selecting appropriate base images, and reducing the number of layers, these builds result in applications that are more efficient, secure, and easier to maintain.
This guide is just scratching the surface of this amazing tool, and there’s a lot more to it!
Multi-stage Docker builds are essential in cloud-native environments because they improve image optimization and security. By reducing dependencies and removing unnecessary packages, they create a more efficient and streamlined setup. Additionally, large images that contain vulnerabilities can be prime targets for attackers, making this optimization even more critical.
FAQ’s
1. What is the purpose of Docker Multi-Stage Builds?
Docker Multi Stage Builds enhance Docker images by separating the build process from the final deployment image, which reduces size and security vulnerabilities.
2. How do Docker multi stage builds improve security?
By excluding unnecessary dependencies, libraries, and files from the final image, multi-stage builds reduce potential attack points and enhance security.
3. Can I implement multi stage Docker builds with Kubernetes?
Yes! The optimized Docker images created through Docker multi stage builds work seamlessly with Kubernetes, leading to better resource management.
4. What are some best practices for creating efficient multi-stage Dockerfiles?
- Utilize lightweight base images (like Alpine)
- Minimize the number of layers
- Remove temporary files
- Leverage caching to speed up builds
5. How can I troubleshoot errors in multi-stage builds?
Use the command to access detailed logs and effectively resolve errors.
docker build --progress=plain 6. What are the main differences between single-stage and multi-stage Docker builds?
Single-stage builds result in larger images because they include everything in one step, whereas Docker multi stage builds reduce image size by transferring only the essential files to the final stage.
7. How can I debug Docker multi stage builds?
You can debug by executing each stage individually with the following commands:
<br>docker build --target -t debug-image .<br>docker run --rm -it debug-image /bin/shThis allows you to examine the intermediate stages of the build.
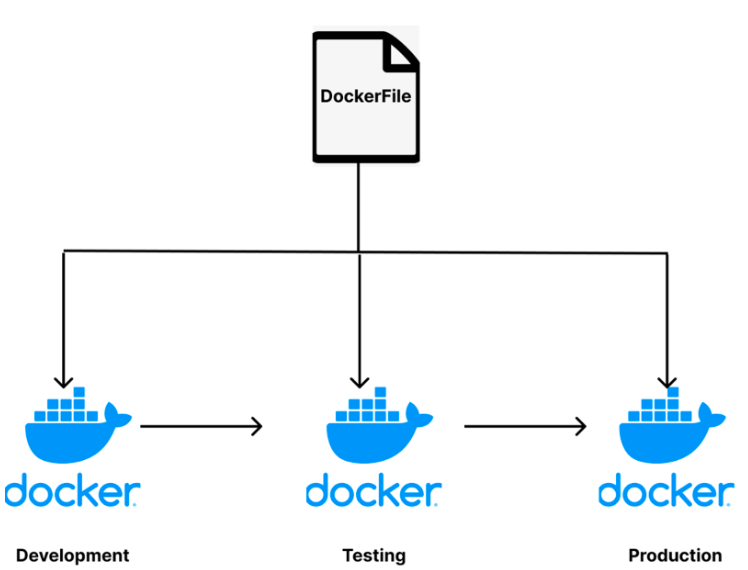
8. Can I use multiple stages for various environments (development, testing, production)?
Absolutely! You can set up distinct stages for each environment and include only the necessary files using build arguments:
Dockerfile<br>ARG ENV=prod<br>FROM node:18 AS base<br>COPY . /app<br>RUN npm install<br><br>FROM base AS dev<br>RUN npm install --only=dev<br><br>FROM base AS prod<br>RUN npm run buildThen, build with:
<br>docker build --build-arg ENV=dev -t my-app-dev .9. How does caching function in Docker multi-stage builds?
Docker caches each stage independently. If the earlier layers remain unchanged, Docker will utilize the cached layers to accelerate the build process. To enhance caching efficiency, organize RUN and COPY commands effectively.