If you’ve been using Ubuntu for a while, you’ve probably heard discussions about firewalls. Your Ubuntu system is under constant threat, and having an Ubuntu Firewall is your first line of defense to keep it safe.
It plays a very crucial role whether you need to enable, disable, or configure it for a specific application, understanding how it works is essential for maintaining security and network control. Ubuntu has a built-in firewall that’s pretty solid, but it’s up to you how you use it.
Don’t Worry, This guide will walk you through everything about the Ubuntu Firewall, how to turn it on or off, configure it for specific applications (advanced specifications), and basically how you can take full charge of your system’s security. So Let’s Start!
What is a Firewall?
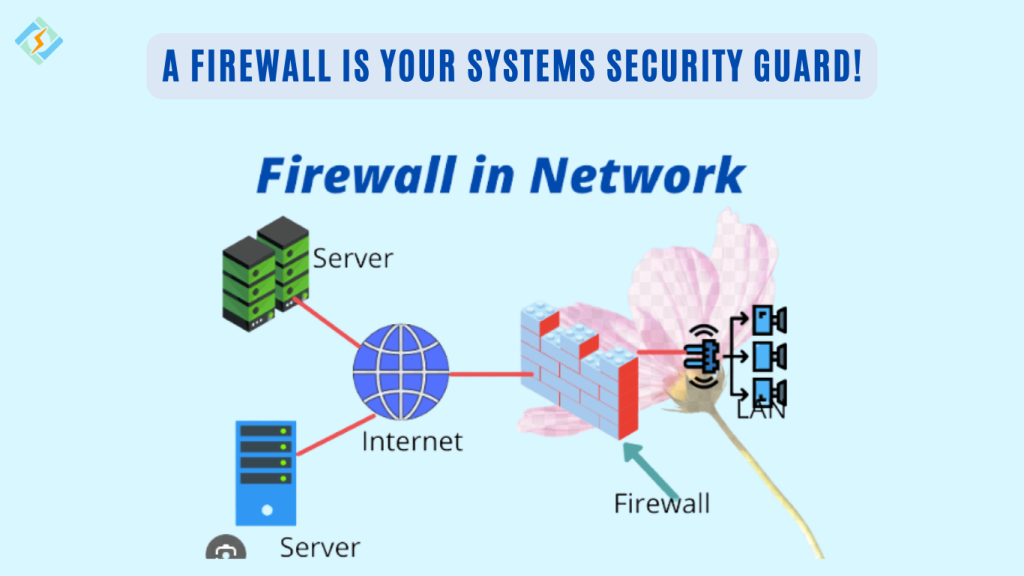
A Firewall is basically a security guard for your system, it controls what traffic enters or leaves your system.
The key role of a firewall in networking is to keep your network safe from cyber threats. It acts as a barrier, stopping harmful and unwanted content from getting into your system.
You set up a Firewall between your network and your Internet connection (or any other untrusted network). This allows you to restrict access points to your network. A firewall acts as a central point (known as a chokepoint) between your network and the Internet. With this single point of contact, you gain greater control over the traffic that enters and exits your network.
Firewalls defend against unauthorized access from hackers who might use various methods to break in, including viruses, backdoors, denial-of-service (DoS) attacks, macros, remote logins, phishing emails, social engineering tactics, and spam.
So they’re crucial for spotting dangerous users, blocking harmful data during attacks, and defending against application-layer threats like malware. It also helps manage network resources by regulating bandwidth usage and can offer VPN services with data encryption for secure communication.
Now let’s learn how to manage it!
How to Check Ubuntu Firewall Status
Before making any changes check if your Firewall is already running:
Step 1— Verifying IPv6 is Active
In the latest Ubuntu versions, IPv6 is typically enabled by default. This means that most firewall rules added to the server will include both IPv4 and IPv6 versions, with the latter marked by v6 in the output of the UFW status command. To confirm that IPv6 is active, check your UFW configuration file located at /etc/default/ufw. You can open this file using nano or any command line editor you prefer:
sudo nano /etc/default/ufwEnsure that the IPV6 value is set to yes. It should appear as follows:
/etc/default/ufw excerpt<br>IPV6=yesAfter making changes, save and exit the file. If you’re using nano, you can do this by pressing CTRL+X, then Y, and ENTER to confirm.
When you enable UFW in a later step of this guide, it will be set up to create both IPv4 and IPv6 firewall rules.
Step 2 — Configuring Default Policies
If you’re new to UFW, a good initial step is to review your default firewall policies. These rules dictate how to manage traffic that doesn’t match any specific rules.
By default, UFW denies all incoming connections while allowing all outgoing connections. This means that anyone attempting to access your server will be blocked, but applications running on the server can still connect to the internet. You can add specific rules to permit certain services and ports as exceptions to this general policy.

To ensure you can follow the rest of this tutorial, you will now configure your UFW default policies for incoming and outgoing traffic.
To set the default UFW incoming policy to deny, execute:
sudo ufw default deny incomingOutput
Default incoming policy changed to 'deny'<br>(remember to adjust your rules accordingly)To set the default UFW outgoing policy to allow, execute:
sudo ufw default allow outgoingOutput
Default outgoing policy changed to 'allow'<br>(remember to adjust your rules accordingly)These commands establish the defaults to deny incoming and allow outgoing connections. These firewall defaults may be sufficient for personal use.
How to Enable the Firewall on Ubuntu
It’s super easy to enable the Ubuntu Firewall. Just Run:
sudo ufw enableYou will see results similar to this:
Output
The firewall is active and set to start with the system.
To double check what is currently blocked or permitted, you can use the verbose option when executing ufw status, like this:
sudo ufw statusOutputStatus: active<br>Logging: enabled (low)<br>Default: deny (incoming), allow (outgoing), deny (routed)<br>New profiles: skipNow your system becomes more secure instantly.
How to Disable the Firewall on Ubuntu
There will be times when you’ll need to disable Firewall Ubuntu, Here’s what to do:
sudo ufw disableBeware This will completely deactivate the Ubuntu Firewall service on your system, and expose your system, so use it wisely.
Resource: Take a look at this detailed guide on how to disable Firewall Ubuntu.
How to Configure the Firewall on Ubuntu (UFW Basics)
Again configuring Ubuntu Firewall is super simple. By default, Linux Firewall Ubuntu when activated, all incoming connections are blocked unless they are specifically allowed.
The UFW firewall starts by blocking all incoming traffic while permitting all outgoing traffic. This strategy reduces the chances of unauthorized access while still enabling connections to external servers and services. Initially, the firewall is turned off because its rules might prevent traffic and hinder access to a remote server.
Before setting up the Ybunt firewall, identify which incoming connections are secure and reliable. For instance, permit SSH for remote access or HTTP/HTTPS for web server operations. Any unanticipated traffic should be viewed as undesirable.
Opening Ports
To allow traffic on a specific port, use the following command:
<br>sudo ufw allow 80Such as:
- Port 80 → For web traffic (HTTP).
- Port 443 → For secure web traffic (HTTPS).
- Port 22 → For SSH (remote access).
You can also open a range of ports:
<br>sudo ufw allow 3000:4000/tcpBlocking a Specific Port
To restrict access to a port, run:
<br>sudo ufw deny 8080This command will block all traffic on port 8080.
Allowing Specific IP Addresses
To allow traffic from a particular IP address:
bash<br>sudo ufw allow from 192.168.1.100This permits traffic only from 192.168.1.100 while blocking others.
Blocking an IP Address
To deny access from a specific IP:
<br>sudo ufw deny from 203.0.113.5Now your firewall is customized to allow only what you need!
Advanced Ubuntu Firewall Settings (For Power Users)
Conclusion- Keeping Your Ubuntu Firewall Optimized
This guide explains how keeping your Ubuntu Firewall properly configured can ensure your system stays safe from attacks. We learned how to enable, and disable Firewall Ubuntu, and Allow or deny IP ports when needed for extra security against cyber threats.
You can always revisit this guide whenever feeling stuck or need to fine-tune your Firewall.
FAQ’s
1. Is a firewall necessary for Ubuntu?
Yes, Linux Firewall Ubuntu is necessary, especially if you’re running a server or accessing public networks.
2. How can I check which ports are open?
You can use the following command:
sudo ufw status numbered3. Is it possible to use iptables instead of UFW?
Absolutely! While UFW is a simpler interface for iptables, both can be used.
4. What differentiates UFW from Firewall?
UFW is user-friendly and designed for Ubuntu, while Firewalld is used in CentOS/RHEL and offers more advanced features.
5. Is the Ubuntu Firewall enabled by default?
Yes, most Ubuntu installations come with UFW installed, but it is not activated by default. You need to enable it manually using the command:
<br>sudo ufw enableHow can I check if my Ubuntu Firewall is active?
To check the status of the firewall, run:
<br>sudo ufw statusIf it shows “Status: active,” then your firewall is currently on.
6. Does the Ubuntu Firewall affect internet speed?
No, UFW does not slow down your internet connection. However, it may block or limit certain connections, which could affect the performance of some applications.
7. How do I allow specific applications through the firewall?
You can allow an application by using the following command:
<br>sudo ufw allow [application_name]For example:
<br>sudo ufw allow OpenSSH8. What happens if I turn off the Ubuntu Firewall?
Turning off the firewall removes an important layer of security, leaving your system vulnerable to unauthorized access. If you disable it temporarily, remember to turn it back on once you are done.
9. How can I reset the UFW Firewall to its default settings?
To revert all changes and start fresh with the firewall, use the command:
<br>sudo ufw reset