SSH is the fundamental tool for all people who need to administer remote servers. It’s of utmost importance for developers, system administrators, and anyone working in the IT field. SSH access in Ubuntu offers a secure way to access your Ubuntu system for purposes of administration or execution of commands from a remote location. SSH proves especially helpful when managing your Ubuntu servers in cloud providers such as AWS, Google Cloud, or DigitalOcean.
Enabling SSH on Ubuntu will not only boost productivity but also add a new level of security. Here is a step-by-step guide on how to enable SSH on Ubuntu, along with practical examples, code examples, and breaking down the essential configurations. Finally, we will also go through the role of CyberPanel in managing SSH services on Ubuntu servers and common questions and wrap up by calling you to get started.
Why Enable SSH on Ubuntu?
One of the most widely used protocols for remote administration, SSH gives you flexibility and security while accessing your Ubuntu machine from anywhere else. With the help of SSH enabled on Ubuntu, you can:
Remote System Administration: Administrators will be able to manage their servers remotely.
File Transfers: Files are transferred with the help of SCP or SFTP, which can be done securely.
Automation & Scripting: You can run scripts and automate tasks through SSH connections.
Get exclusive access to all things tech-savvy, and be the first to receive
the latest updates directly in your inbox.
Enhanced Security: It encrypts the connection so that the data cannot be eavesdropped.
Now, let’s go in-depth about how to enable SSH on Ubuntu and make proper configuration settings for optimum security and performance.
Steps For Enabling SSH On Ubuntu
1. System Update
Before you can install SSH on your computer, ensure the system is updated by clicking on your terminal and proceeding to enter this command.

2. Install the OpenSSH server
Since SSH isn’t enabled in Ubuntu, we can simply install the server to be able to set up the SSH.

For this step, the code is entered into your Ubuntu terminal;
This installs open SSH servers on your computer, making it possible for you to connect to another computer with SSH.
3. Check SSH Service Status
Once installed, you need to check if the SSH service is running or not:


If you get a message saying “active (running)”, then your SSH is enabled and good to go.
4. How to Enable SSH Server on Ubuntu to Start at Boot
You can enable SSH so it starts every time that your system boots up with this command:

This turns SSH on Ubuntu on startup, so you don’t need to restart it manually every time.

5. Allowing SSH Through the Firewall
If you are using UFW (Uncomplicated Firewall) on Ubuntu, open SSH traffic through the firewall:

This command opens port 22 (the default SSH port) for incoming connections. To verify, you can use:

6. Testing the SSH Connection
You can test SSH connectivity to your Ubuntu server from a remote system using the following command:

Configuring SSH for Security and Performance
Once SSH is enabled on Ubuntu, several configurations have to be implemented in order for security to be enhanced.
Editing SSH Configuration File
It can be found at /etc/ssh/sshd_config, and one uses the command

Some security settings are:
Disable root Login
Prevent direct SSH log-in as root by setting the value of PermitRootLogin to no.

Change the default port of SSH
Changing from the default 22 to something unique may reduce unwanted login attempts.

Allow Specific Users
Limit SSH access only to specific users by using the following lines

After making changes, restart the SSH service:

Ubuntu SSH Connection Refused
The SSH connection may sometimes fail because of the “connection refused” error message. Therefore, this indicates that there is a “connection refused” because of the reasons or conditions mentioned below:
- The SSH service isn’t installed.
- SSH service isn’t active or running.
- Firewalls on the specific Linux system you may be using might have rules that will not allow an SSH service to activate and run as it should.
Troubleshooting
1. Check if SSH is installed or not:

2. Check if the SSH service is running:

3. Ensure the firewall allows SSH traffic

sudo apt install OpenSSH-server
This install is the OpenSSH server package, given on Ubuntu, for SSH access.
Usage:
You can install the OpenSSH server by running the following command:

This will download the packages necessary for installing the SSH server and enabling SSH on your system.
Ubuntu SSH client
SSH Client: This is an application that enables connecting to a remote server through SSH from your Ubuntu. It is quite fortunate that Ubuntu has an SSH client pre-installed; therefore, you don’t usually have to download it manually.
How to Use SSH Client:
To attach to a remote server, use the SSH command with the IP or hostname of the server

Enabling SSH on Ubuntu by CyberPanel

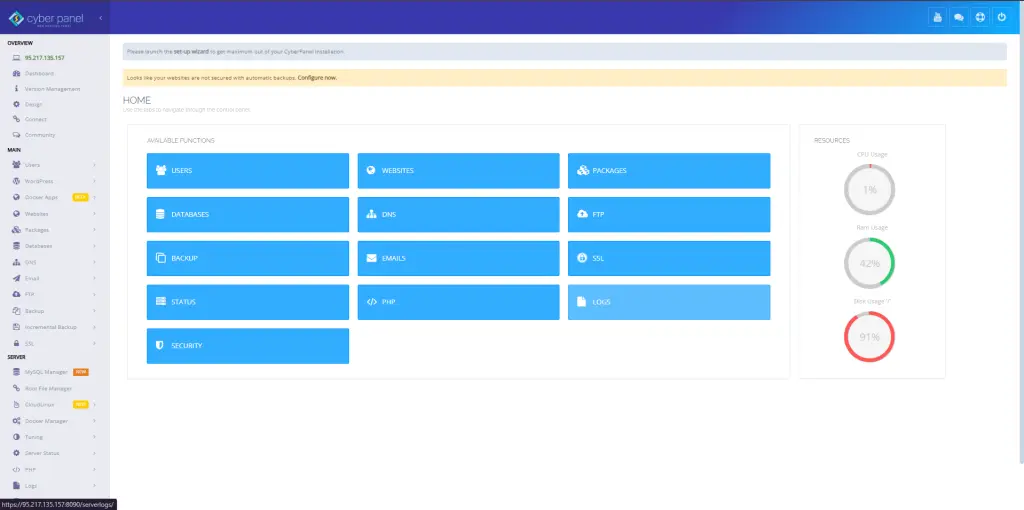
CyberPanel i.e. an open-source web hosting control panel provides a very handy interface for managing most aspects of your server, including SSH. Here is how you can enable and manage SSH on Ubuntu using CyberPanel:
Access CyberPanel Dashboard: Login to your CyberPanel dashboard.
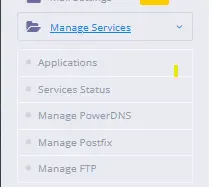
Go to Server Management: Then navigate to Manage Services >Services Status.

Enable SSH: In services, you will find SSH enabled; you can start, stop, or restart the SSH service using the CyberPanel interface instead of the terminal.
The management of SSH settings becomes much more straightforward when using CyberPanel, especially if you have multiple servers or different configurations.
FAQs On Enabling SSH On Ubuntu
1. How do I enable SSH on Ubuntu?
Open the Terminal application and type the following commands to install the OpenSSH server package and enable it with sudo systemctl enable ssh.
2. Can I use a non-standard port for SSH on Ubuntu?
Such that It is possible, to edit /etc/ssh/sshd_config and change the Port directive to an unused number.
3. How secure is Ubuntu SSH?
SSH is pretty secure if set up correctly. Use key-based authentication, disable root logins, and change the default port to take the security level of your service to the next level.
4. What is the default SSH port?
The default is 22 but can be changed for the extra level of security your account will get.
5. How do I configure passwordless SSH on Ubuntu?
ssh-keygen Generate a key pair and copy the public key to a remote server using ssh-copy-id username@server_ip.
Conclusion: Secure your Ubuntu Server with SSH today!
Now it is easy to enable SSH on Ubuntu, though for the benefits, it’s not small. SSH provides your Ubuntu system with access as if you were at their location, secure transfer, and even remote admin functions. All of this procedure ensures the safety of enabling SSH on an Ubuntu system, putting its configuration in best practice with security in mind but managing all the way through CyberPanel as if not happening.
Get ready to spice up server management with SSH assistance: Just apply the process above on your Ubuntu system, and enjoy the services of SSH in enabling secure access to remote platforms.


